
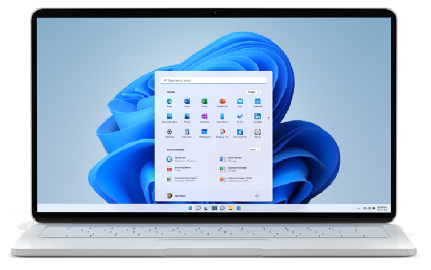
Download Windows 11
(Current release: Windows 11 2023 Update l Version 23H2)There are three options for installing or creating Windows 11 media. Take a look at each one to determine
the best option for you.
Before installing, please refer to the PC Health Check app to confirm your device meets the minimum system requirements
for
Windows 11 and check the Windows release information status for known issues that may affect your device.
Windows 11 Installation Assistant
This is the best option for installing Windows 11 on the device you’re currently using. Click Download Now to get started.- Before you start
This assistant is for those who want to:- Upgrade a Windows 10 PC to Windows 11.
Before you start, check to see if the following conditions apply to you:- You have a Windows 10 licence.
- Your PC must have Windows 10, version 2004 or higher installed to run Installation Assistant.
- Your PC meets the Windows 11 device specifications for upgrade requirements and supported features. Certain features require additional hardware. We also recommend that you visit your PC manufacturer’s website for information about updated drivers and hardware compatibility.
- Your PC must have 9 GB of free disk space to download Windows 11.
- Select Run. You'll need to be an administrator to run this tool.
- After the tool has confirmed the device hardware is compatible, you will be presented with the licence terms. Select Accept and Install.
- When the tool is ready, click the Restart Now button to complete the installation on your computer.
- It may take some time to install Windows 11, and your PC will restart a few times. Make sure that you don’t turn off your PC.
Note: Windows 11 Installation Assistant doesn't run on ARM-based PCs. It's only supported for PCs using x64 processors. If you need installation media to install Windows 11 on a different PC, see Create Windows 11 Installation Media.
Create Windows 11 Installation Media
If you want to perform a reinstall or clean install of Windows 11 on a new or used PC, use this option to download the media creation tool to make a bootable USB or DVD.- Before you startTo get started, you'll first need a licence to install Windows 11 or have a Windows 10 device that qualifies for an upgrade to Windows 11.
Make sure that you have:- An internet connection (internet service provider fees may apply).
- Sufficient data storage available on the computer, USB or external drive you are downloading the .iso file to.
- A blank DVD disc with at least 8 GB of storage space (and DVD burner) to create a bootable disc. We recommend using a blank USB or blank DVD because any content on it will be deleted during installation.
- If you receive a “disc image file is too large” message while attempting to burn a DVD bootable disc from an ISO file, consider using a higher capacity Dual Layer DVD.
- Has a 64-bit CPU: Windows 11 can only run on 64-bit CPUs. To see if your PC has one, go to Settings > System > About, or search “System Information” in Windows and look under “System Type.”
- Windows 11 Media Creation Tool creates installation media only for x64 processors. For ARM-based PCs, you should wait until you are notified through Windows Update that the upgrade is ready for your PC.
- Meets system requirements: Not all devices running Windows 10 are eligible to receive a Windows 11 upgrade. See the Windows 11 device specifications for upgrade requirements and supported features. Certain features require additional hardware. We also recommend that you visit your PC manufacturer's website for information about updated drivers and hardware compatibility.
- WARNING: Installing Windows 11 media on a PC that does not meet the Windows 11 minimum system requirements is not recommended and may result in compatibility issues. If you proceed with installing Windows 11 on a PC that does not meet the requirements, that PC will no longer be supported and won't be entitled to receive updates. Damages to the PC due to lack of compatibility aren't covered under the manufacturer warranty.
- Matches your current language: You'll need to choose the same language when you install Windows 11. To see what language you're currently using, go to Time & language in PC settings or Region in Control Panel.
- After downloading, run the media creation tool. You'll need to be an administrator to run this tool.
- If you agree to the licence terms, select Accept.
- On the What do you want to do? page, select Create installation media for another PC, and then select Next.
- Select the language, edition, and architecture (64-bit) for Windows 11.
- Select which media you want to use:
- USB flash drive: Attach a blank USB flash drive with at least 8 GB of storage space. Any content on the flash drive will be deleted.
- ISO file: Save an ISO file to your PC. This can be used to create a bootable DVD. After the file has been downloaded, you can go to location where the file is saved, or select Open DVD burner, and follow the instructions to burn the file to a DVD.
- To check for updates now, select the Start button, and then go to Settings > Windows Update, and select Check for updates. You should also visit your device manufacturer’s support site for any additional drivers that may be needed.
Note: Drivers for Surface devices can be found on the Download drivers and firmware for Surface page.
Before you install Windows 11, it’s a good idea to save any work and back up your PC before you start. If you used the media creation tool to download an ISO file for Windows 11, remember to burn it to a DVD before following these steps:- Attach the USB flash drive or insert the DVD on the PC where you want to install Windows 11.
- Restart your PC.
- If your PC does not automatically boot to the USB or DVD media, you may have to open a boot menu or change the boot order in your PC's BIOS or UEFI settings.
- To open a boot menu or change the boot order, you'll typically need to press a key (such as F2, F12, Delete, or Esc) immediately after turning on your PC. For instructions about accessing the boot menu or changing the boot order for your PC, check the documentation that came with your PC or go to the manufacturer's website.
- If you can't see the USB or DVD media device listed within the boot options, you may need to get in touch with the manufacturer of the PC to get instructions for temporarily disabling Secure Boot in your BIOS settings.
- If changing the boot menu or order doesn't work, and your PC immediately boots into the OS you want to replace, it is possible the PC had not shut down completely. To ensure the PC shuts down completely, select the power button on the sign-in screen or on the Start menu and select Shut down.
- On the Install Windows page, select your language, time, and keyboard preferences, and then select Next.
- Select Install Windows.
This option is for users who want to create a bootable installation media (USB flash drive, DVD, etc.) or create a virtual machine (ISO file) to install Windows 11. This download is a multi-edition ISO that uses your product key to unlock the correct edition.
- Before you startMake sure that you have:
- An internet connection (internet service provider fees may apply).
- Sufficient data storage available on the computer, USB, or external drive you are downloading the ISO file to.
- A blank DVD disc with at least 8 GB of storage space (and DVD burner) to create a bootable disc. We recommend using a blank USB or blank DVD, because any content on it will be deleted during installation.
- If you receive a “disc image file is too large” message while attempting to burn a DVD bootable disc from an ISO file, consider using a higher capacity Dual Layer DVD.
- Has a 64-bit CPU: Windows 11 can only run on 64-bit CPUs. To see if your PC has one, go to Settings > System > About, or search “System Information” in Windows and look under “System Type.”
- The Windows 11 ISO is only available for devices with x64 processors. For ARM-based PCs, you should wait until you are notified through Windows Update that the upgrade is ready for your PC.
- Meets system requirements: Not all devices running Windows 10 are eligible to receive a Windows 11 upgrade. See the Windows 11 device specifications for upgrade requirements and supported features. Certain features require additional hardware. We also recommend that you visit your PC manufacturer's website for information about updated drivers and hardware compatibility.
- WARNING: Installing Windows 11 media on a PC that does not meet the Windows 11 minimum system requirements is not recommended and may result in compatibility issues. If you proceed with installing Windows 11 on a PC that does not meet the requirements, that PC will no longer be supported and won't be entitled to receive updates. Damages to the PC due to lack of compatibility aren't covered under the manufacturer warranty.
Installation instructions (DVD):- Locate the folder where you downloaded the Windows 11 ISO file to.
- To use Windows Disk Image Burner to create the installation DVD, right-click on the ISO file and select Properties. Under the "General" tab, click "Change..." where it says, “Opens with:” and select Windows Explorer. Select Apply. This will enable the Burn disc image to be displayed when you right-click the ISO file.
- To use a third-party DVD burning program, you can right-click on the ISO file and select Open with.
Installation instructions (ISO):- If you want to install Windows 11 directly from the ISO file without using a DVD or USB flash drive, you can do so by mounting the ISO file. This will perform an upgrade of your current operating system to Windows 11.
- To mount the ISO file:
- Go to the location where you downloaded the ISO file to. Then right-click the ISO file and select Properties.
- On the "General" tab, click "Change…" where it says, “Opens with:”, and select Windows Explorer for the program you would like to use to open ISO files and select Apply.
- Right-click the ISO file and select Mount.
- This will create a “virtual” bootable disc. Double-click on it to view the files within. Double-click setup.exe to start the Windows 11 setup process.
* Your use of the media creation tools on this site is governed by the Microsoft Terms of Use for this website.
Validating your request. This may take several minutes. Do not refresh the page or select back – doing so will cancel the request.
