This relatively simple example demonstrates how you can call AX business logic from SSIS by connecting to a custom web service. It assumes some knowledge of the individual technologies themselves.
The underlying business logic for our custom web service in AX 2012 returns a message based on a parameter of type integer passed into it (1 or 2). The custom web service is called by a script task in SQL Server Integration Services (SSIS).
We will start with by creating the custom web service, followed by the script task. After that there is a configuration change to be made to enable the connection.
Disclaimer:
This programming example is for illustration purposes only. Microsoft disclaims all warranties and conditions with regard to use of the programming example for other purposes. Microsoft shall not, at any time, be liable for any special, direct, indirect or consequential damages, whether in an action of contract, negligence or other action arising out of or in connection with the use or performance of the programming example. Nothing herein should be construed as constituting any kind of warranty.
1. Create the custom web service in AX
When creating a custom web service in AX 2012 we would often create a data contract class as well, but we are skipping this here for simplicity.
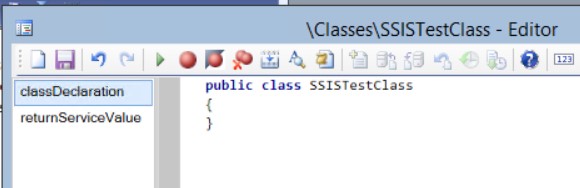
a) Create the custom service class – SSISTestClass
This will contain the custom business logic being called in AX. In this example we return “Hello, World!” in English or Danish depending on whether you pass in 1 or 2 as a parameter (no offence intended to speakers of other languages; these are the native languages of the author and editor!).
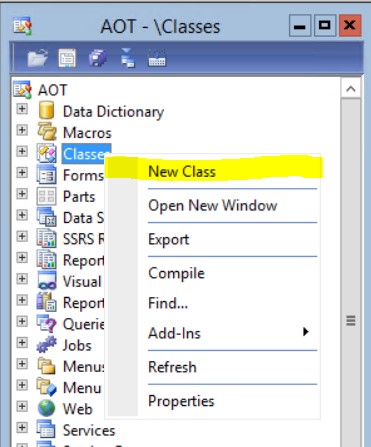
- In AX, open a new development workspace and go to the AOT (or ctrl+D).
- Right click Classes>New Class.
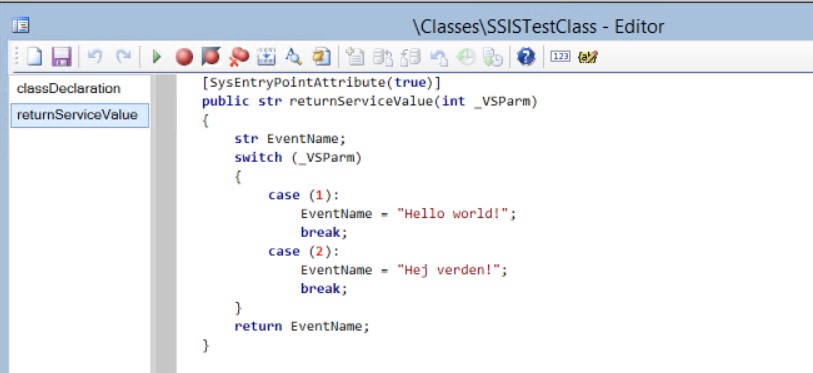
- Copy / paste the following code into the new class. The first snippet goes in the class declaration and regarding the second snippet, we are adding a new method called returnServiceValue, which we decorate with [SysEntryPointAttribute(true)], thereby avoiding the need for a data contract class:
public class SSISTestClass
{
}
[SysEntryPointAttribute(true)]
public str returnServiceValue(int _VSParm)
{
    str EventName;
    switch (_VSParm)
    {
        case (1):
            EventName = "Hello world!";
            break;
        case (2):
            EventName = "Hej verden!";
            break;
    }
    return EventName;
}
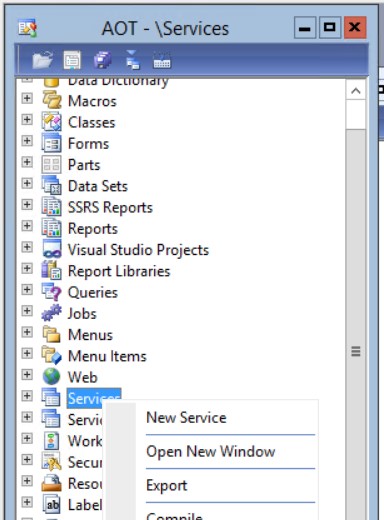
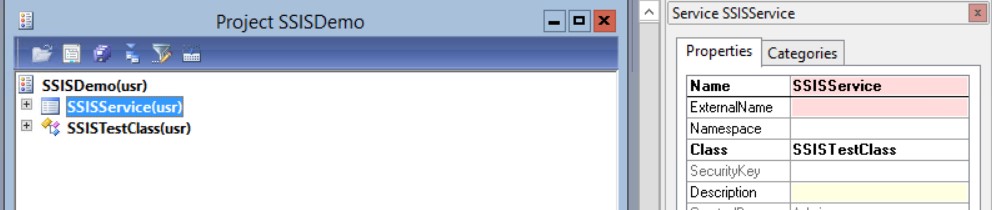
b) Create the custom web service
- In the AOT, browse to Services.
- Right click>New Service.
- On the new service: right click>Properties (or alt+enter). Change the Name to SSISService and the class to SSISTestClass. Save the service.
- Browse to the Operations node on the service, right click>Add Operation.
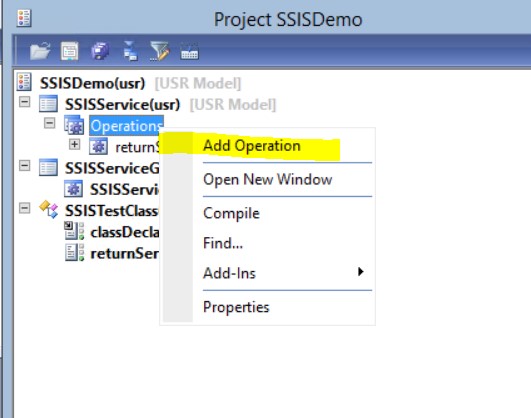
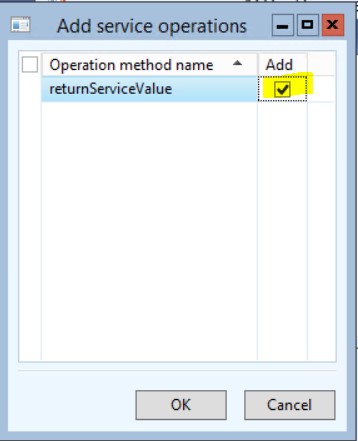
- Tick ‘Add’ next to returnServiceValue. Click OK. Save the service.
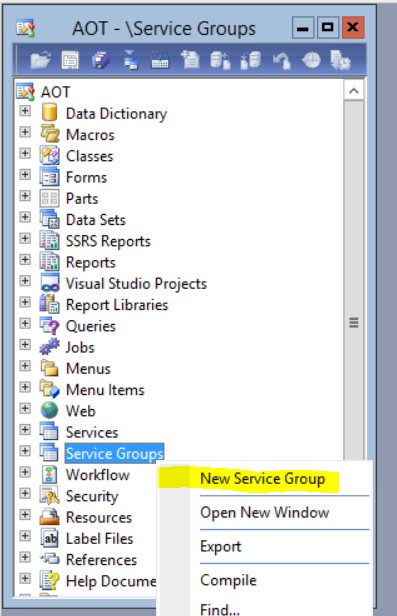
c) Add the service to a new service group
In the AOT, browse to Service Groups:
- Right click>New Service Group.
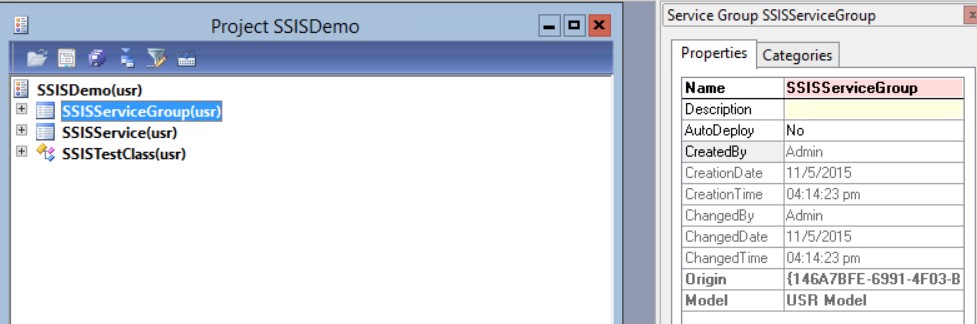
On the new service group:
- Right click>Properties (or alt+enter). Change the Name to SSISServiceGroup.
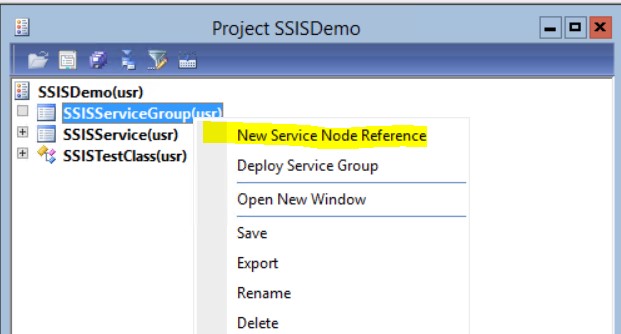
- Right Click>New Service Node Reference.
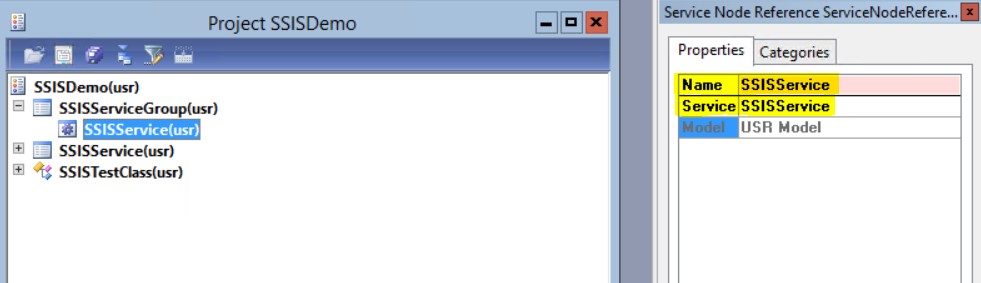
- On the new service node reference, enter any Name and in the Service property, enter SSISService.
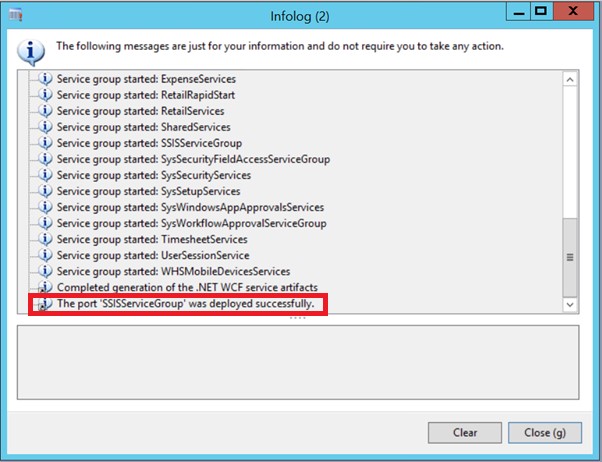
- On the service group, right click>Deploy service group.
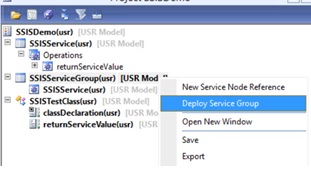
- An Infolog message should appear: “The port ‘SSISServiceGroup’ was deployed successfully”.
d) Validate the ports
- Go to System administration/Setup/Services and Application Integration Framework/Inbound ports.
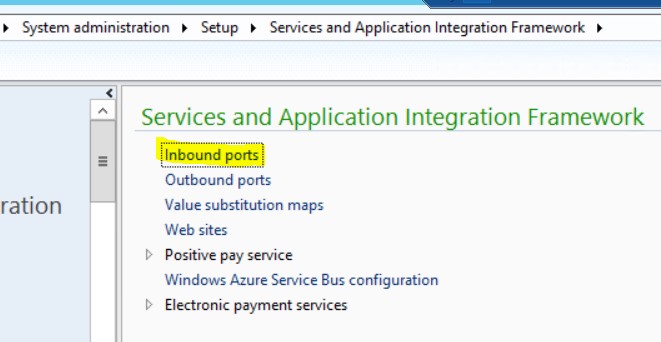
- Ensure SSISServiceGroup has a green tick next to it or otherwise click the activate button at the top of the same form.
- Copy the WSDL URI of the Service Group, e.g. http://AXA:8101/DynamicsAx/Services/SSISServiceGroup. You’ll use this next.

2. Create the SSIS script task
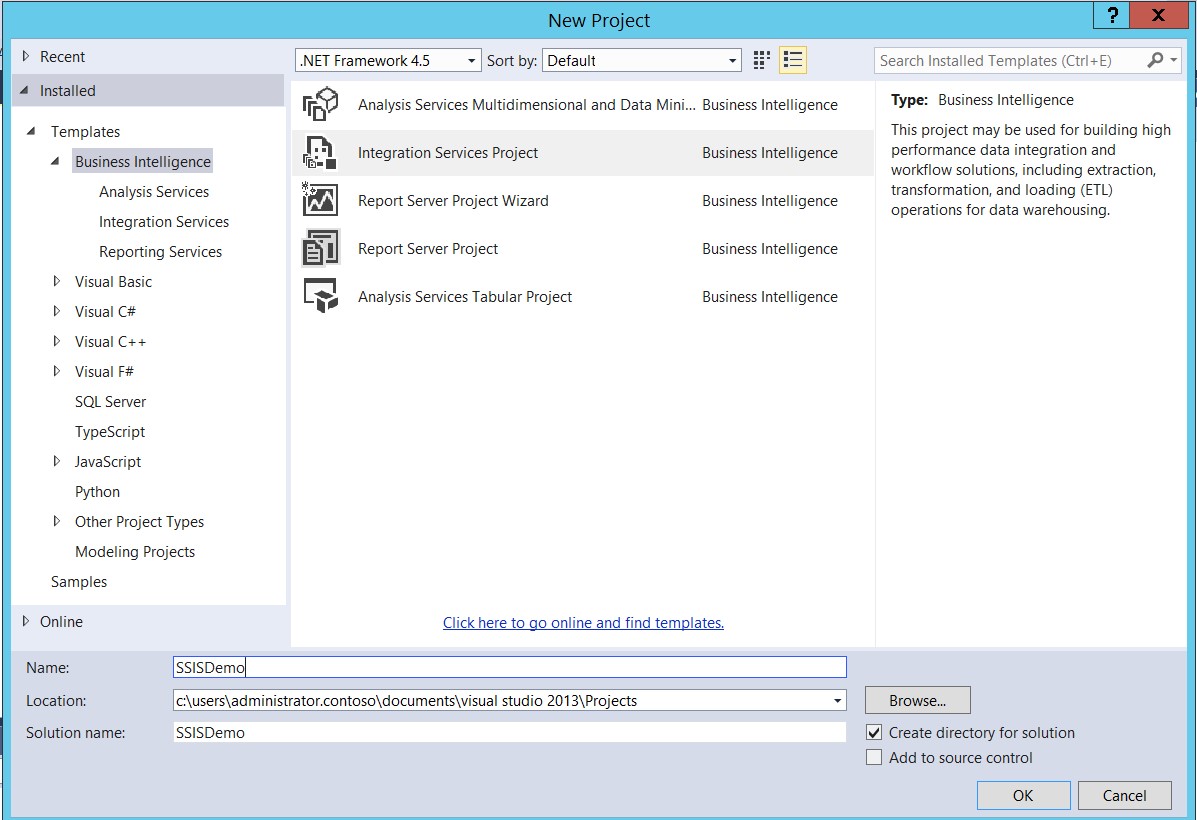
a) Create a new SSIS project
- Open SQL Server Data Tools.(https://msdn.microsoft.com/en-us/library/hh272686(v=vs.103).aspx)
- Create a new Integration Services project (File>New>Project>Integration Services Project).
- Give the project a name, change the file path (location) if required and click OK.
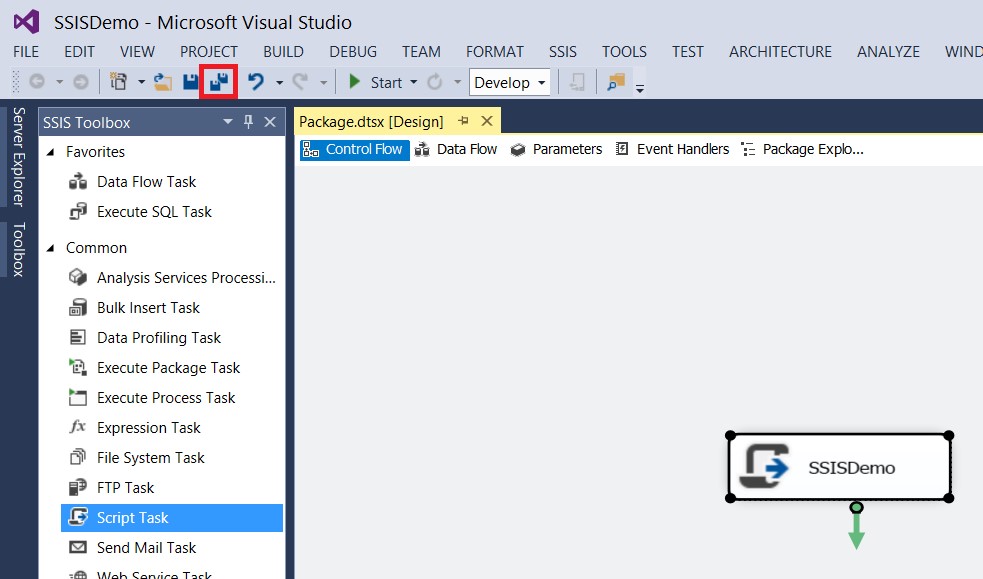
- Add a script task to your package (drag and drop on to the control flow) and in the properties, give it a suitable name, then click Save.
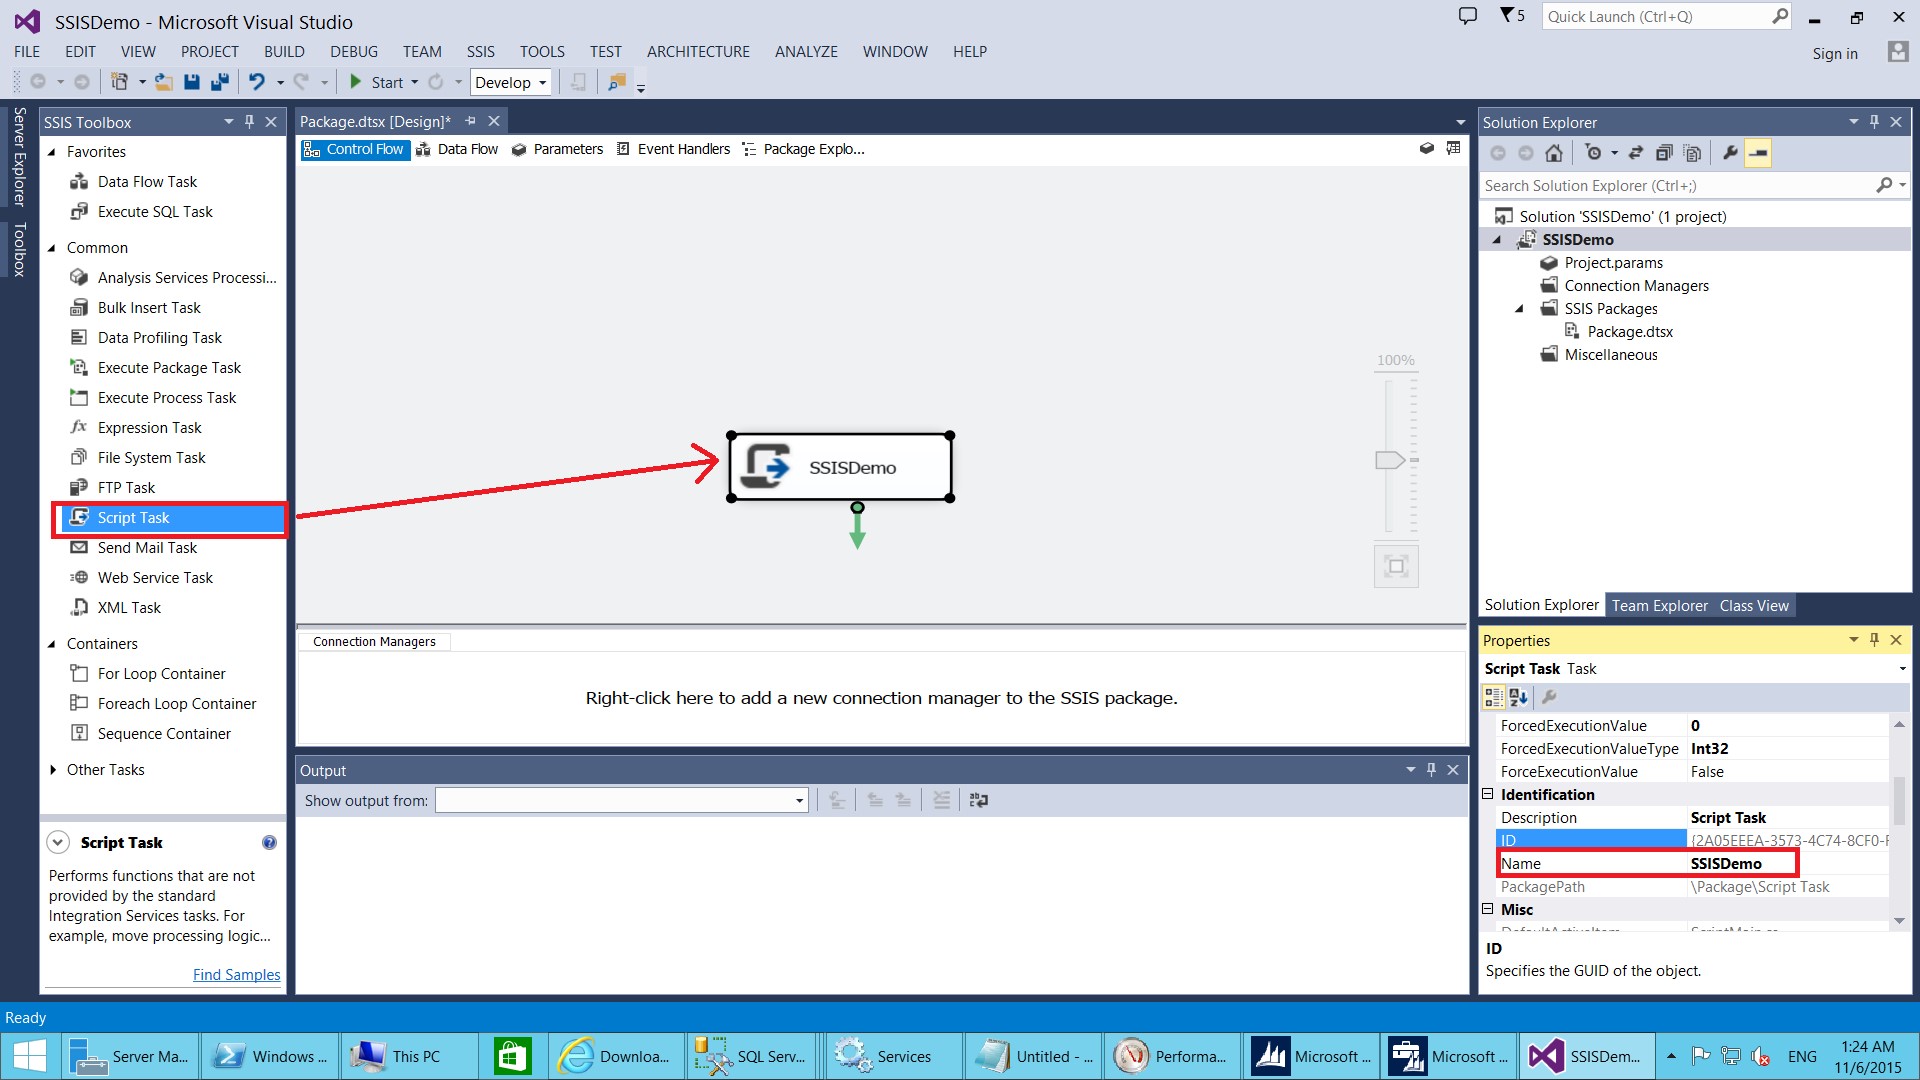
- On the script task, right click>Edit.
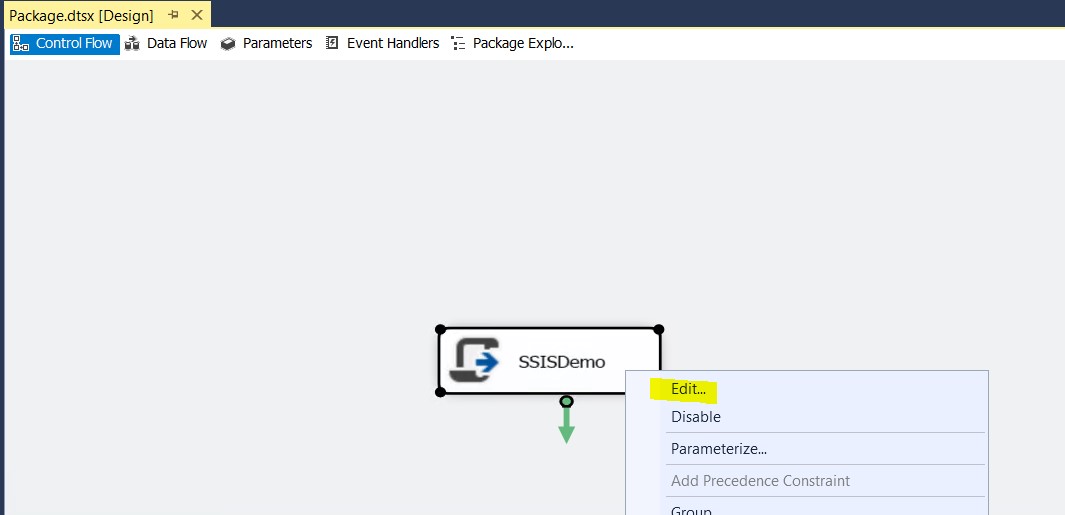
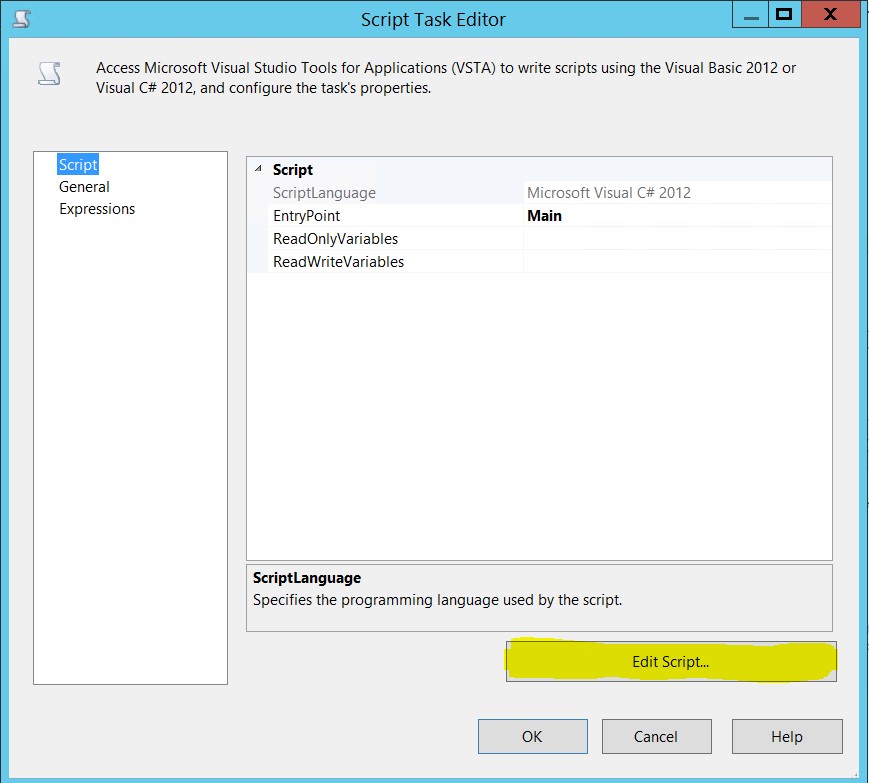
- Click ‘Edit Script…’
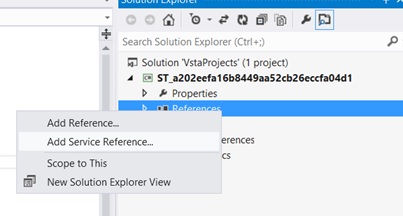
b) Create a new service reference
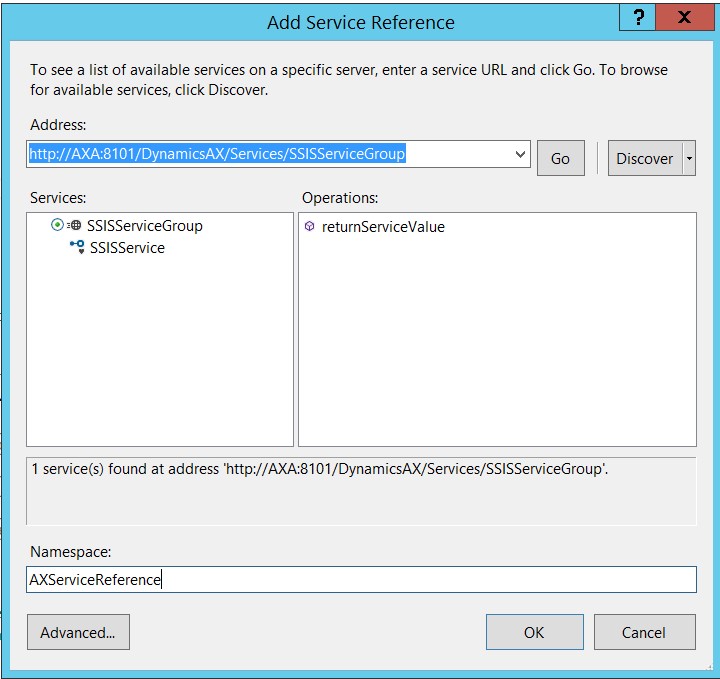
- In Solution Explorer, on the Service References node, right click>Add Service Reference.
- In the Address field, paste in the WSDL URI from step 1d above. Click Go.
- Add a suitable name in the Namespace field, then click OK.
c) Build the script
- In ScriptMain.cs, ensure you have declared all of the relevant namespaces, e.g.:
#region Namespaces
using System;
using System.Data;
using Microsoft.SqlServer.Dts.Runtime;
using System.Windows.Forms;
using System.ServiceModel;
using ST_fcf30ebe667342e6805d2e771a1b2f6b.AXServiceReference;
#endregion
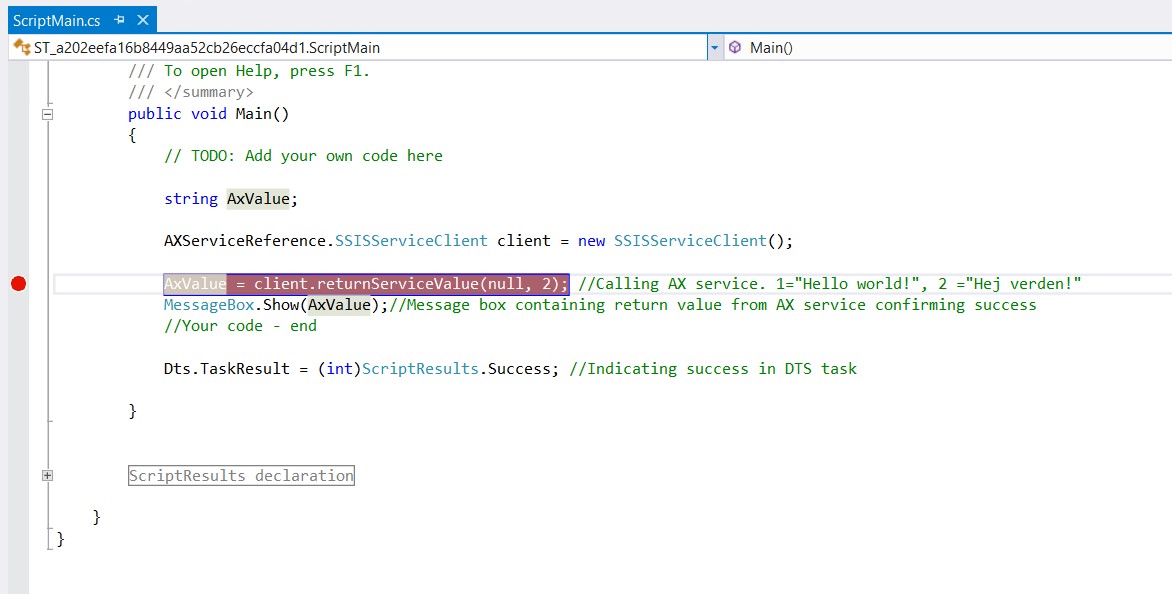
- Add the following code, then save:
public void Main()
        {
            // TODO: Add your own code here
            string AxValue;
            AXServiceReference.SSISServiceClient client = new SSISServiceClient();
            AxValue = client.returnServiceValue(null, 2); //Calling AX service. 1="Hello world!", 2 ="Hej verden!"
                       MessageBox.Show(AxValue); //Message box containing return value from AX service confirming success
            //Your code - end
            Dts.TaskResult = (int)ScriptResults.Success; //Indicating success in DTS task
        }
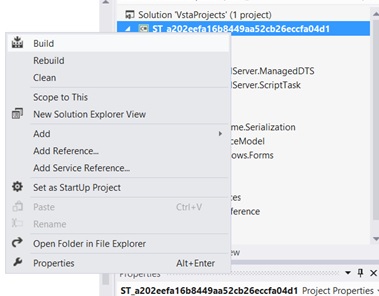
- In the Solution Explorer, on the solution, right click>Build.
- Go back to the package and save the package.
3. Amend the configuration for SSIS
Before completing this part, you will receive an error like the following, because SSIS is not reading from the usual app.config file (as with a C# project for example), so can’t determine the endpoint address:
InvalidOperationException was unhandled by user code.
Could not find default endpoint element that references contract [Custom service name] in the ServiceModel client configuration section. This might be because no configuration file was found for your application, or because no endpoint element matching this contract could be found in the client environment.
What you will need to do is copy the information from your app.config, then paste into the relevant SSIS configuration file in notepad (after opening notepad as administrator).
You can determine which is the correct configuration file to change and where it can be found through one of the following approaches:
- This third party blog post contains information a summary of the 5 configurations:
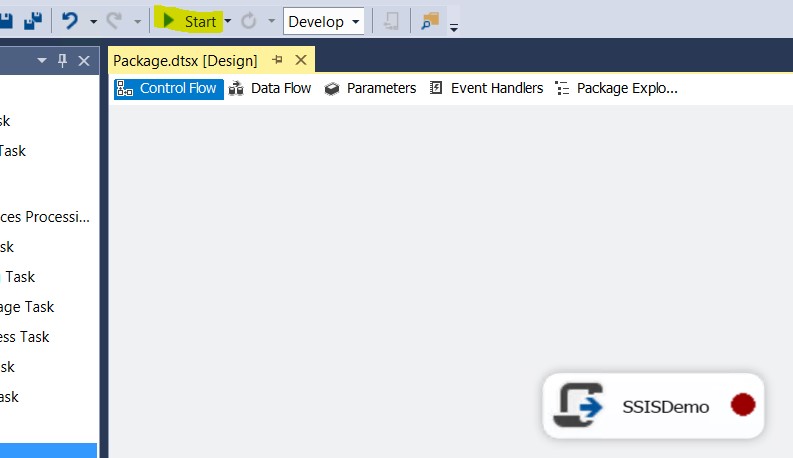
- Place a breakpoint on or before the line where the error is reached.
c. Then save and run (‘Start’) the package.
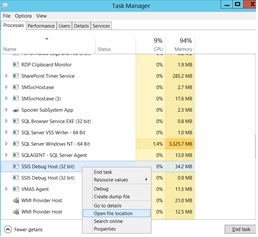
d. Open task manager and look for one of the above processes (in part a).
e. From the task manager you can then right click on the relevant process and select ‘Open file location’.
For example, in my case:
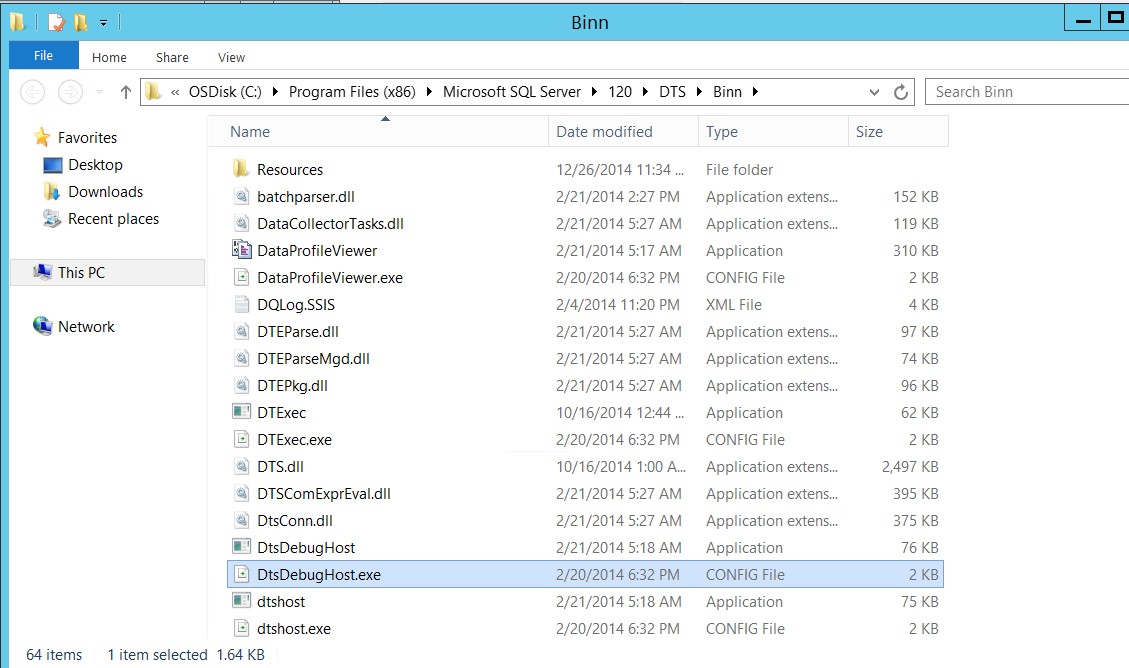
- The process was DtsDebugHost.exe (“SSIS Debug Host”).
- The configuration file was DtsDebugHost.exe.config.
- The file path was C:\Program Files (x86)\Microsoft SQL Server\110\DTS\Binn (similar to the above blog post, but replacing ‘90’ with my SQL Server version, i.e. 110 [SQL Server 2012].
- Task manager: right click on process >Open file location
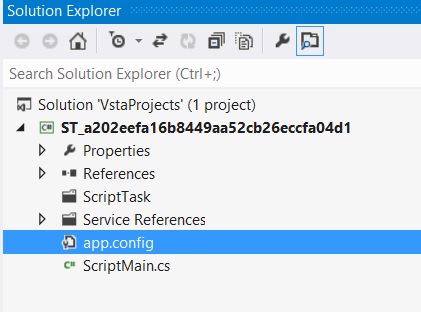
- I then copied the contents of my app.config (double click to open, then take the part between and including the system.serviceModel tags as highlighted below):
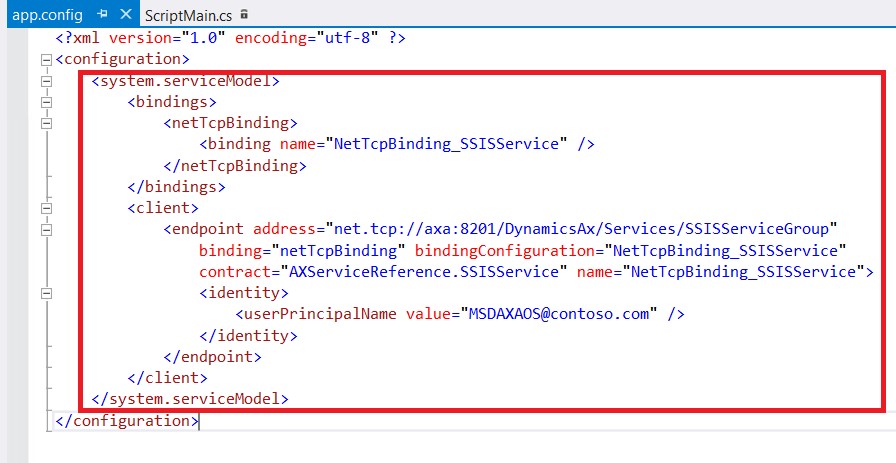
- I then pasted that into my DtsDebugHost.exe.config file (after creating a backup copy), then saved the file, i.e.:
- Copy and paste the file to create a backup copy.
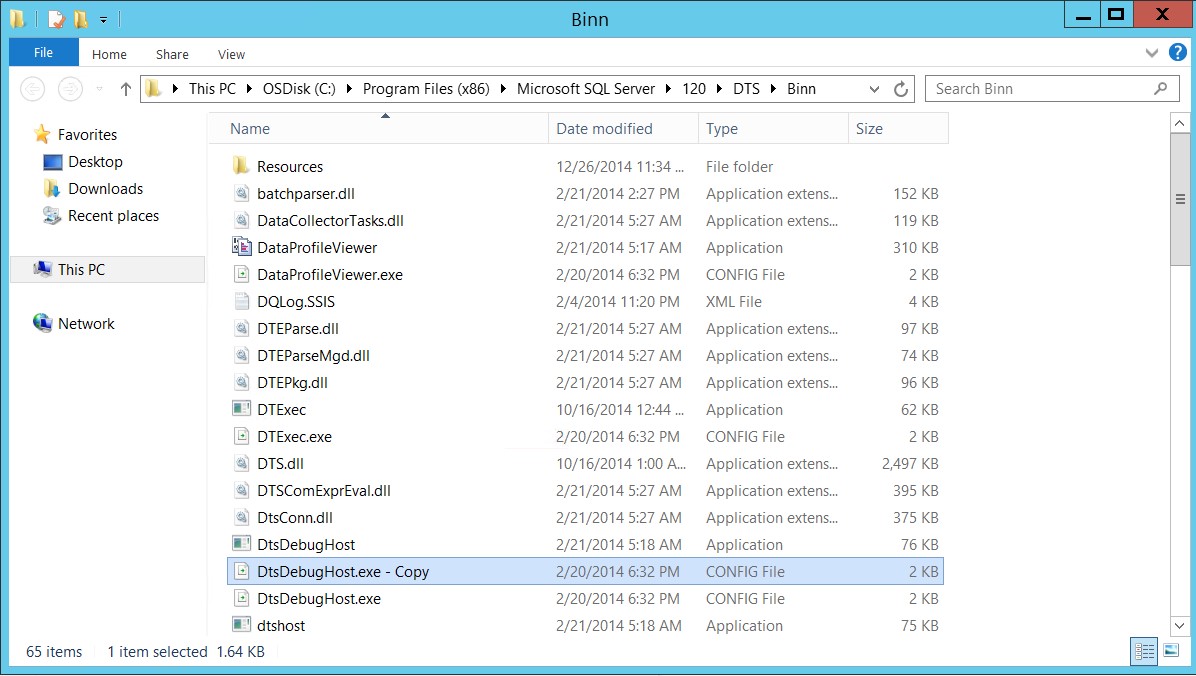
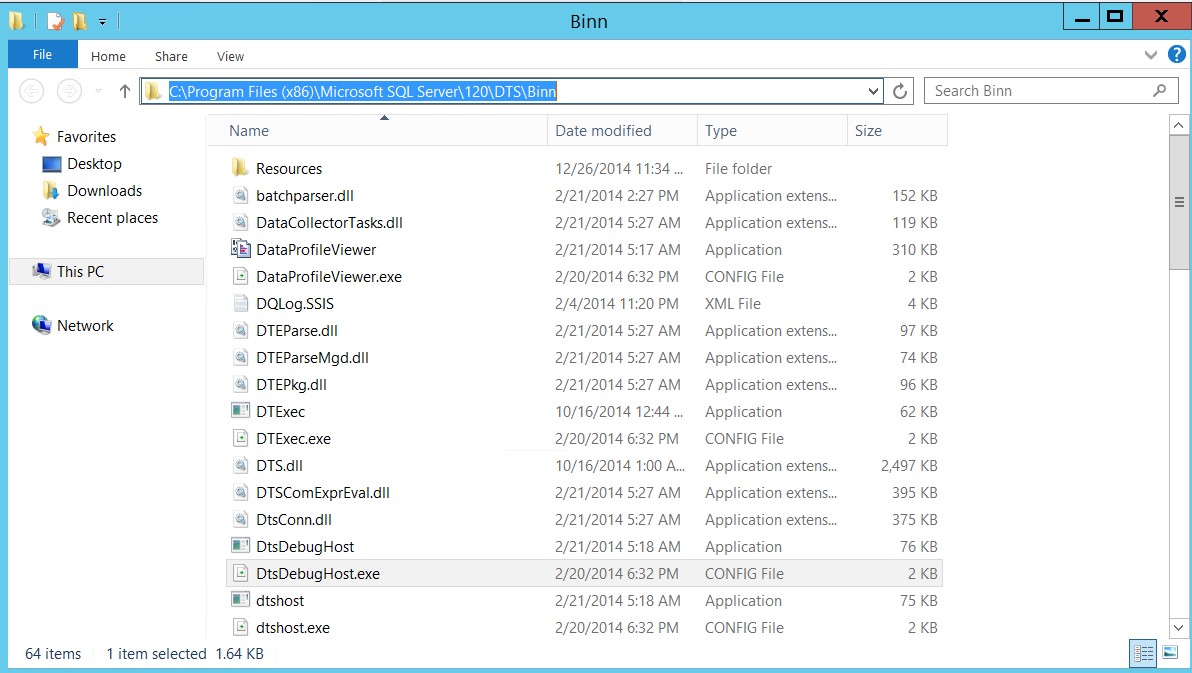
- Copy the binn directory path.
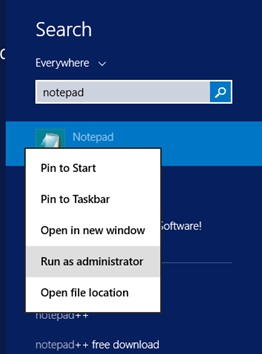
- Run notepad as administrator.
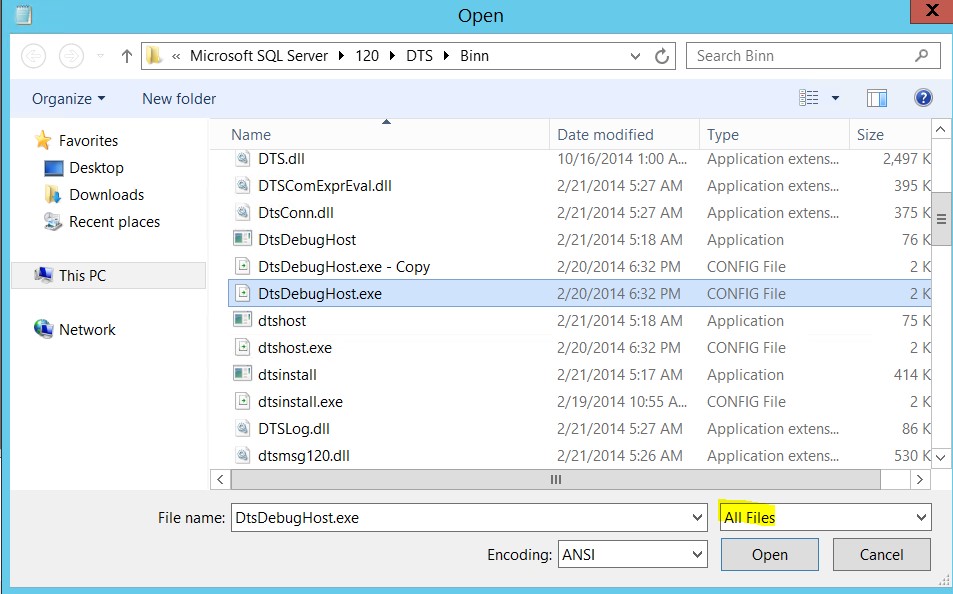
- Paste in the binn directory location, then select ‘all files’, then DtsDebugHost.exe.config (in this example).
- Save the file.

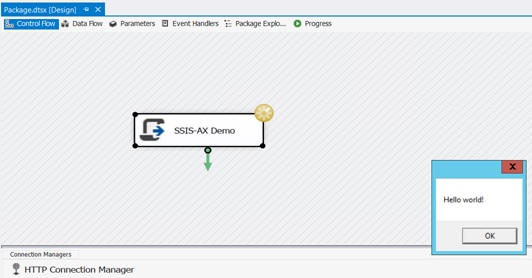
Expected result
After building the solution, run the package, then depending on the number you pass from the script into AX (highlighted below), you should receive a message box saying either “Hello world!” or “Hej verden!”
Extract from ScriptMain.cs showing the logic:
AxValue = client.returnServiceValue(null, 1);
//Calling AX service. 1="Hello world!", 2 ="Hej verden!"
Screenshot of expected result
Author: Glen Turnbull
Editor: Mansour Yahya Mohamad