Easily add and move fields and controls on a form using drag-drop and cut-paste
Makers can now easily add and move fields and controls, to the exact location they want, directly on the form preview, and instantly see how the form will appear to end-users. Two new features added to the new form designer: drag-drop and cut-paste are making this possible. Combined with the live WYSIWYG preview of the form, these new features provide a big productivity boost when authoring forms.
The classic form designer includes drag-drop support, but it often runs into issues impacting productivity. The drop targets are also thin lines making them hard to see as well as to drop elements quickly in place. The classic form designer also allows moving fields and controls using arrow keys but that translates to multiple clicks and suffers from inconsistent behavior across browsers.
Our new WYSIWYG form designer includes lots of productivity enhancing features and addresses many problems faced by makers in the classic form designer. With the added support for drag-drop and cut-paste, adding and moving fields and controls is quick, easy and intuitive. To add fields and controls, makers can drag them from the panes on the left and drop them on the form preview in the desired location. To move fields and controls already on the form, makers can drag-drop or cut-paste them from one location to another, while preserving updated property settings. The drop targets are also much bigger and clearly highlighted helping speed up the form authoring process.
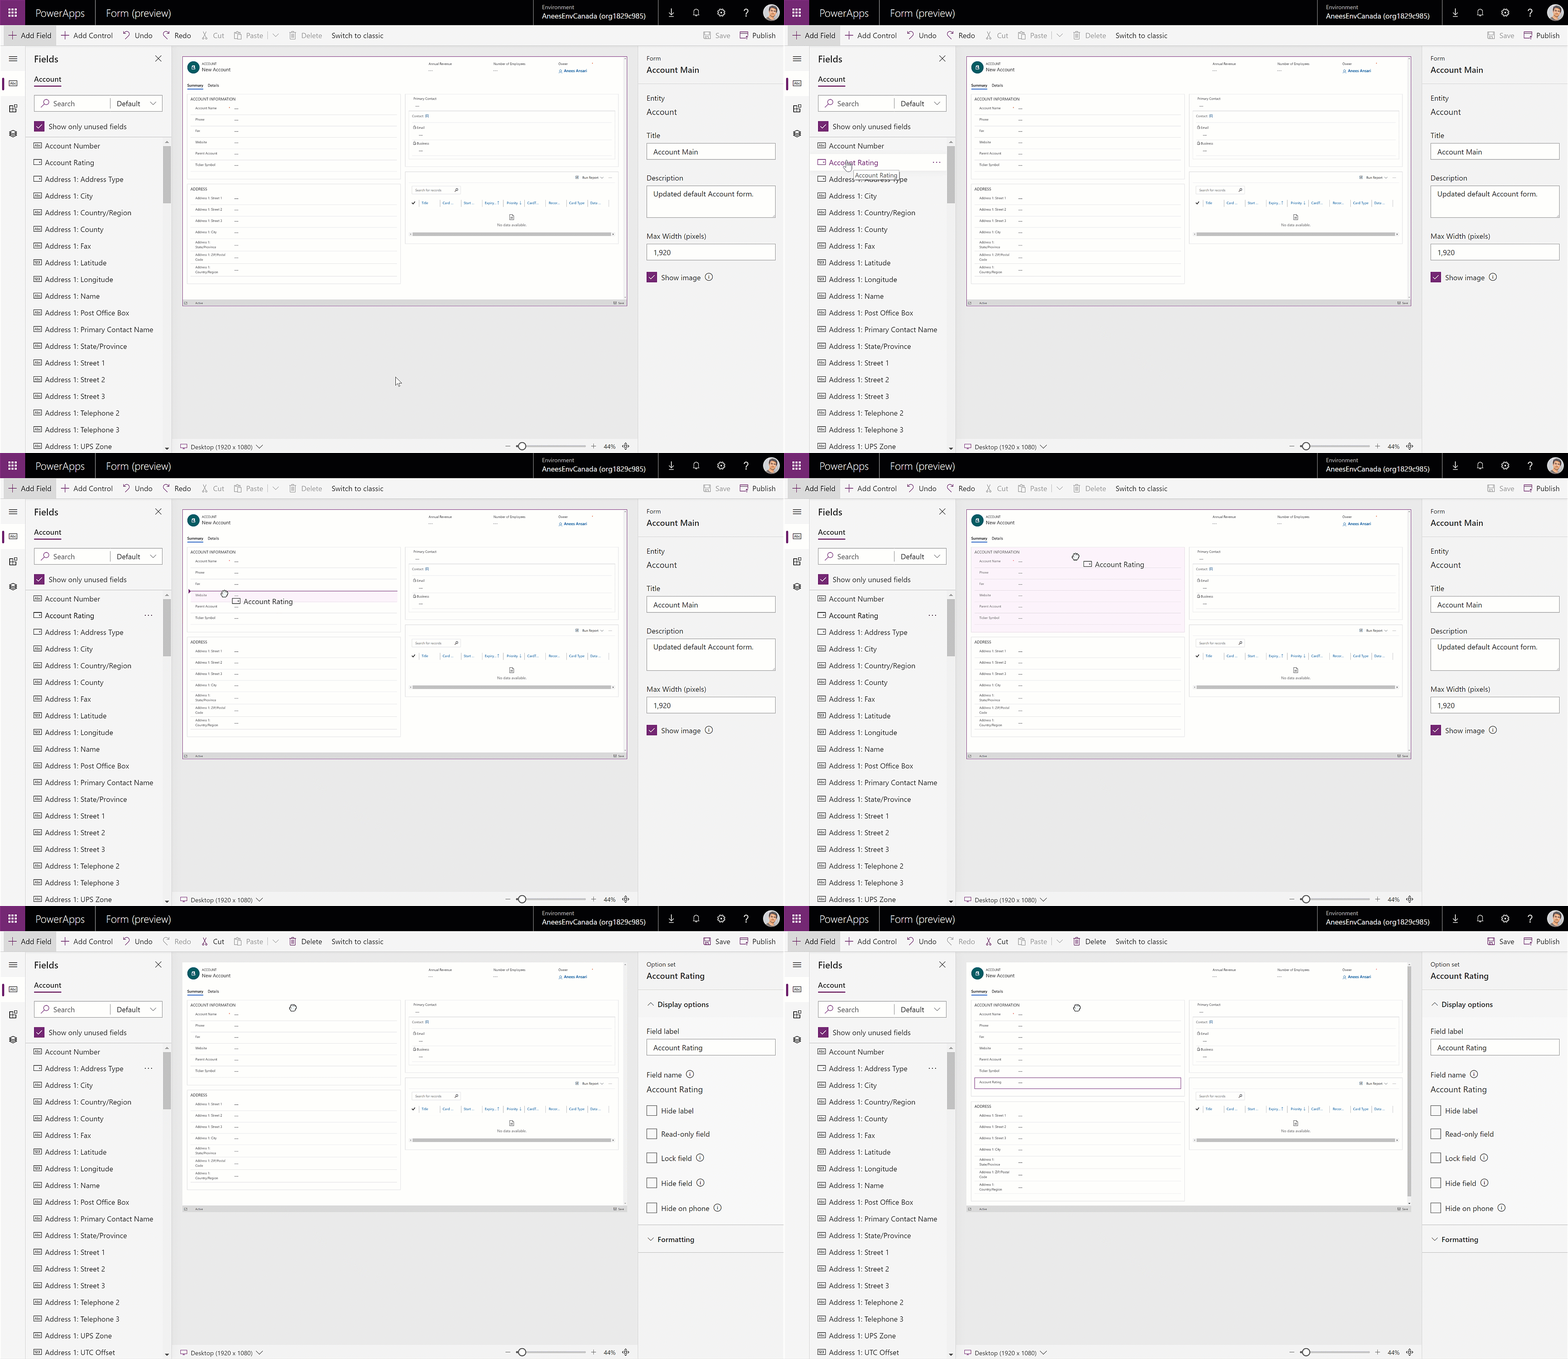
Makers can drag a field from the pane and drop it on the form preview in the exact location that they want. Drop targets appear before and after fields already on the form.
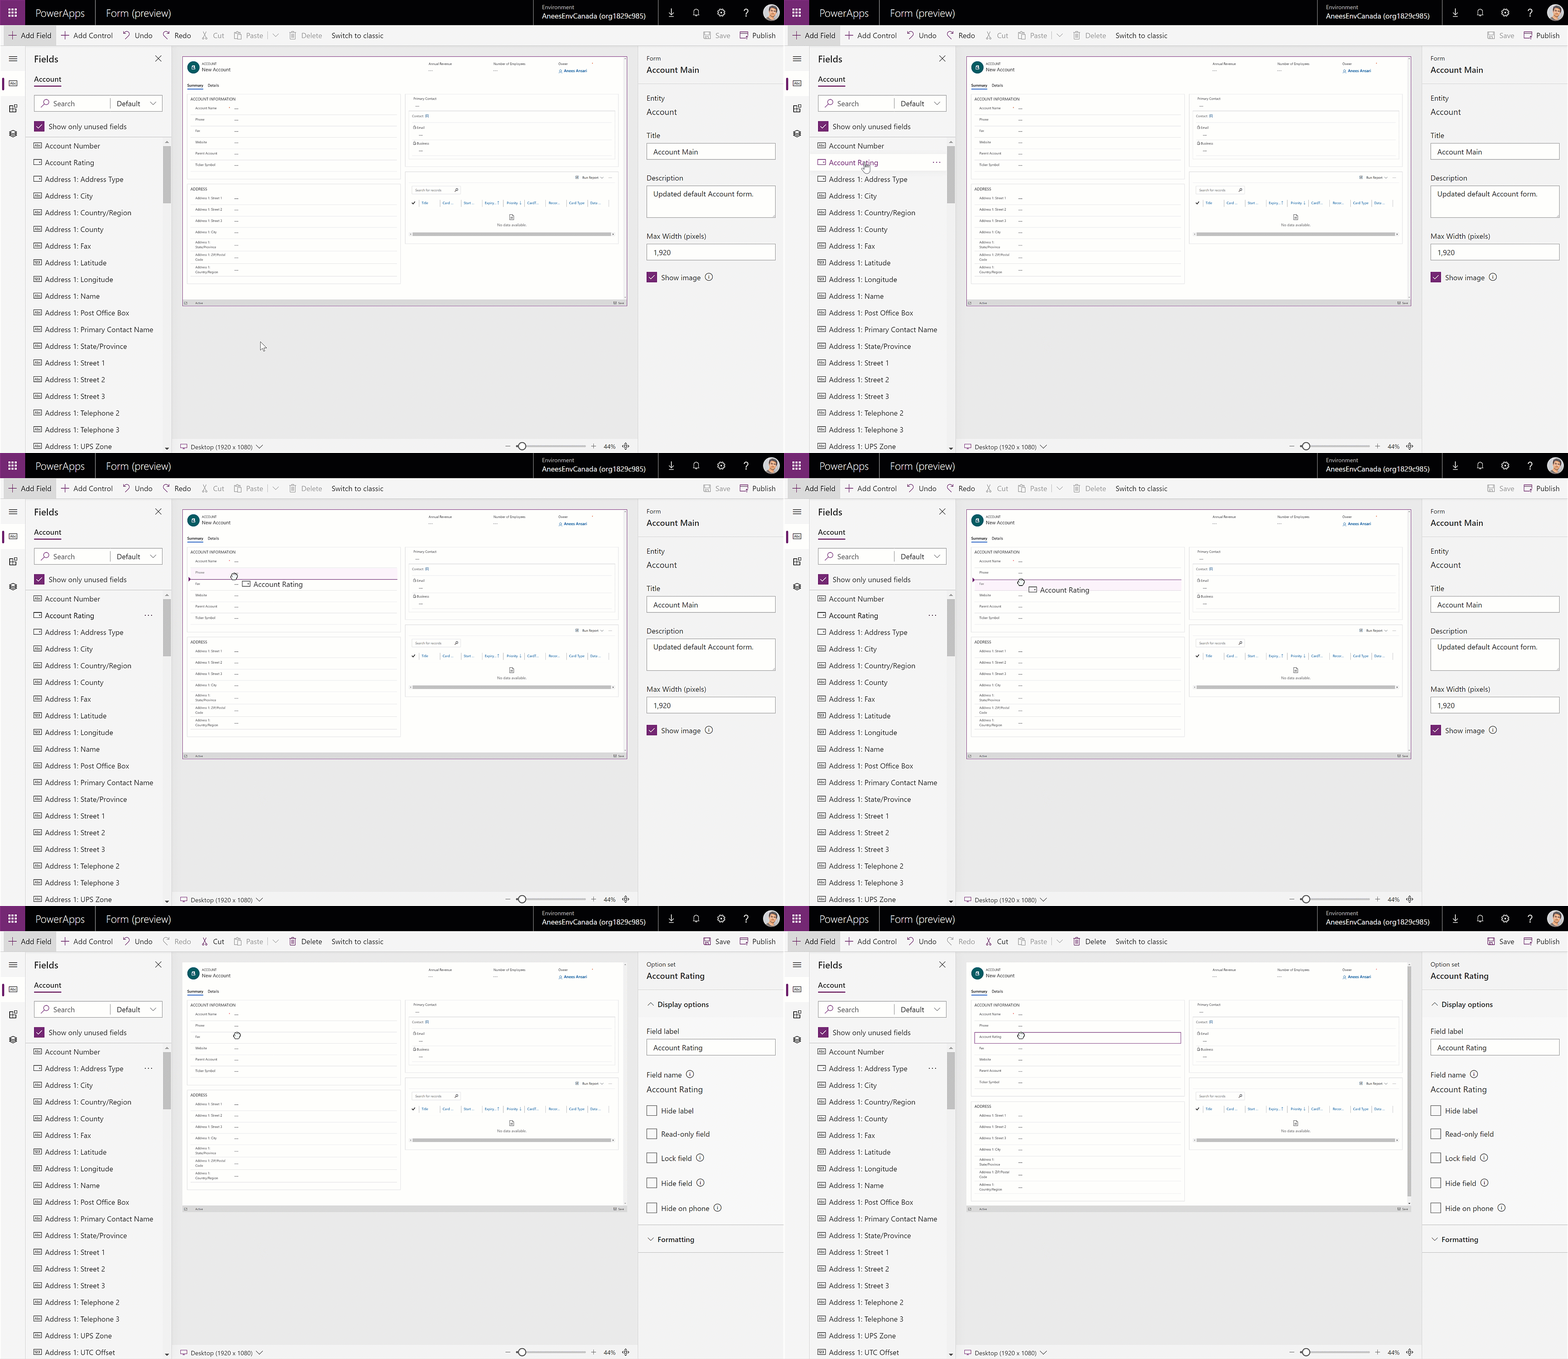
Makers can also drop fields in a section (empty white-space in the section). In this case the entire section will be highlighted, and the field will be added in the default location as determined by the section.
Makers can drag a section control from the pane and drop it on the form preview in the exact location that they want. Drop targets appear before and after sections already on the form.
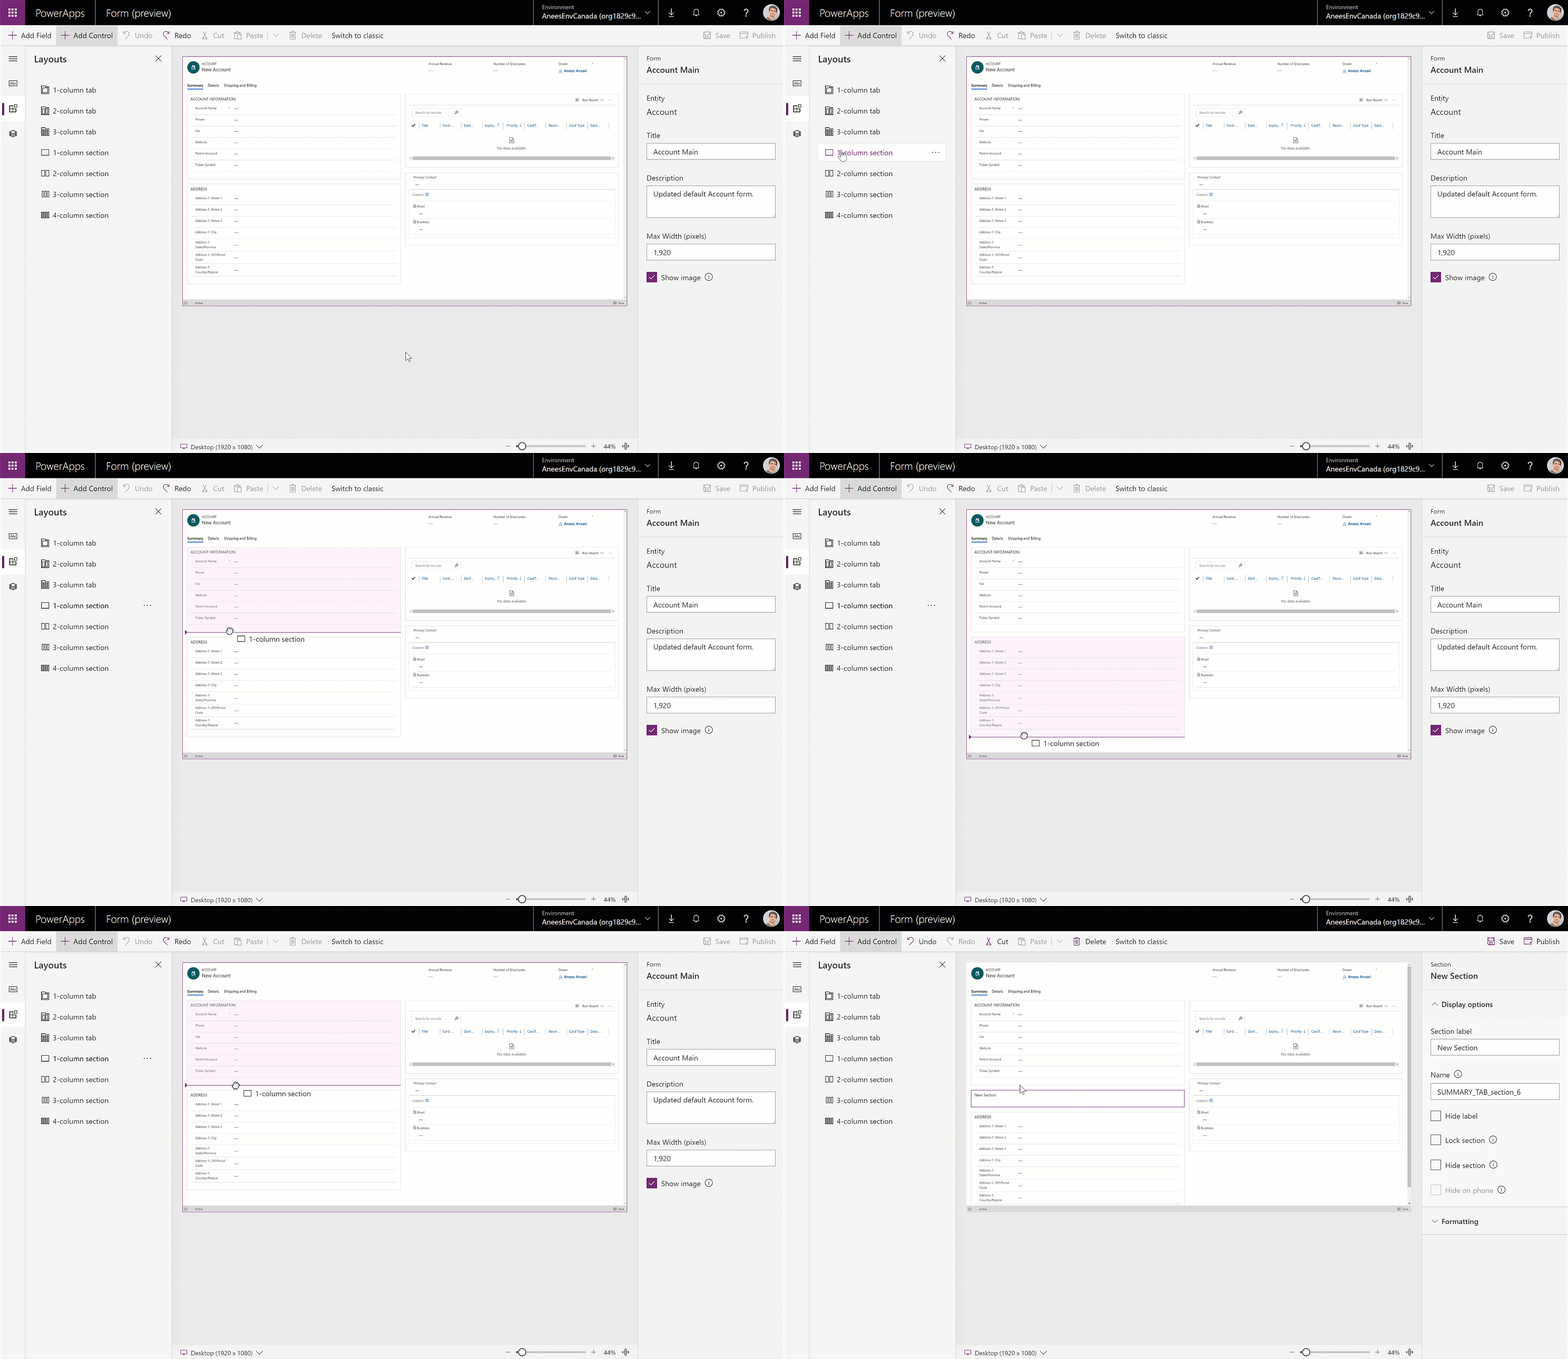
Makers can also drop sections in a tab (empty white-space in the tab). In this case the entire tab will be highlighted, and the section will be added in the default location as determined by the tab.
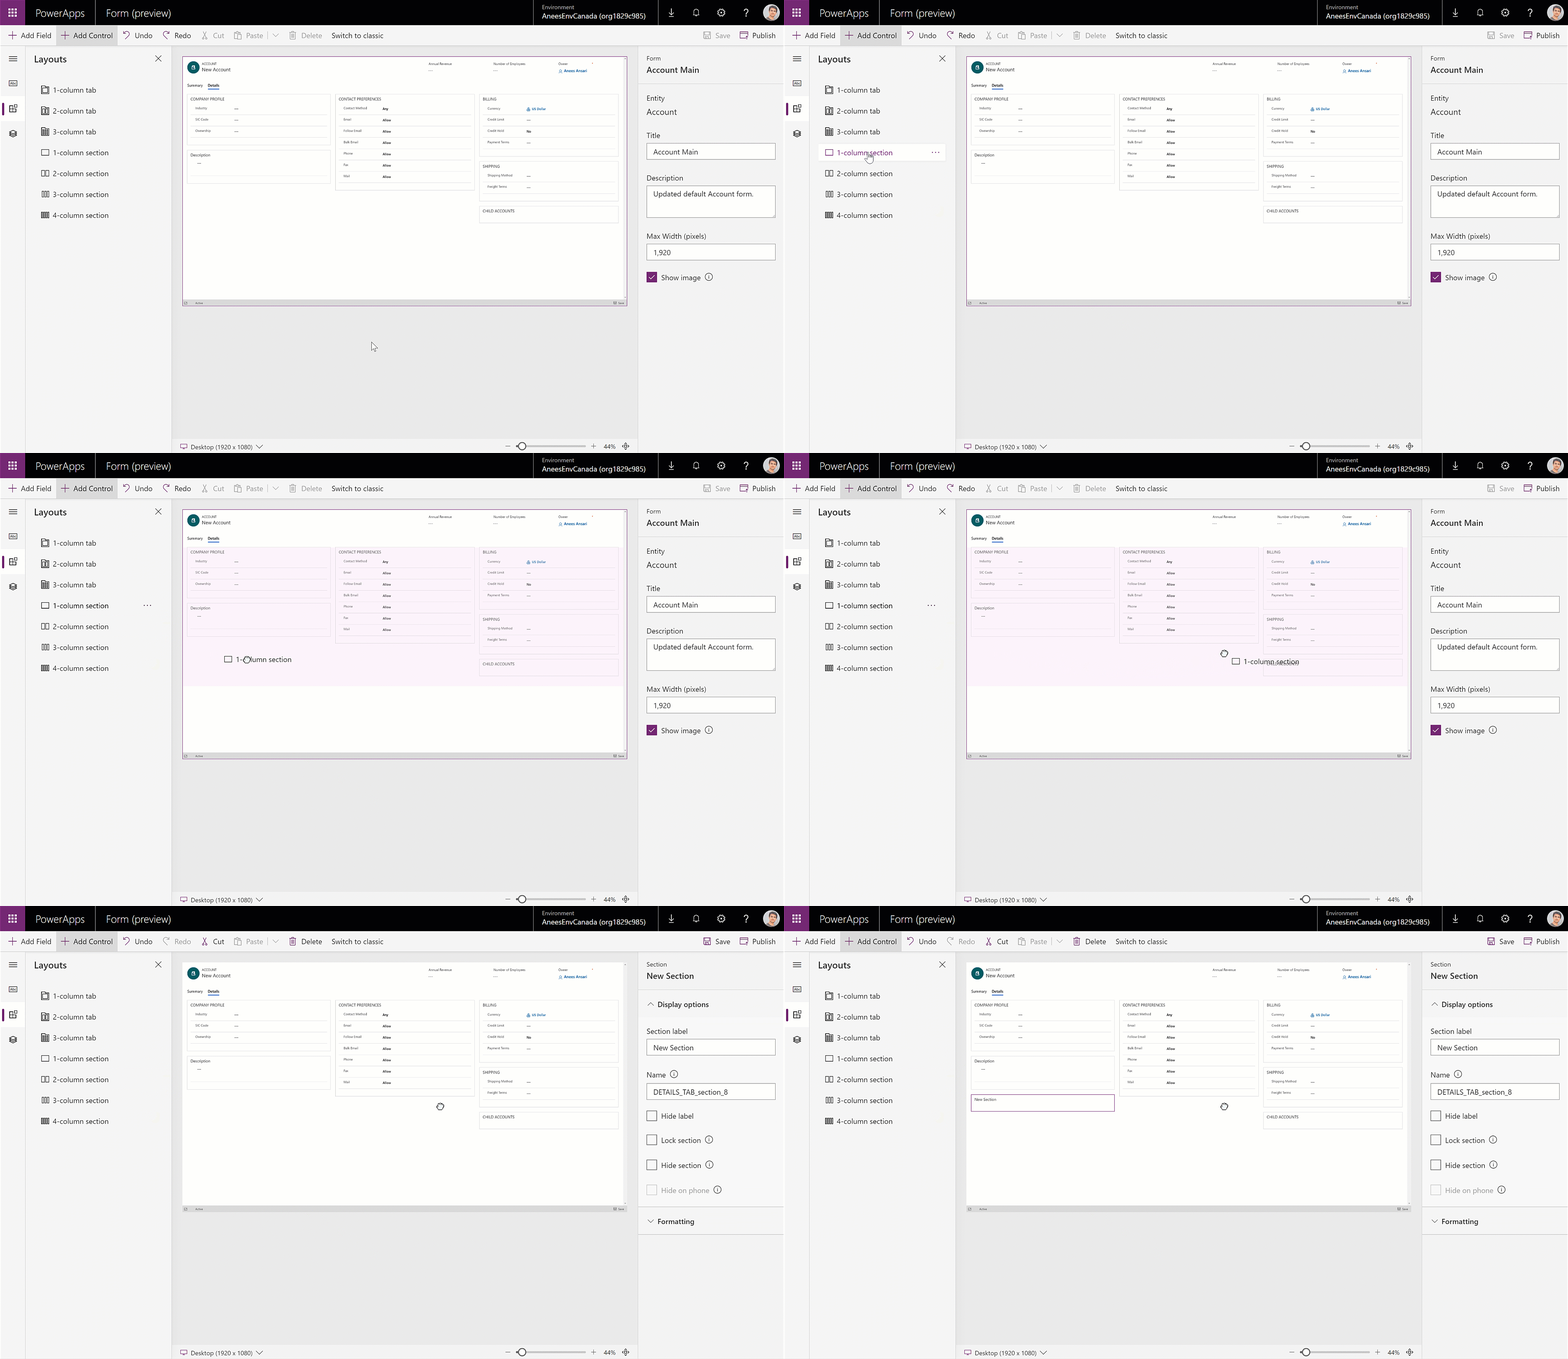
Makers can drag a tab control from the pane and drop it on the form preview in the exact location that they want. Drop targets appear in the tab header area before and after tabs already on the form.
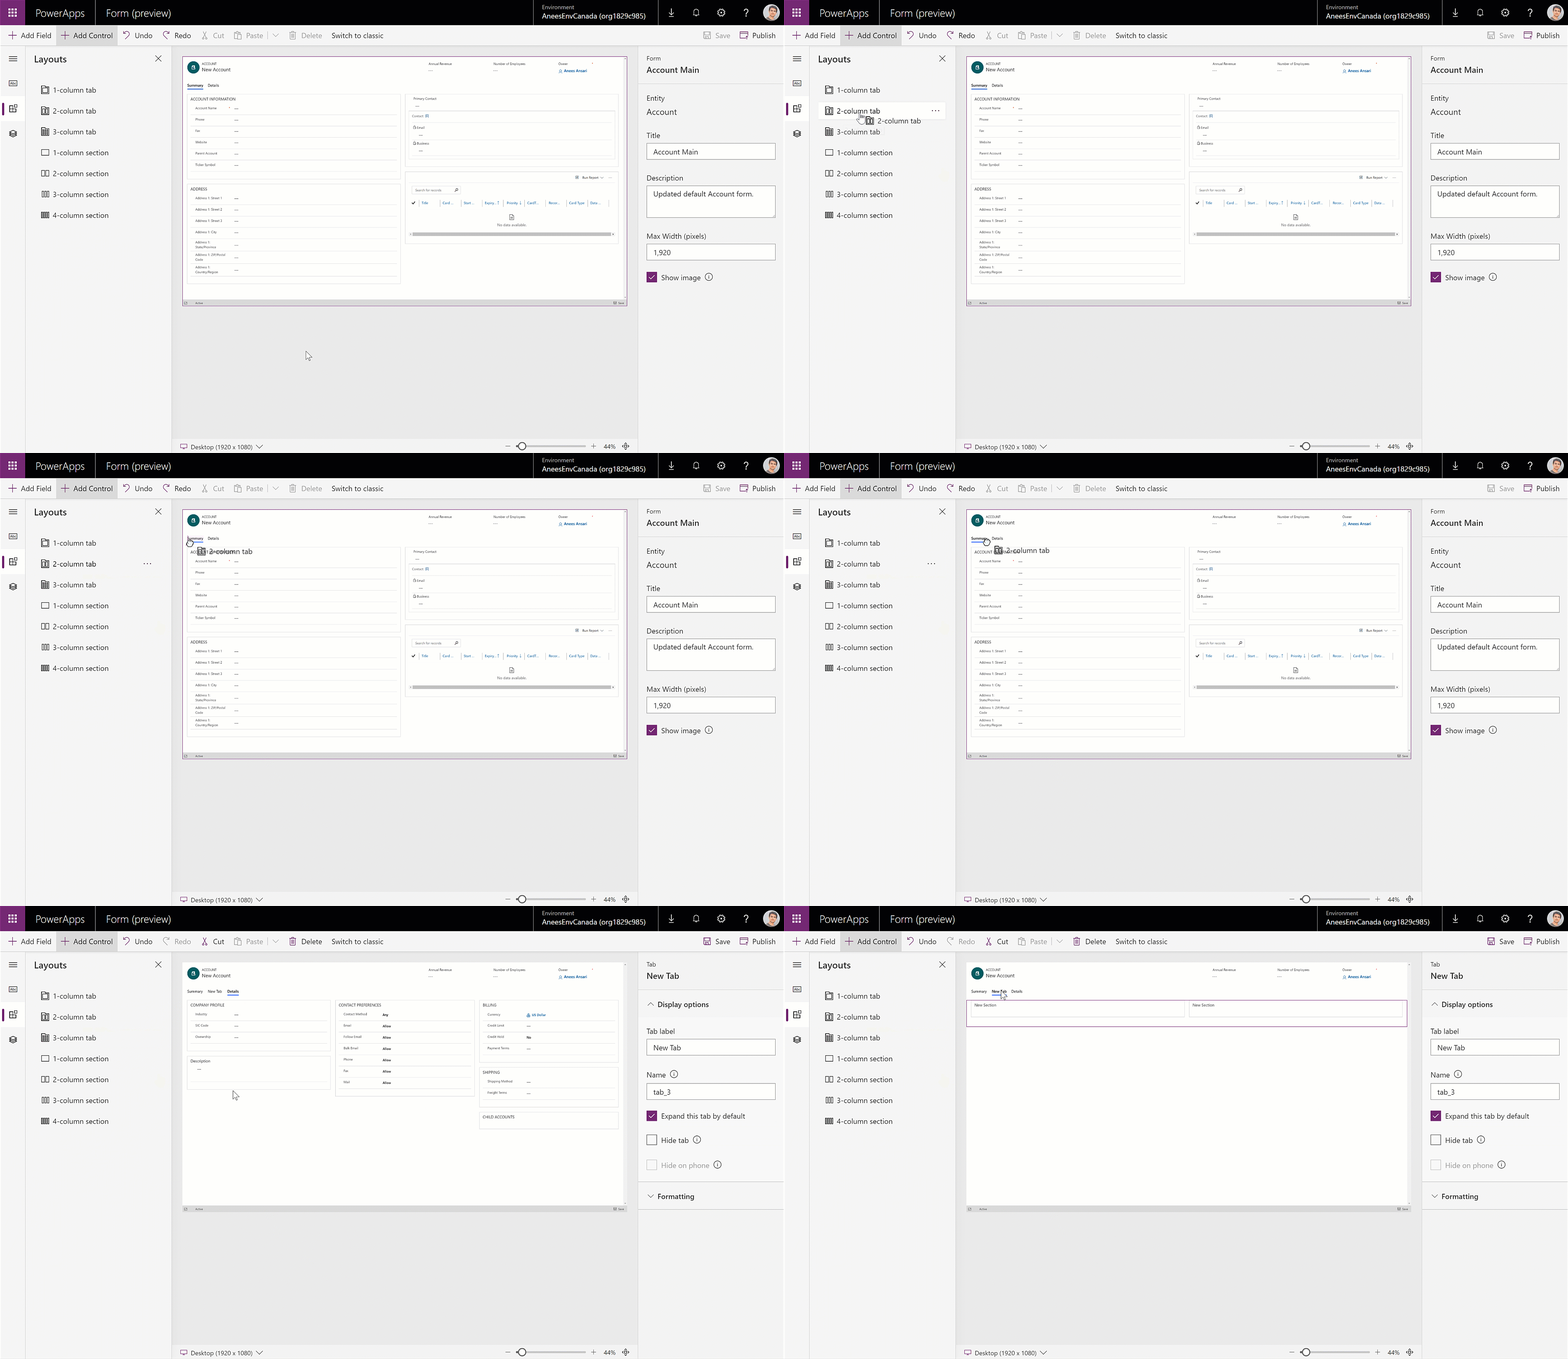
Makers can also drop tab controls on the left or right edge of the current tab. This will add the new tab before or after the current tab.
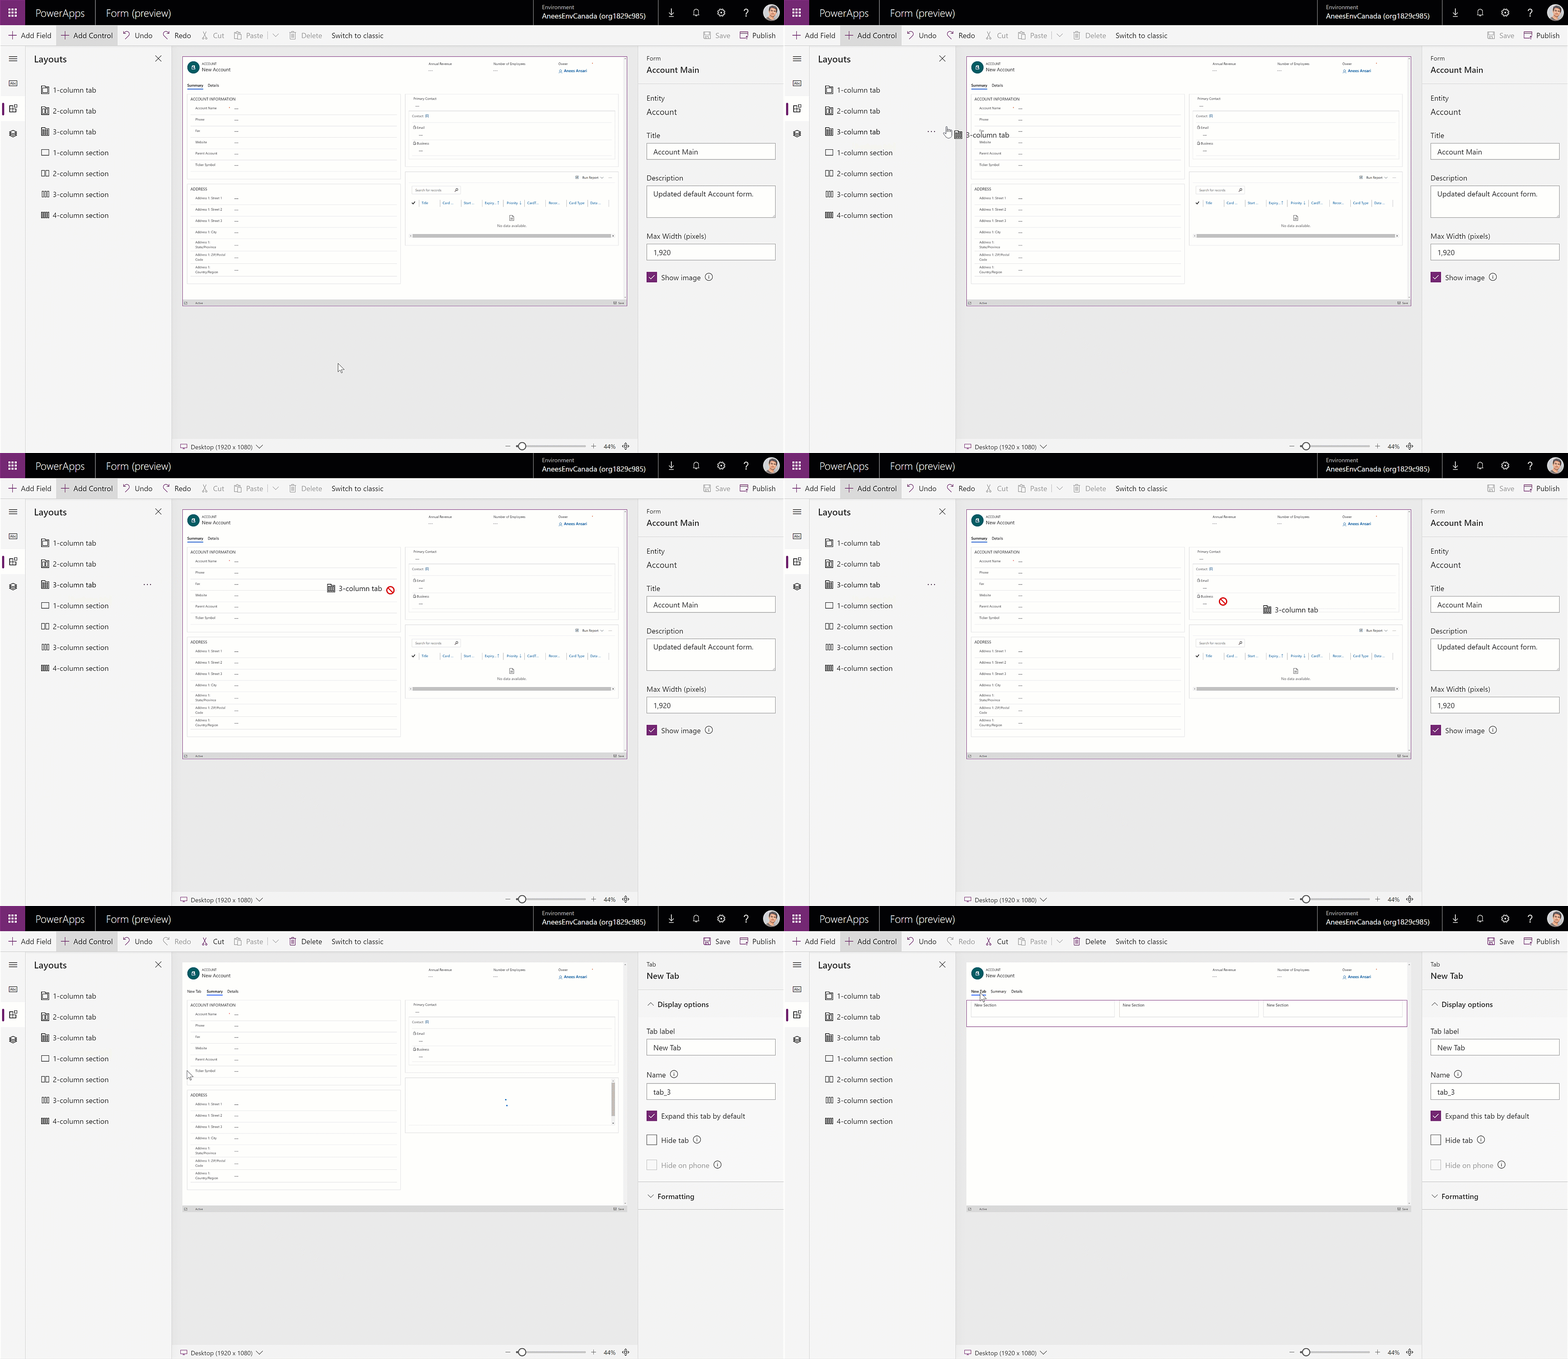
Hovering over a tab header when dragging a field or section changes the currently selected tab, allowing makers to add the field or section to a tab other than the one currently selected.
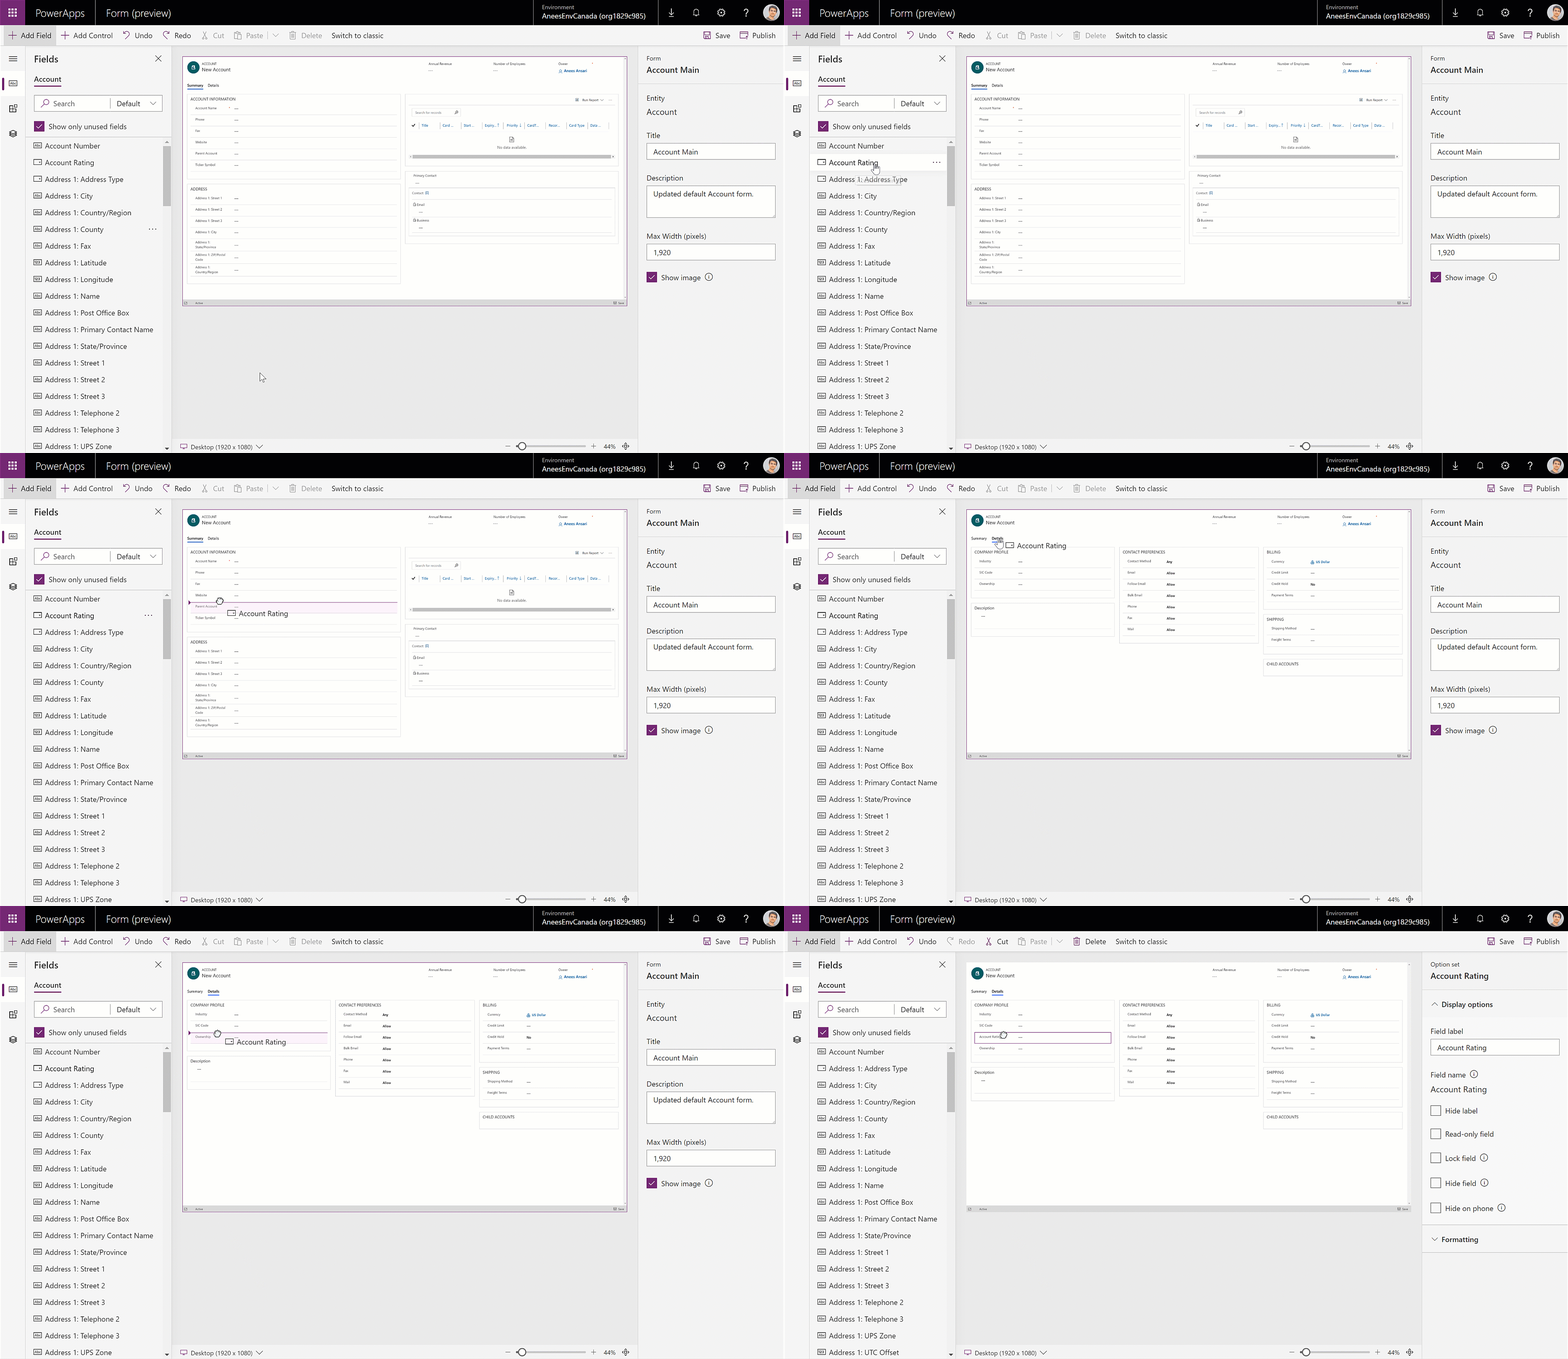
Makers can also move fields, sections and tabs that are already on the form using drag and drop.
To move a field, click anywhere on the field and initiate the drag action.
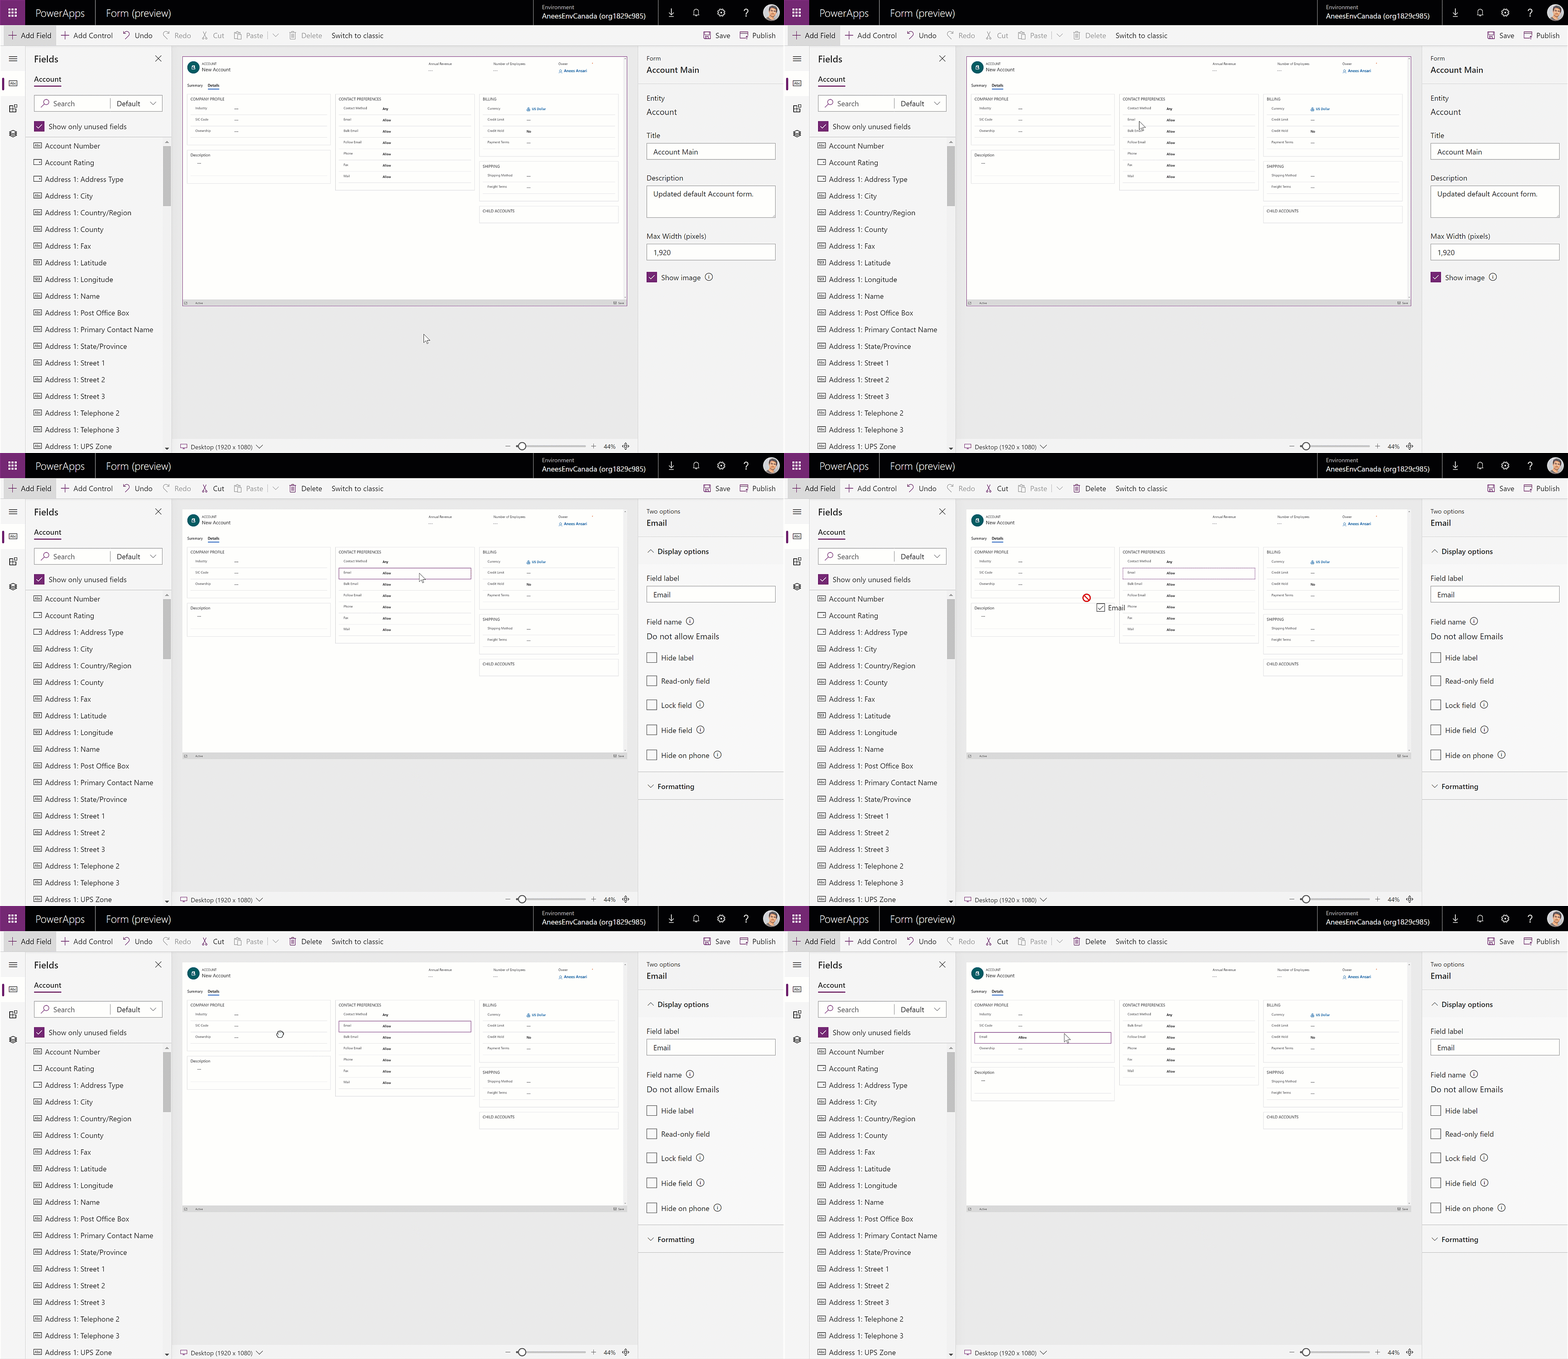
To move a section, makers can click on the section label or empty white-space within the section and initiate the drag action.
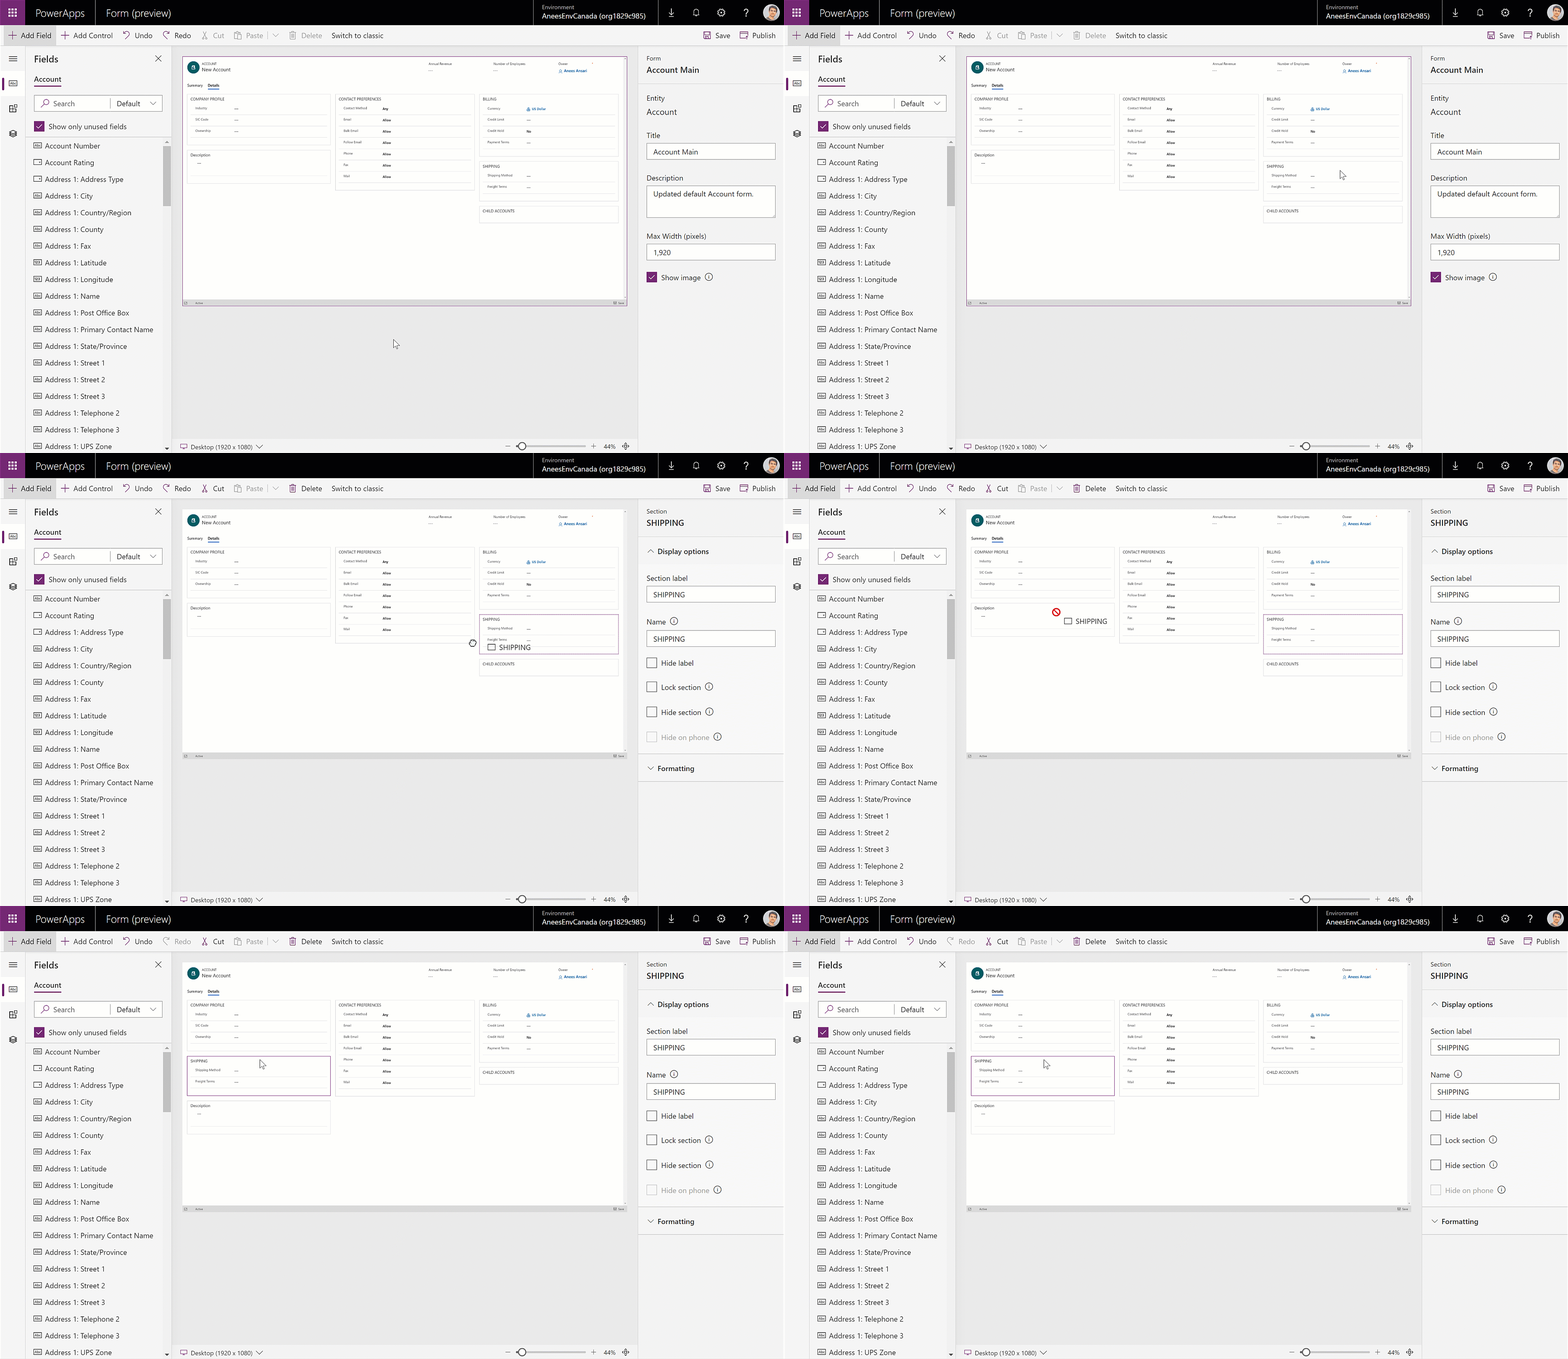
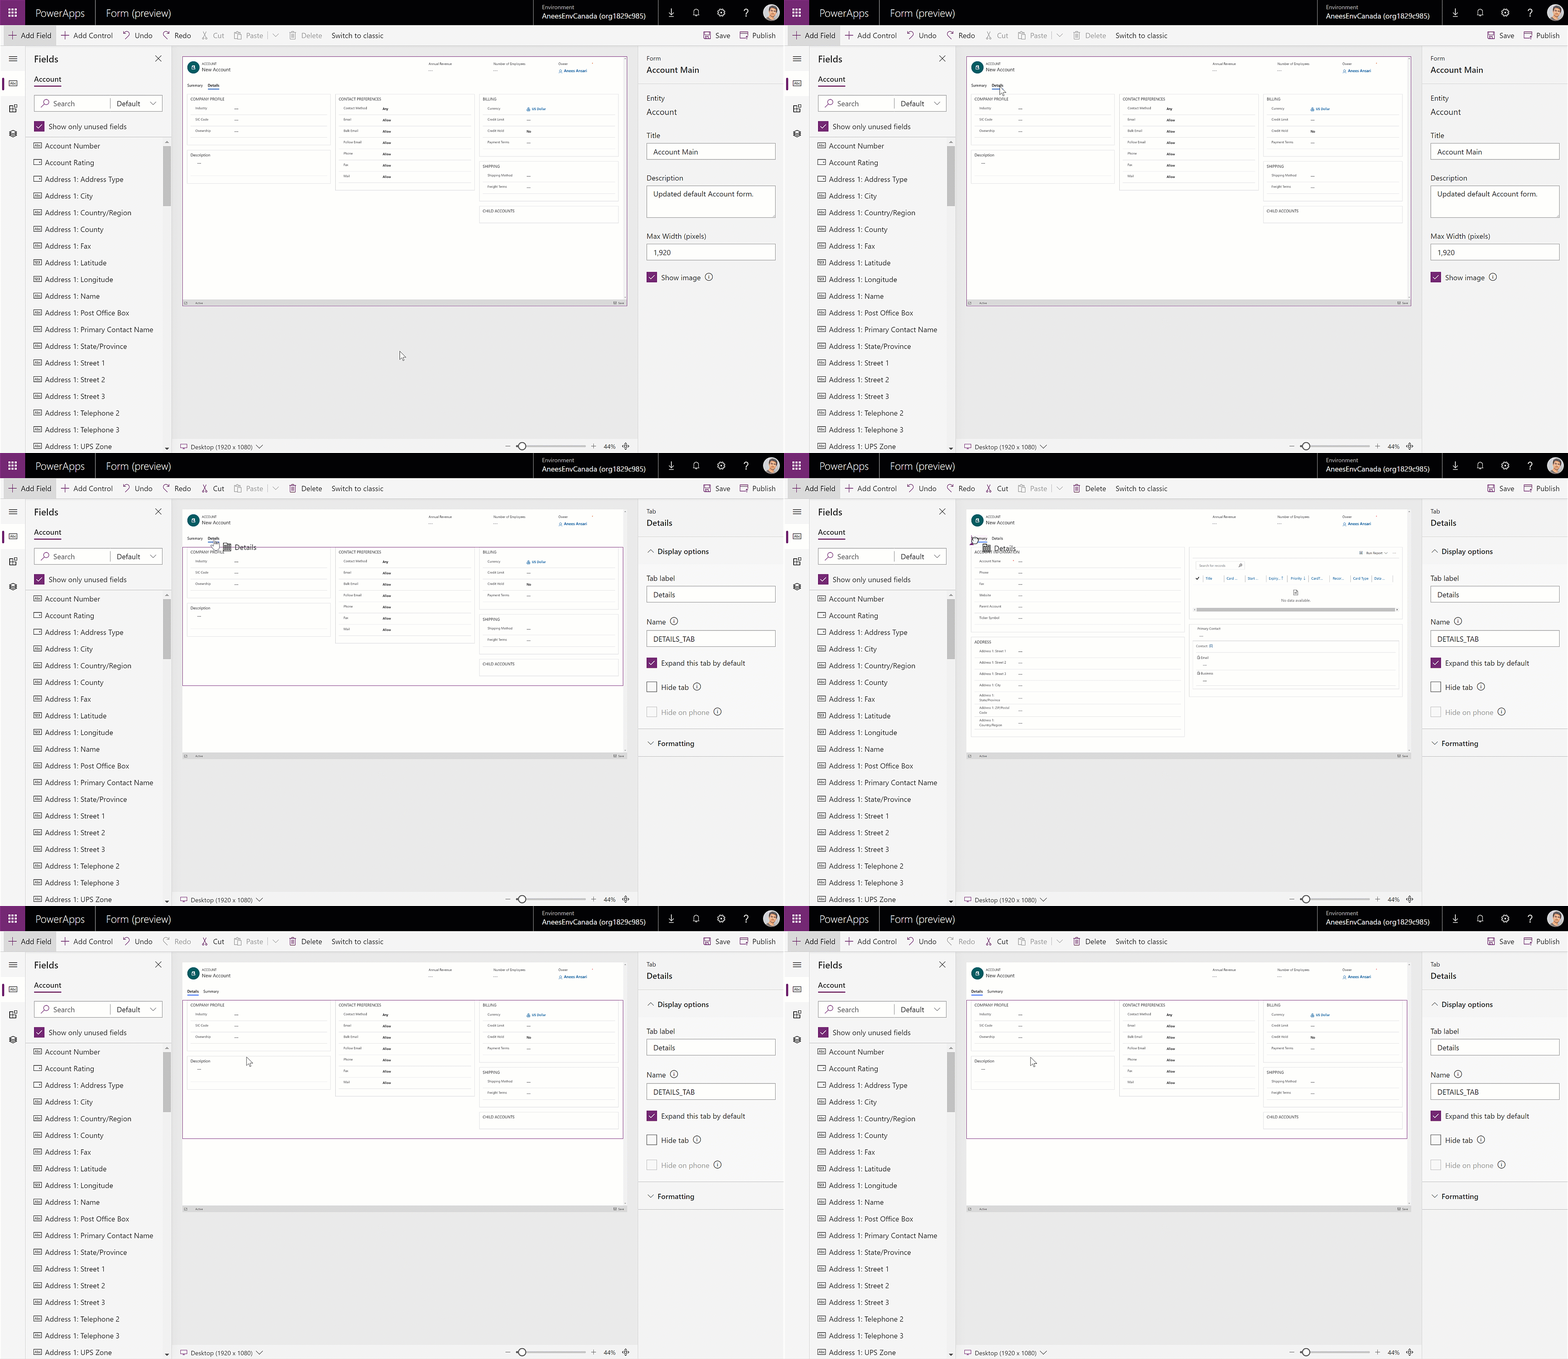
To move a tab, makers can click on the tab header and initiate the drag action.
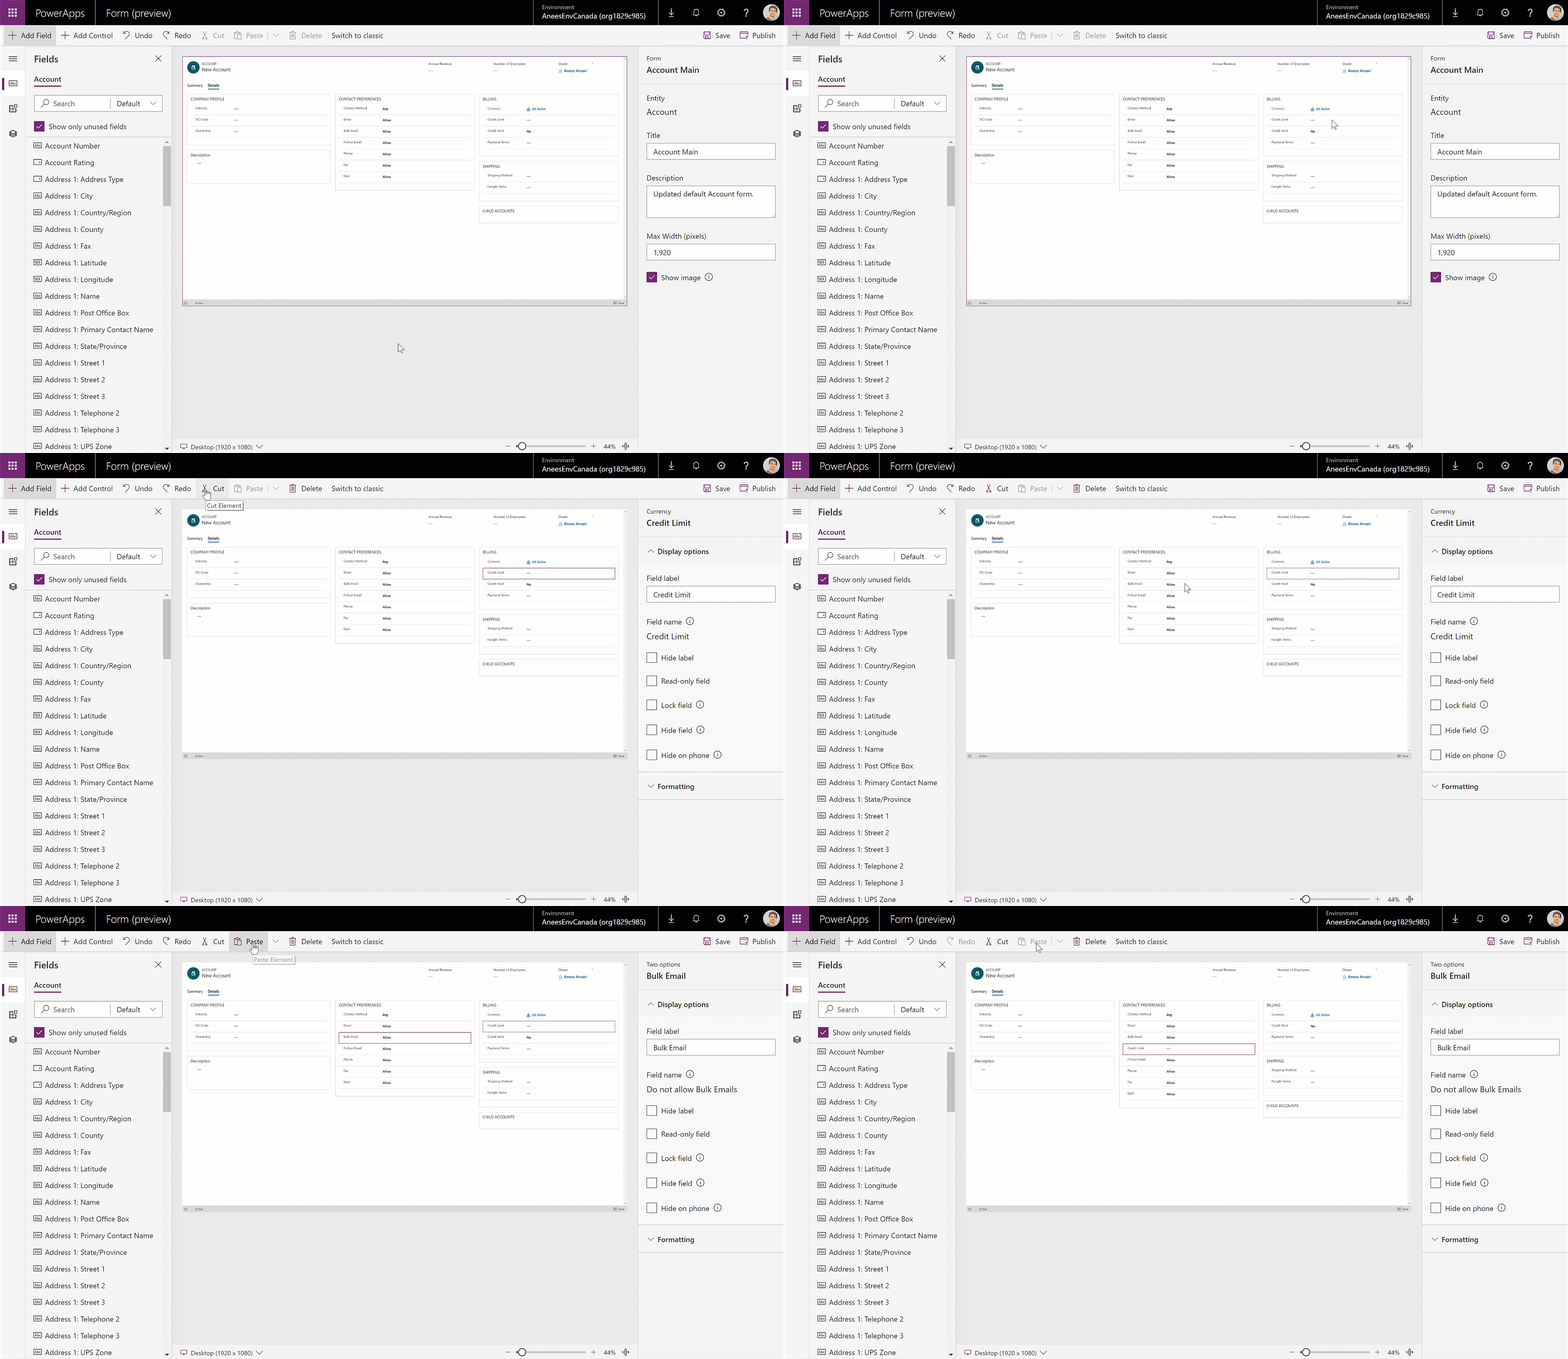
Makers can also use cut-paste to move fields, sections and tabs.
- Select the field, section or tab that you want to move.
- In the command bar, select Cut.
- Select another element to paste the cut element relative to.
- In the command bar, select Paste.
Moving a field using cut-paste.
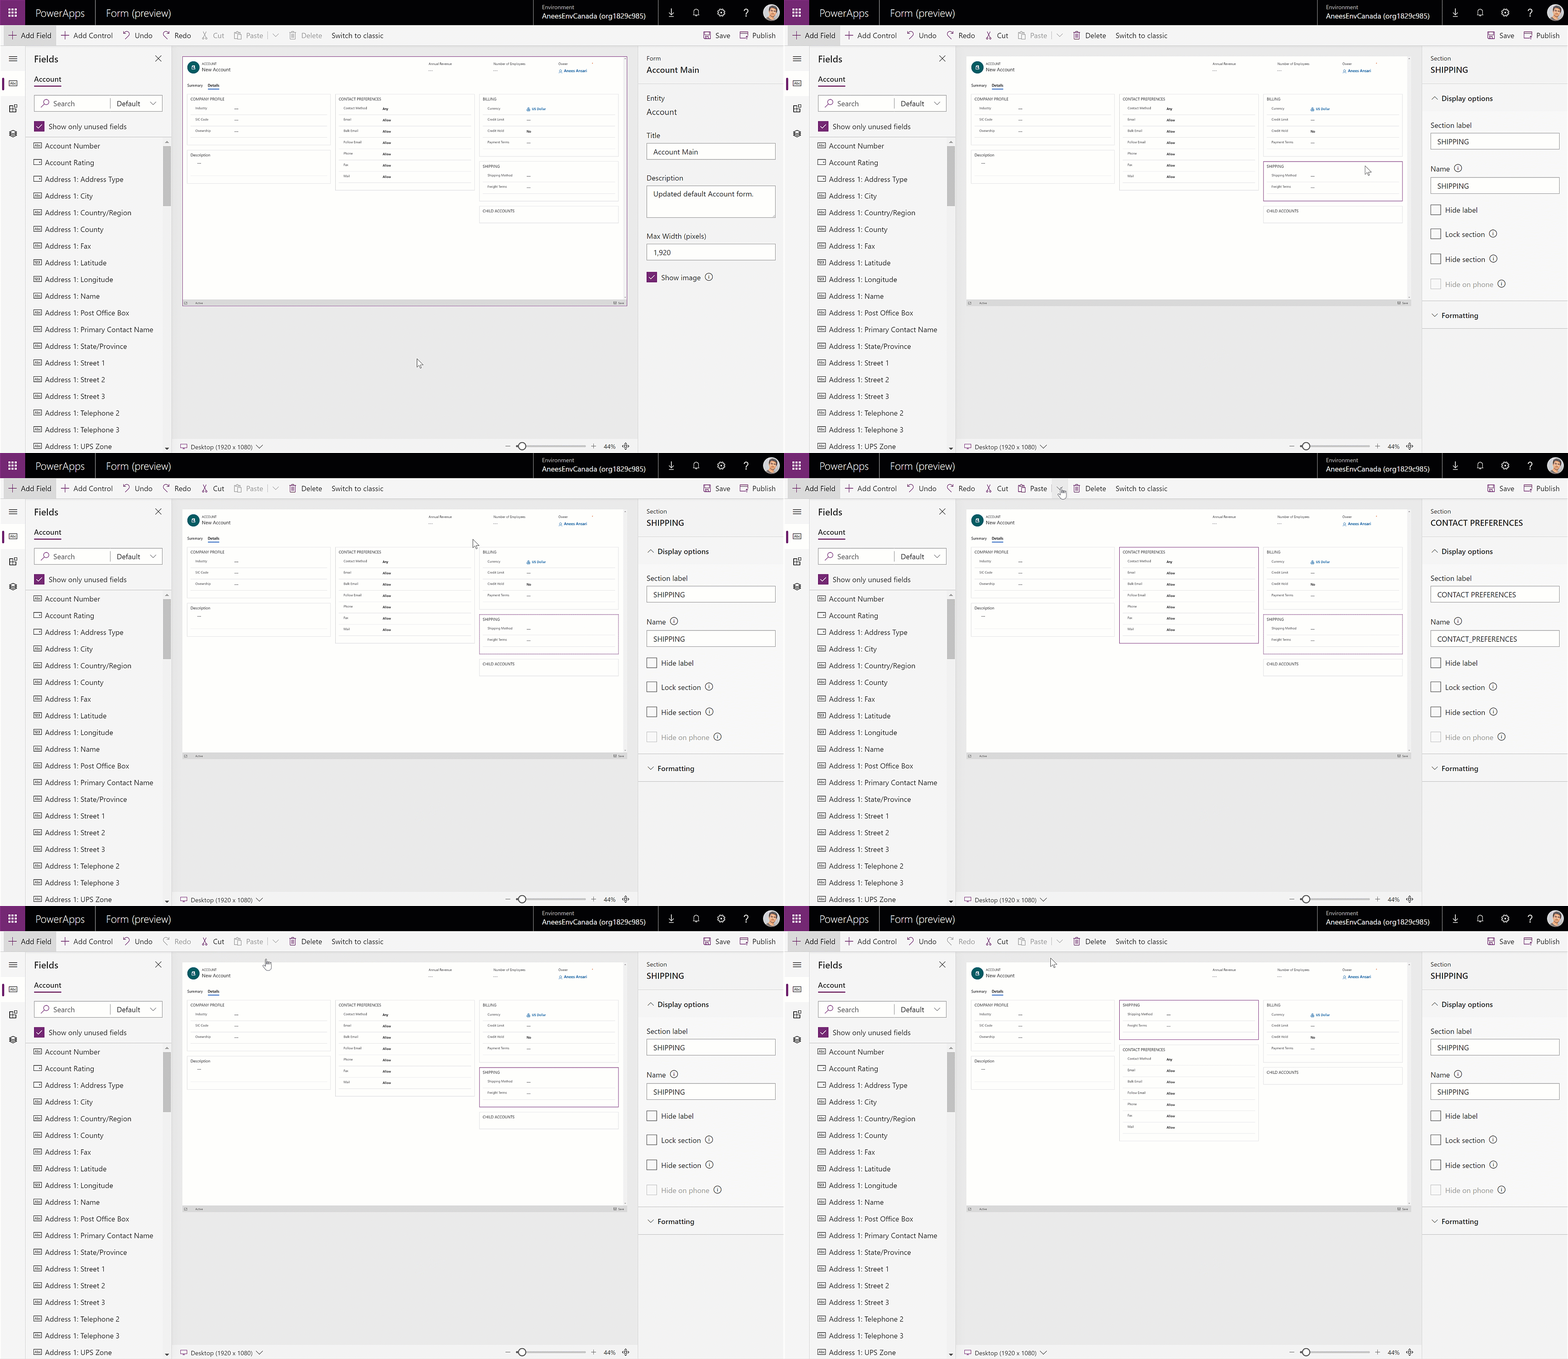
The paste action puts the element being pasted after the selected element. Use the Paste before action, if you would like to instead put the element being pasted before the selected element. This is especially helpful when wanting to paste an element at the top of a column.
- Select the field, section or tab that you want to move.
- In the command bar, select Cut.
- Select another element to paste the cut element relative to.
- In the command bar, select the chevron next to Paste, and in the menu, select Paste before.
Moving a section to the top of a tab column using cut-paste before.
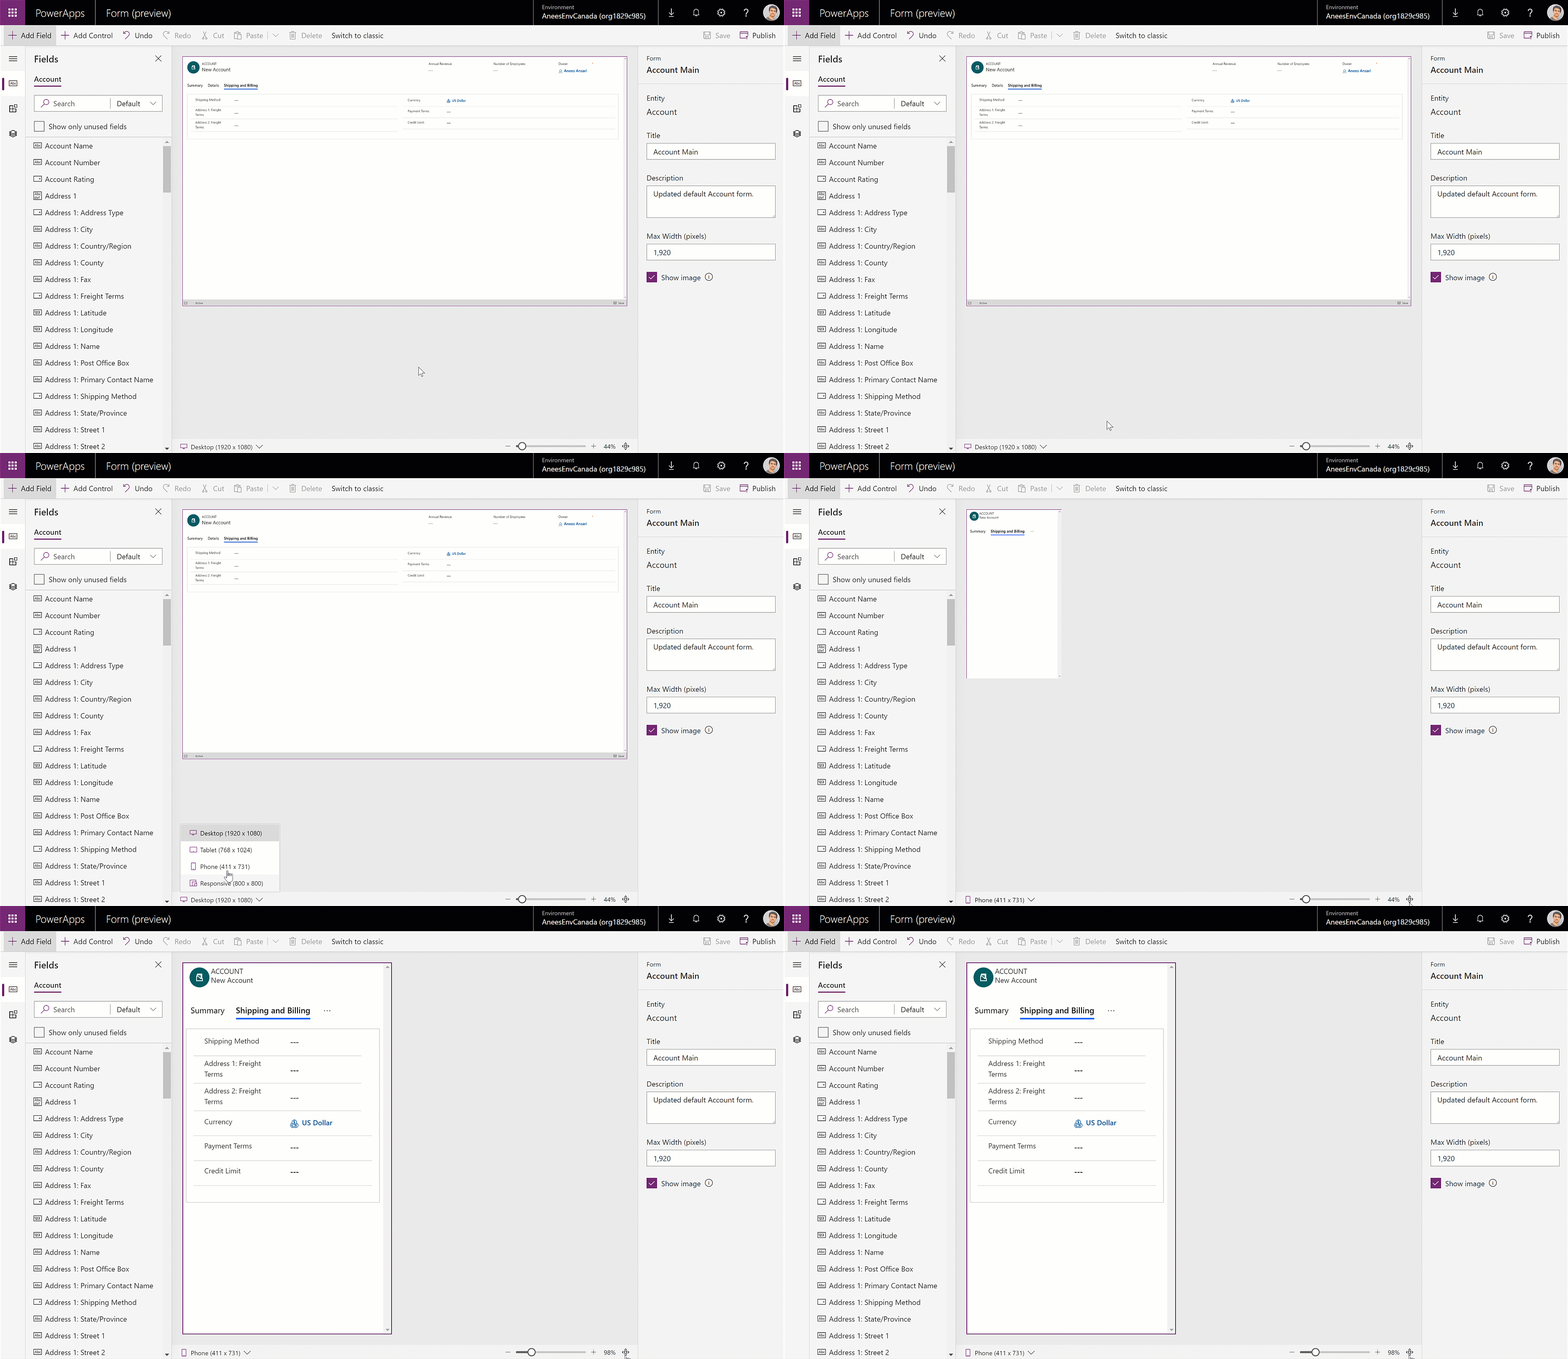
When adding or moving fields or controls be aware that the form preview is responsive and may be rendering multiple columns as stacked. To ensure that the element being added or moved is in the correct column, drop or paste it anchored to an element that is already in that column.
Here’s an example where two section columns, each with three fields, are being rendered as stacked giving the appearance of a single column.
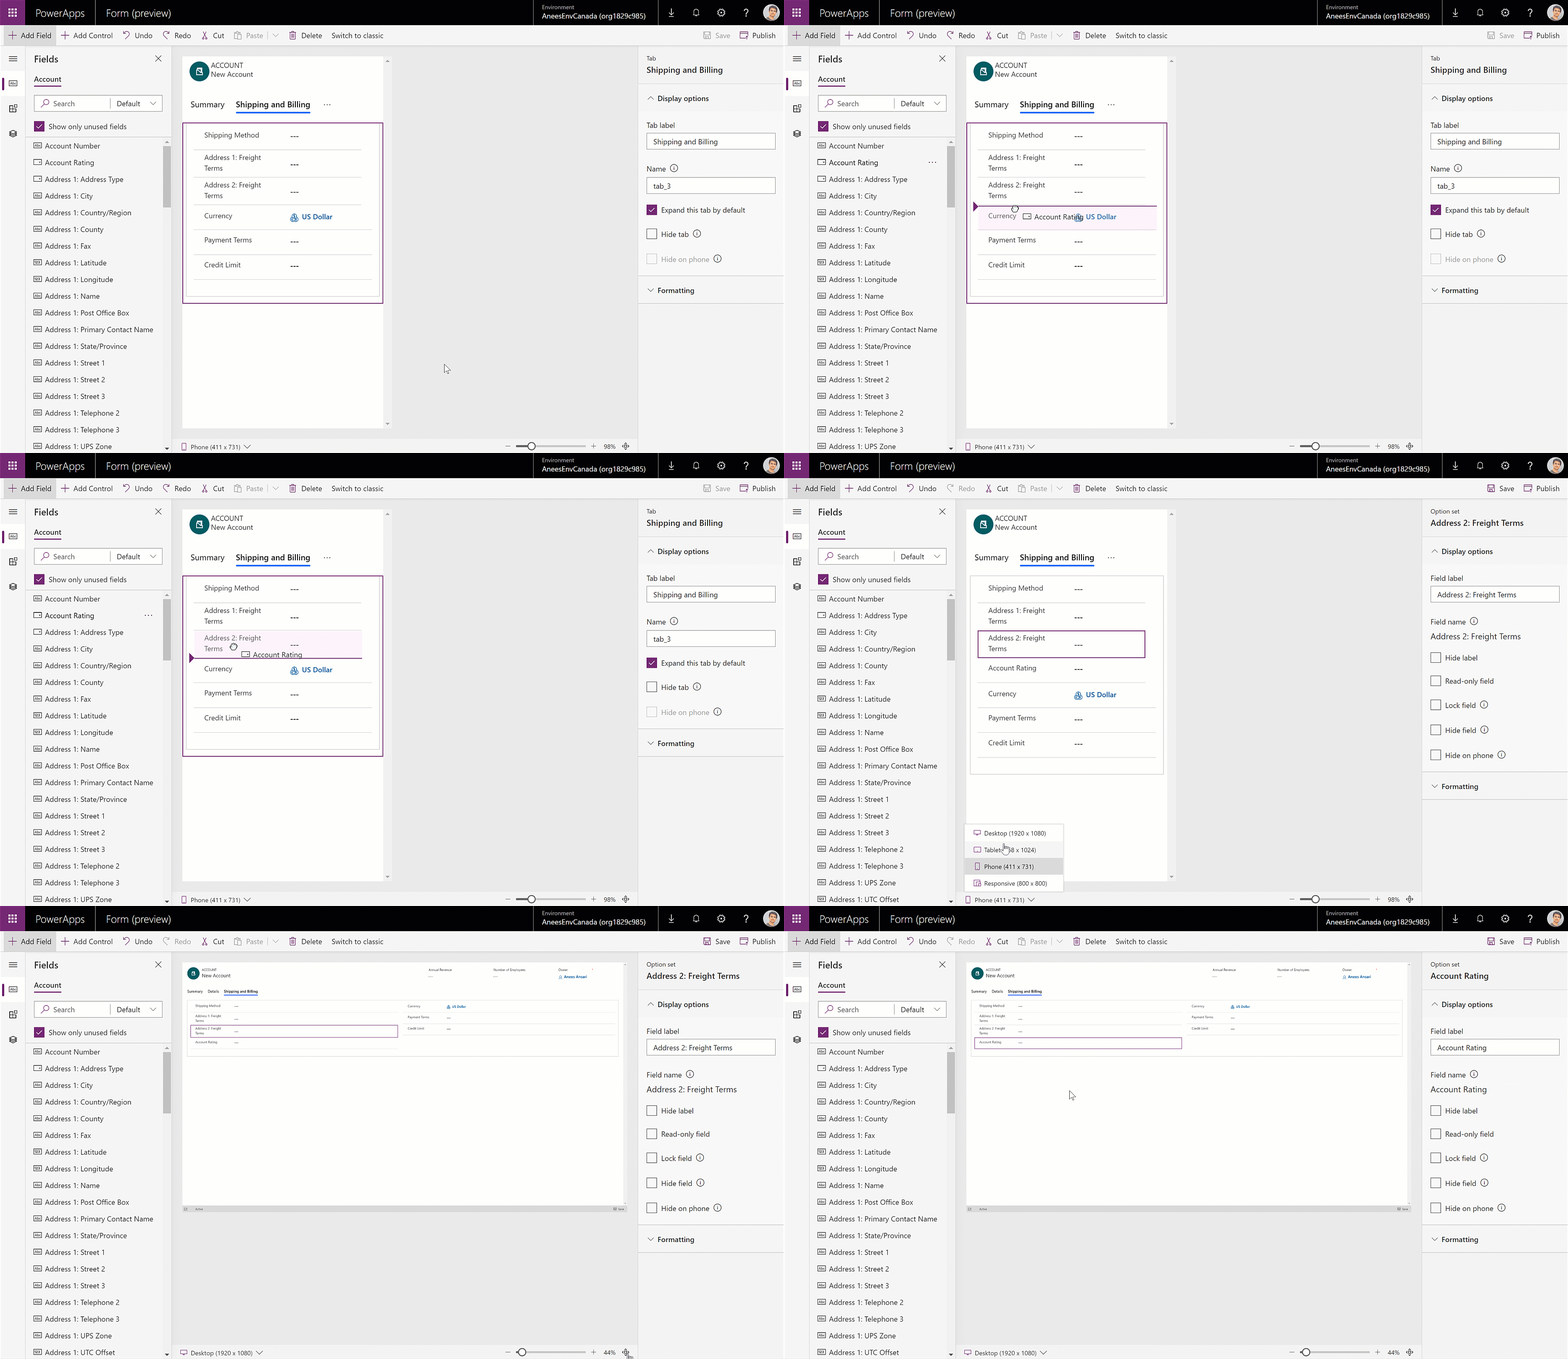
Dropping a field anchored to the last field in the first section column ensures it is in the first section column.
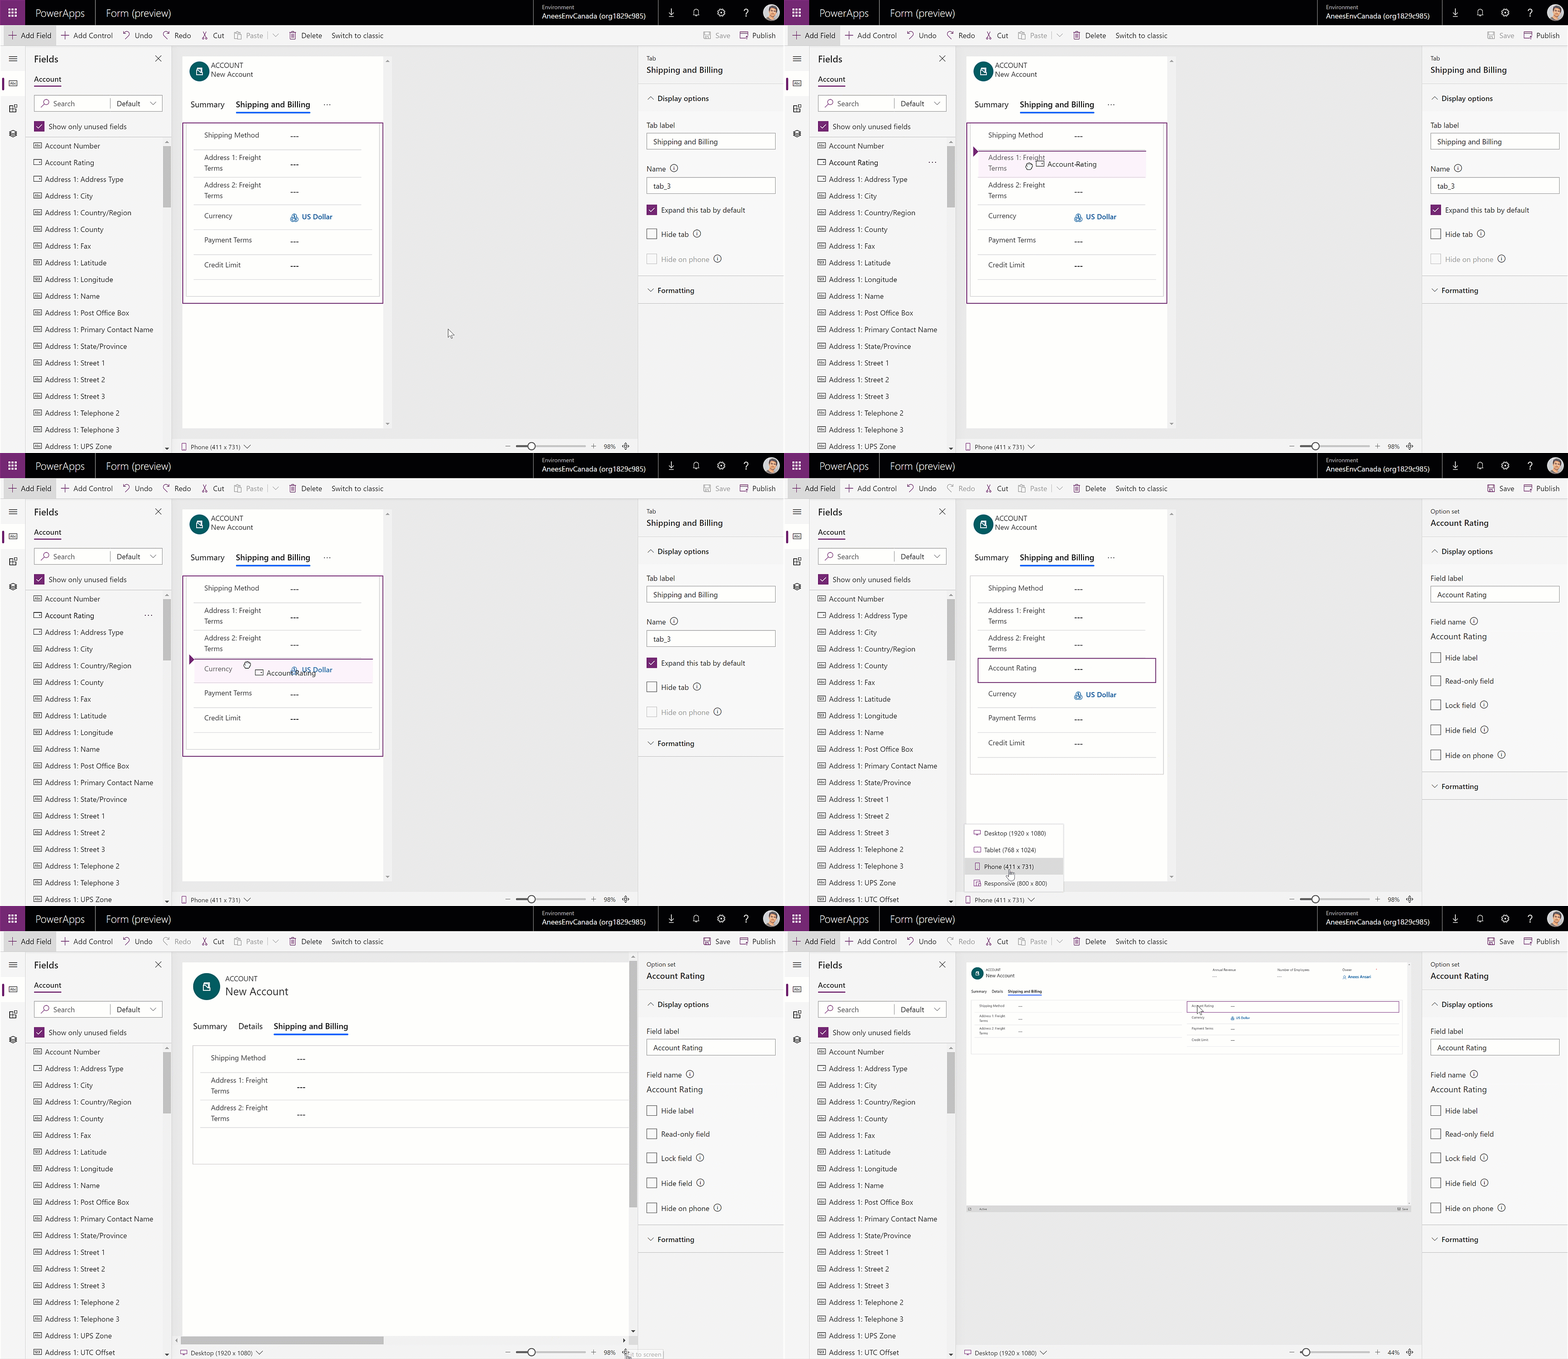
Dropping a field anchored to the first field in the second section column ensures it is in the second section column.
For detailed step-by-step instructions on adding and moving fields, sections and tabs please refer to the following articles.
- Add, move or delete fields on a form using the form designer
- Add, move or delete sections on a form using the form designer
- Add, move or delete tabs on a form using the form designer
With this update we have made the new form designer the default on PowerApps, simply click on a form name and it will open the form for authoring in the new form designer.
Few things that you might miss that will be a part of a future update.
- Keyboard shortcuts for cut-paste.
- Automatically scrolling the form when dragging an element and hovering at the edge of a form.
Support for drag and drop has been one of the most requested features from our customers and we always strive to ensure that we deliver features that align with our customer’s expectations. We hope that these updates help further improve your experience and enhance your productivity when authoring forms.


