Find Messages and entities eligible for plug-ins using the Common Data Service
For many years we provided an Excel workbook with the Dynamics 365 Customer Engagement SDK that showed the list of messages and entities that you could register plug-in steps with. But this workbook could only show the standard entities and messages available in a system that was not customized. The Plug-in Registration tool doesn’t depend on a static list, it queries the system so that any custom entities or custom actions can also be included.
In the same way, you can create an Excel workbook that queries the system and shows the messages and entities you can use when you register plug-in steps. This blog post will show you how.
This workbook will be connected the Common Data Service database in your environment, so it will include any custom entities or custom actions defined there. You can also use this process to connect to any entity data in the Common Data Service, but this example will be specifically for data showing eligible messages and entities for plug-ins.
There are two parts to this procedure. Before you can create this workbook, you will need the service root url for the Web API for your Common Data Service database.
Get the service root url for the Web API
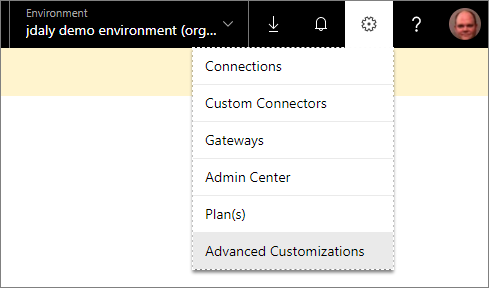
- From the maker portal powerapps.com, with your environment selected, choose the gear icon in the top right corner and choose Advanced Customizations.
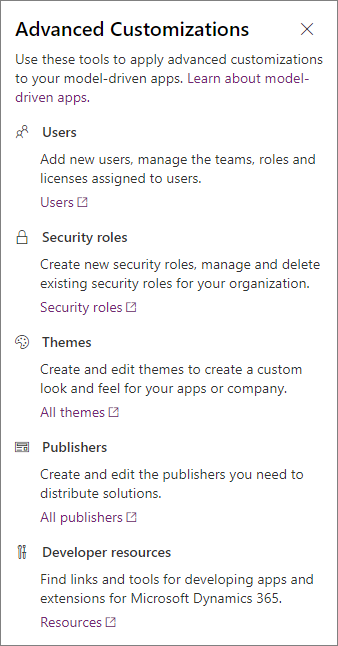
- At the bottom, choose Developer Resources.
- A new window or tab will open and under Instance Web API you can find the Service Root URL.
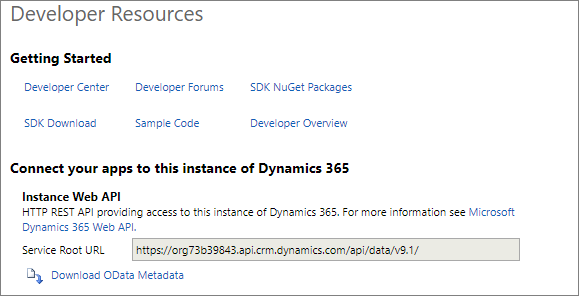
The value will look something like this:https://org73b39843.api.crm.dynamics.com/api/data/v9.1/ - Copy this value. You will need it in the next step.
Create an Excel Workbook
- Open Microsoft Office Excel and create a new blank workbook.
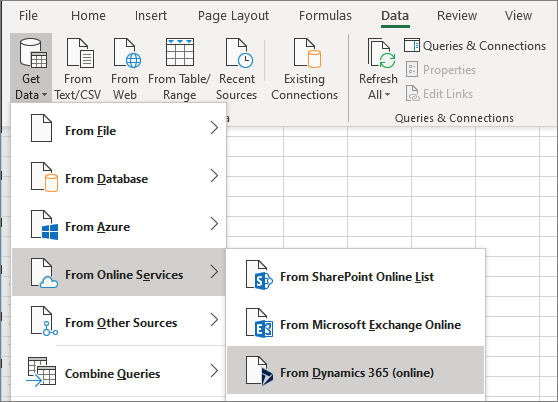
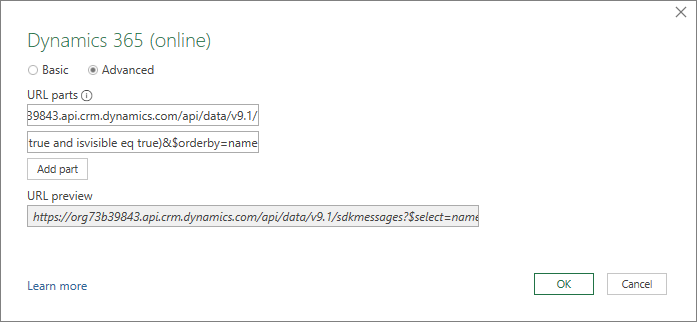
- On the Data tab, select Get Data > From Online Services > From Dynamics 365 (online).
- In the dialog, select the Advanced.
- In the first URL part, paste the service root url you copied from the steps listed in Get the service root url for the Web API.
- In the second URL part, paste the following:
sdkmessages?$select=name&$filter=isprivate eq false and (name ne 'SetStateDynamicEntity' and name ne 'RemoveRelated' and name ne 'SetRelated' and name ne 'Execute') and sdkmessageid_sdkmessagefilter/any(s:s/iscustomprocessingstepallowed eq true and s/isvisible eq true)&$expand=sdkmessageid_sdkmessagefilter($select=primaryobjecttypecode;

$filter=iscustomprocessingstepallowed eq true and isvisible eq true)&$orderby=name - The dialog should now look like this:
- Click OK.
- In the next step, select Organization account, and click the Sign in button if you aren’t already signed in.
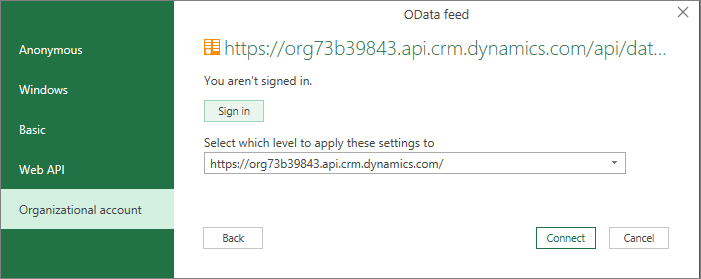
- Choose the account that you use to connect to your PowerApps environment.
- Click Connect.
- In the next dialog, click Transform Data.
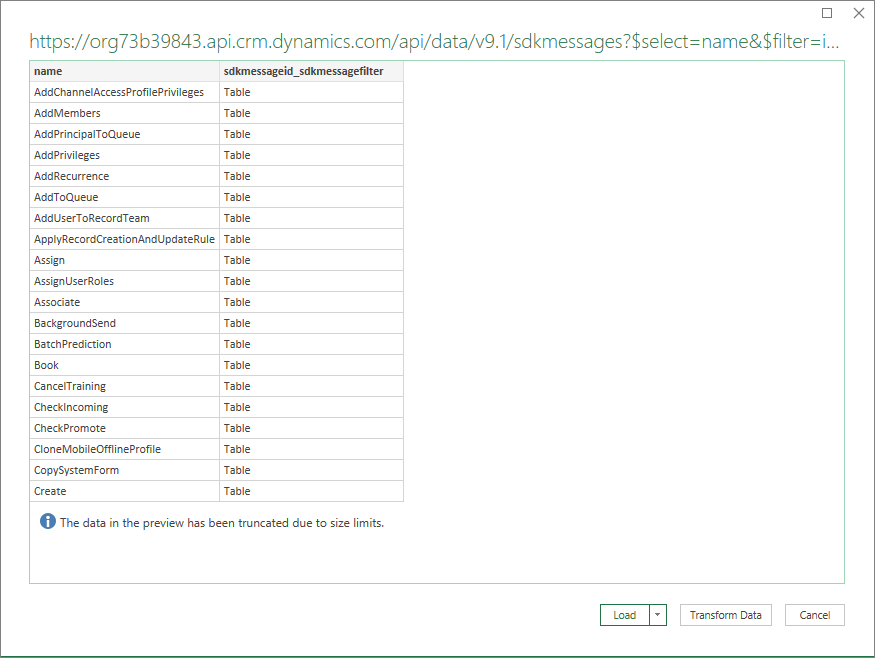
- This will open the Power Query Editor.
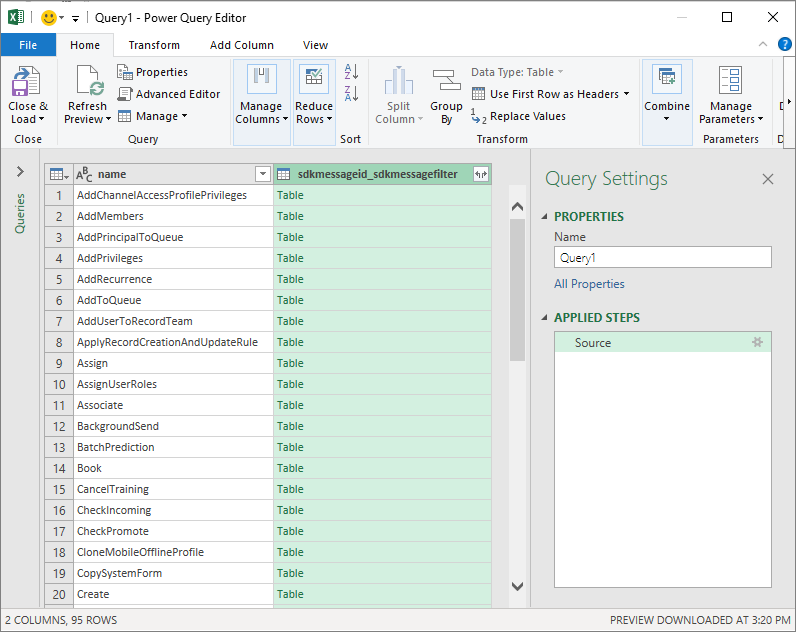
- In the second column titled sdkmessageid_sdkmessagefilter, click the icon in the heading to show the following dialog:
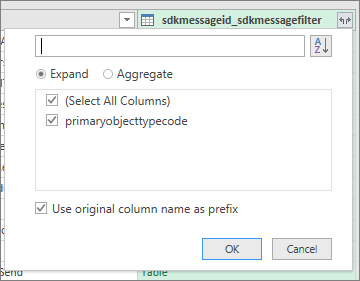
- Without changing the default values, with Expand selected, click OK.
- Important: Select both columns before performing the next step.
- In the Home > Query group, select Reduce Rows > Remove Rows >
Remove Duplicates.
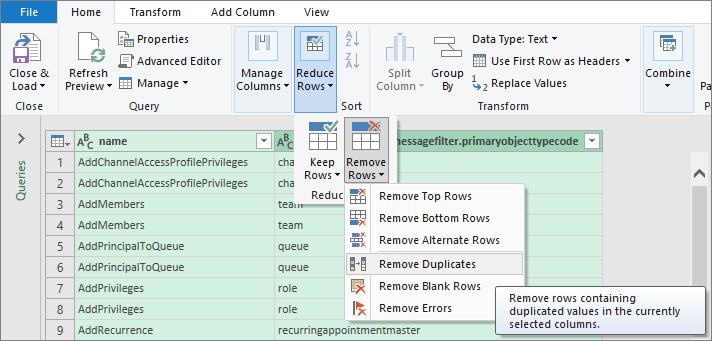
- Click Close & Load to close the Power Query editor.
- After the query finishes loading, you can now view the list of message names and entities.
- You may want to rename the sdkmessageid_sdkmessagefilter.primaryobjecttypecode column to entity, but it will be overwritten if you refresh the data in the future.
You can now use standard Excel capabilities to filter on a message or entity to find the eligible combinations of messages and entities you can use with plug-ins in your environment.


