

Using GitHub Actions to deploy an Azure Static Web App

In this article we will make a static web app and deploy to Azure using GitHub actions.
What is a static web app?
In modern web development, the front end application that the user accesses in their browser is often purely HTML, CSS and JavaScript, meaning the application can be used entirely with the user’s browser. This is a static web application and uses principals often referred to as JAM Stack (JavaScript, APIs, Markup).
Any dynamic interactions are achieved by APIs hosted within separate applications, such as Azure Functions. This allows the applications to be maintained and hosted separately with their own deployment pipelines.
Separating the frontend to a static web app allows the hosting to be more lightweight than a full application, including server-side technologies, and supports a microservice architecture.
In Azure, we can host our static application on Azure Static Web Apps.
Creating our Static Web App
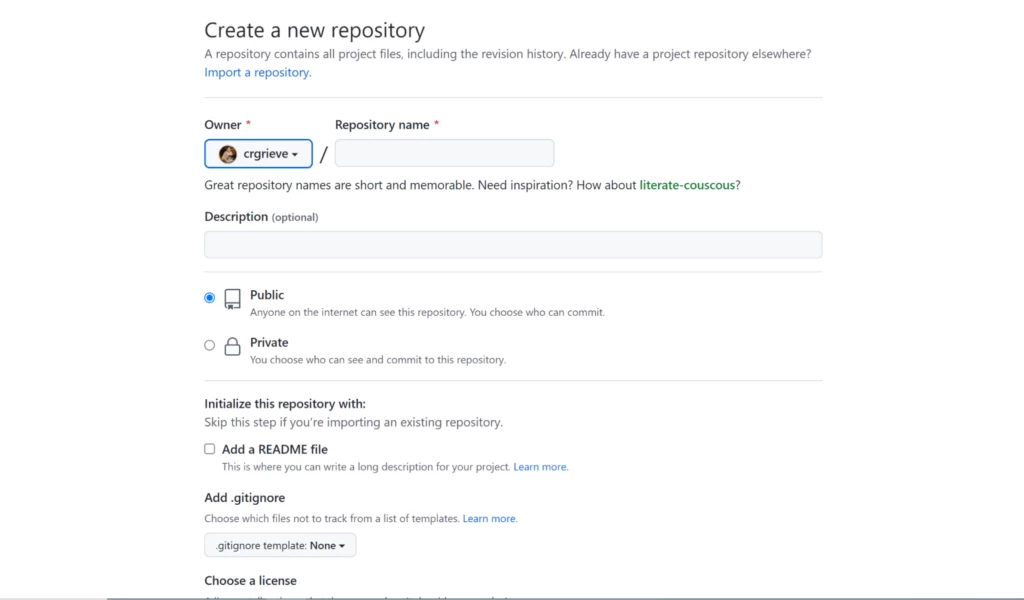
Let’s start by creating our repository in GitHub:
I am going to use GitHub Codespaces to build my application, but you can build on your own machine and commit to your repository using your preferred development tools. If using GitHub, you can click on the “Code” button and select “Codespaces” to set up a new space for this repo. Codespaces sets up a development environment in the cloud – if you have used Visual Studio Code, this will look very familiar!

I am most experienced with .NET technologies so I am going to use a Blazor Web Assembly as my static web app here, but you can use your preferred framework such as React or Vue.
In the Codespaces “terminal” tab, run dotnet new blazorwasm to create a templated Blazor application with some sample pages.

Now, if we look at the files in the file directory, we can see the folders and files for the template application. Let’s see what it looks like in browser – run dotnet run and it will build and run on a localhost port.
Of course, in a real application we would make a lot of changes before being ready for deployment, but for now we can commit and push our changes to our GitHub repo.

Creating your Static Web App
Now that we have our application running locally and pushed to our repo, let’s get our Azure Static Web App ready to deploy to. Within Azure create a resource of type “Static Web App”, selecting the relevant details for your subscription, resource group, plan type and region.
You will have an option to choose where to deploy from. In this example I am choosing my GitHub repo but you can also link to Azure DevOps or another source control. You can also deploy to your application using the Azure SWA CLI but in this example I want to show the integration with GitHub.

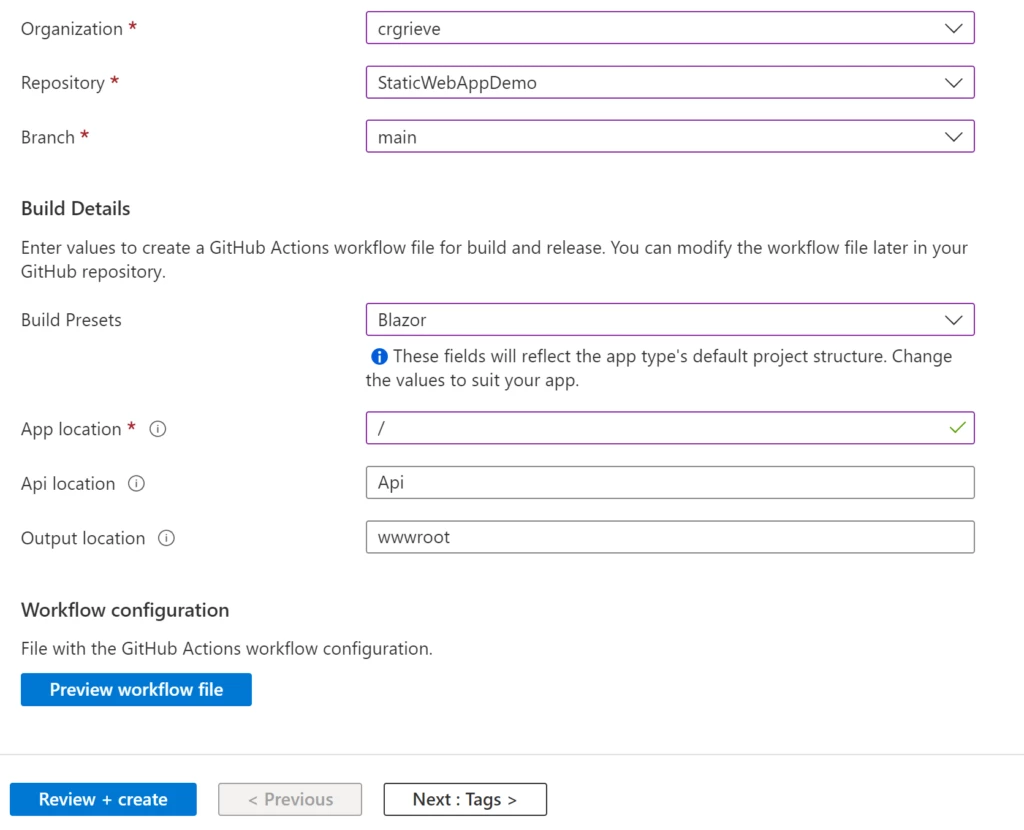
When selecting GitHub, I am asked to authenticate to my GitHub account and select the repo and branch. As previously mentioned, you can choose your relevant framework, Blazor in my example. You can tell it which folder within your repo to use in your deployment, as well as any API links such as Azure Functions (but we have static client side assets only in our example). We can then select “review + create” and let Azure takeover.
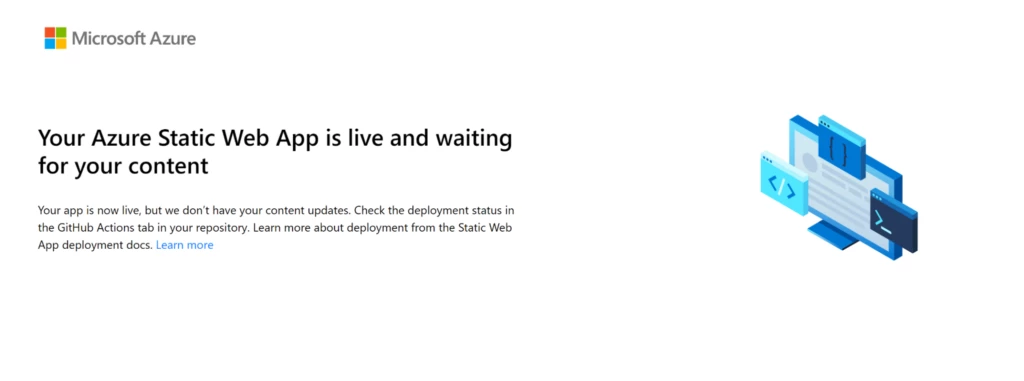
Initially, your application will look like this holding page:
While Azure creates the SWA resource, you will see a new commit with a .yml file in your GitHub repo. This represents a GitHub Action, a workflow that can automatically run on push or PR for example. If you haven’t worked with .yml or Actions before, this is a great way to understand how they work. The auto-generated one has configuration for deploying to Azure on push to your repo. Let’s check the “Actions” tab and we’ll see it working on our deployment:

You can take a look at the .yml file in this example over on GitHub.
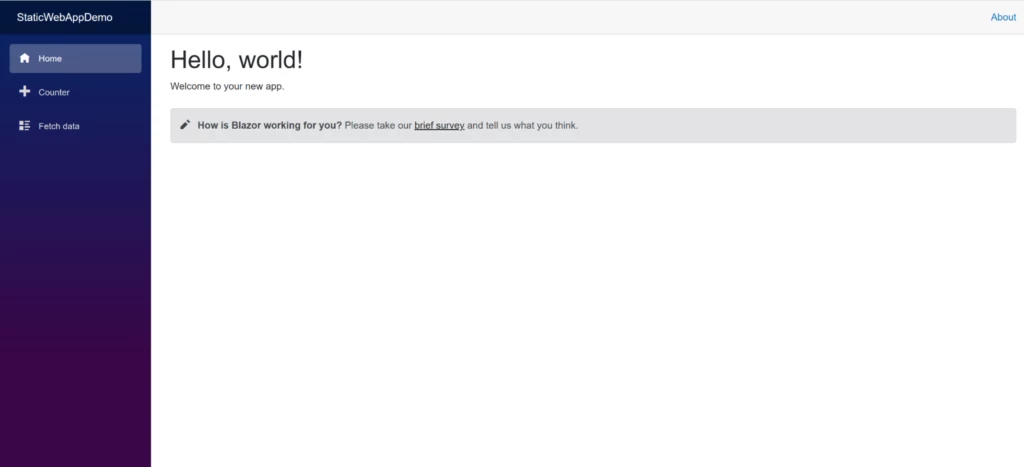
Now that we have run this Action successfully, lets refresh our Azure Static Web App and (*drumroll*)… it’s now showing our Blazor application! Our GitHub pipeline was successful and will auto deploy on push to main.
Reviewing your PRs on preview environments
One feature I find really powerful on Azure SWA is the ease of preview environment creation. First, if we look at our .yml file, we can see there is a workflow for pull request creation. To test this out, I am back to my codebase and make a change to the menu colour and commit the changes to a branch. We can then create a Pull Request from this branch.
If we have a look on the Actions tab again, we’ll see it’s running on my “example-branch”.
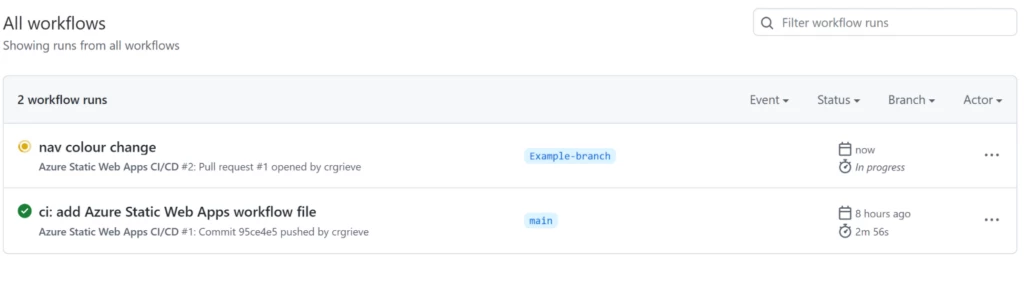
Once this completes, we can see a URL in the detail of the Action workflow. This is the deployment location of the preview environment for this PR on Azure, with the main branch still being on the original SWA URL. I love this feature as it means that as well as reviewing code in a PR, we can also view the changes on a live web app as part of our review. We could also share the link with project stakeholders to get immediate feedback before merge and deployment to main.
Here we can see both of the deployed web apps from the main branch and PR branch side by side:

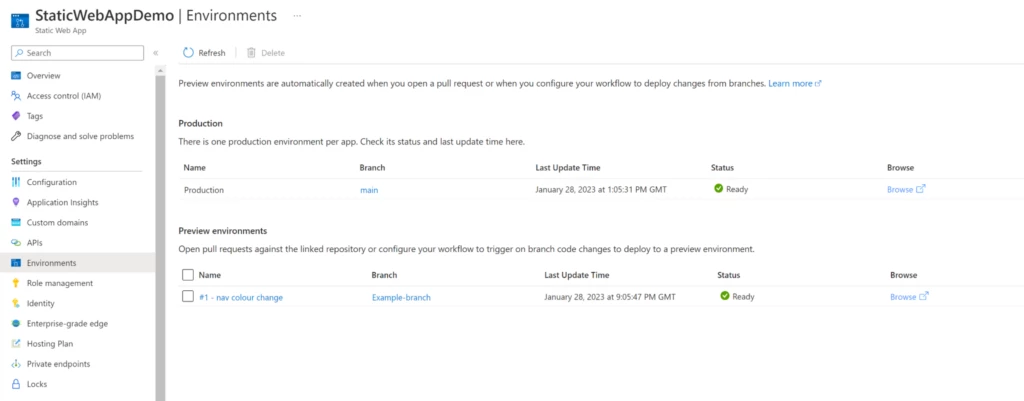
From within the Azure portal, you can see all your active environments in the “environments” tab. Here we can see the production URL (based on main branch) and any preview environments (my “example- branch” in this example):
Once the reviewer is happy with the changes, they can approve and merge. Once merged, the GitHub action will automatically close the PR preview environment and deploy the changes to the main static web app.
Summary
And just like that, we have created a new application and deployed it to Azure Static Web Apps! As shown, with GitHub actions we can create reliable and repeatable deployment and review workflows using .yml configuration.
Hopefully this has given you an overview of the benefits of these tools and will let you integrate to your own processes. Have fun!
Learn more
- You can find more from Carole on her blog
- Getting started with GitHub
- A look at the announcements from GitHub Universe