
IDMF – Archiving Restoring and Purging data from a custom table
Consider a scenario where you are running AX 2012 R3 and you want to archive or purge data from a custom table in AX using IDMF.
The screenshots are from a VM TEST environment with CONTOSO DEMO DATA that is running AX 2012 R3 CU10 on SQL Server 2014 and the latest version of IDMF.
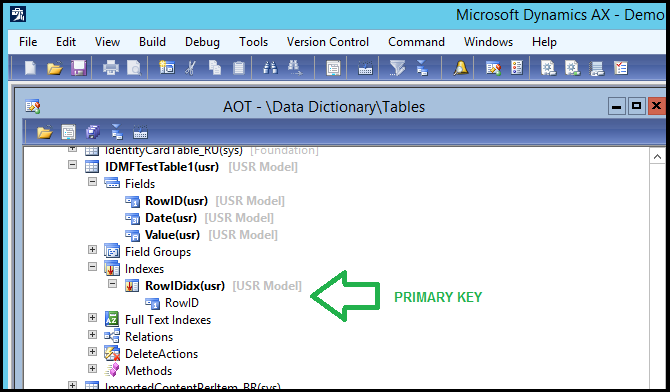
1. The custom table
I’ve created a simple custom table called IDMFTestTable1 which has three fields (RowID, Date, Value) and where RowID is the Primary Key (i.e. unique):
I’ve inserted 1000 rows for each year between 2012 and 2016 in order to simulate data row growth over time, so I can demonstrate date based purging and archiving:

2. Archiving data
I begin by creating a new Archive Object from the Configure menu:
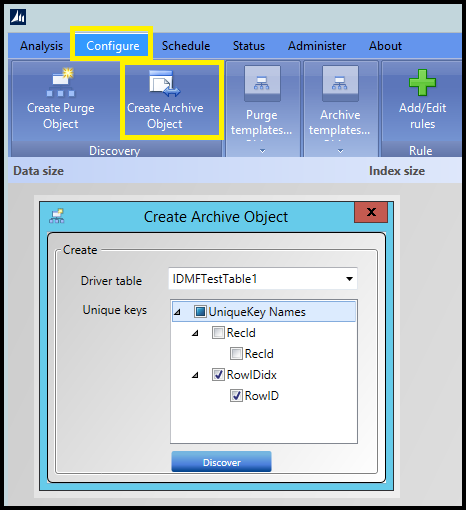
Note that I’ve chosen the Primary Key on RowID by checking it.
In this example, I am going to add an expression under by clicking on Add/Edit rules and then choosing Add expression:
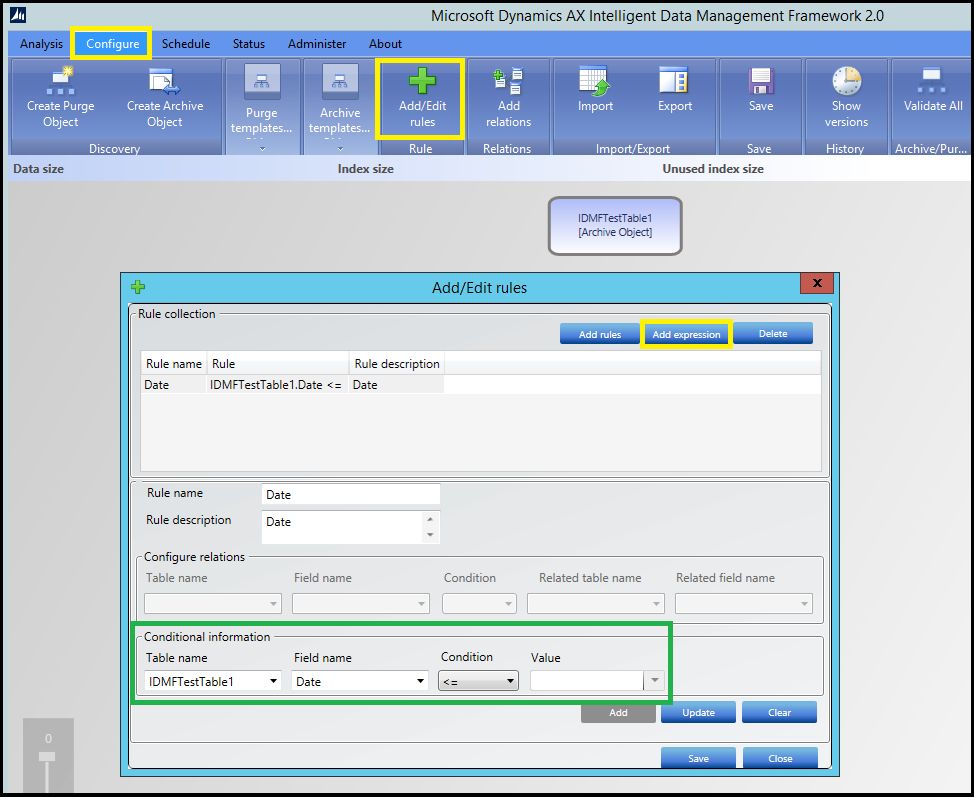
Note that I’ve configured the rule to only archive rows from the custom table where the Date field is <= to the value I enter when I schedule the archive job to run.
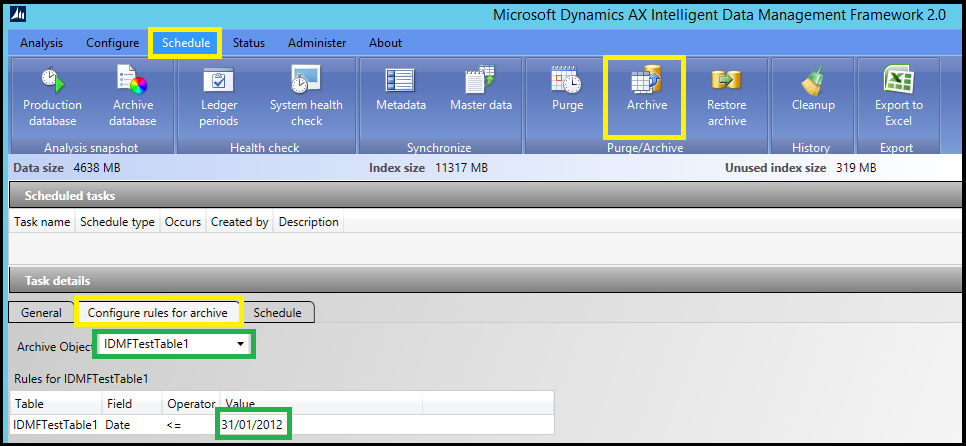
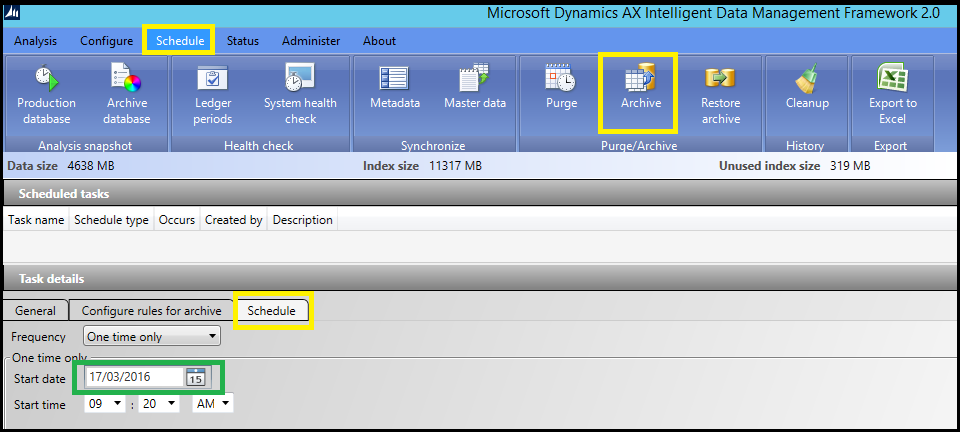
I now schedule the Archive job to run and add the value I want to use for Date <=. All this is done from the Schedule menu:

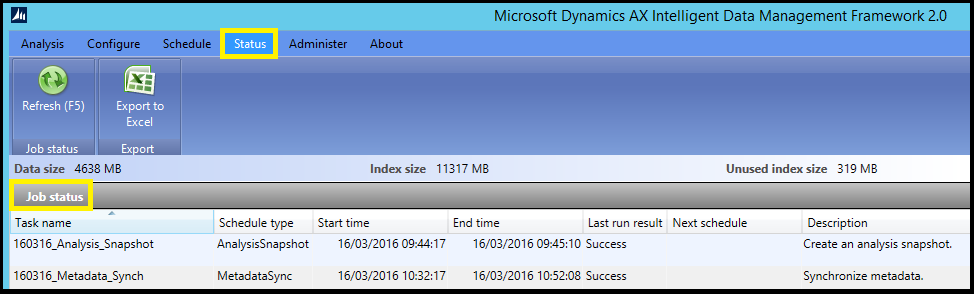
Once you’ve scheduled the job, it should appear in the job status list under Status:
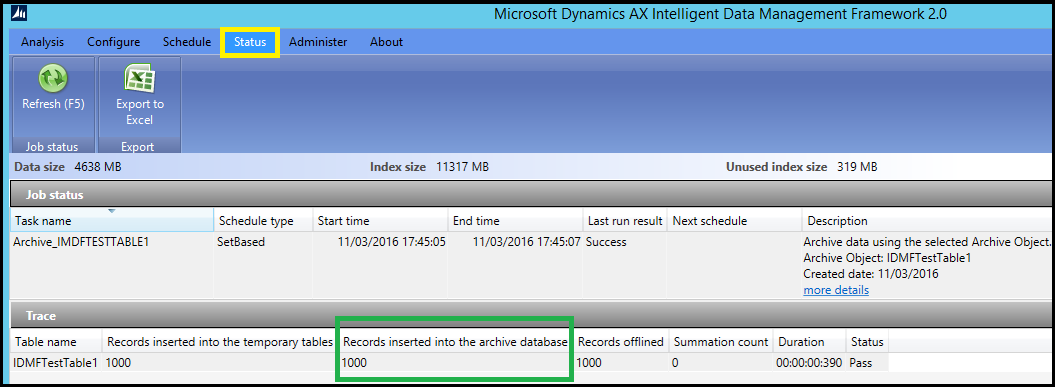
When the job has run successfully, you can see how many rows it inserted into the Archive database:
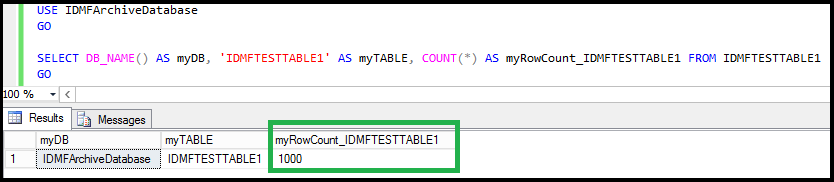
If I check my Archive Database, I can see that there are now 1000 rows in the archive table stored there:
3. Purging data
I begin by creating a new Purge Object from the Configure menu.
In this example, I am going to add an expression under by clicking on Add/Edit rules and then choosing Add expression:
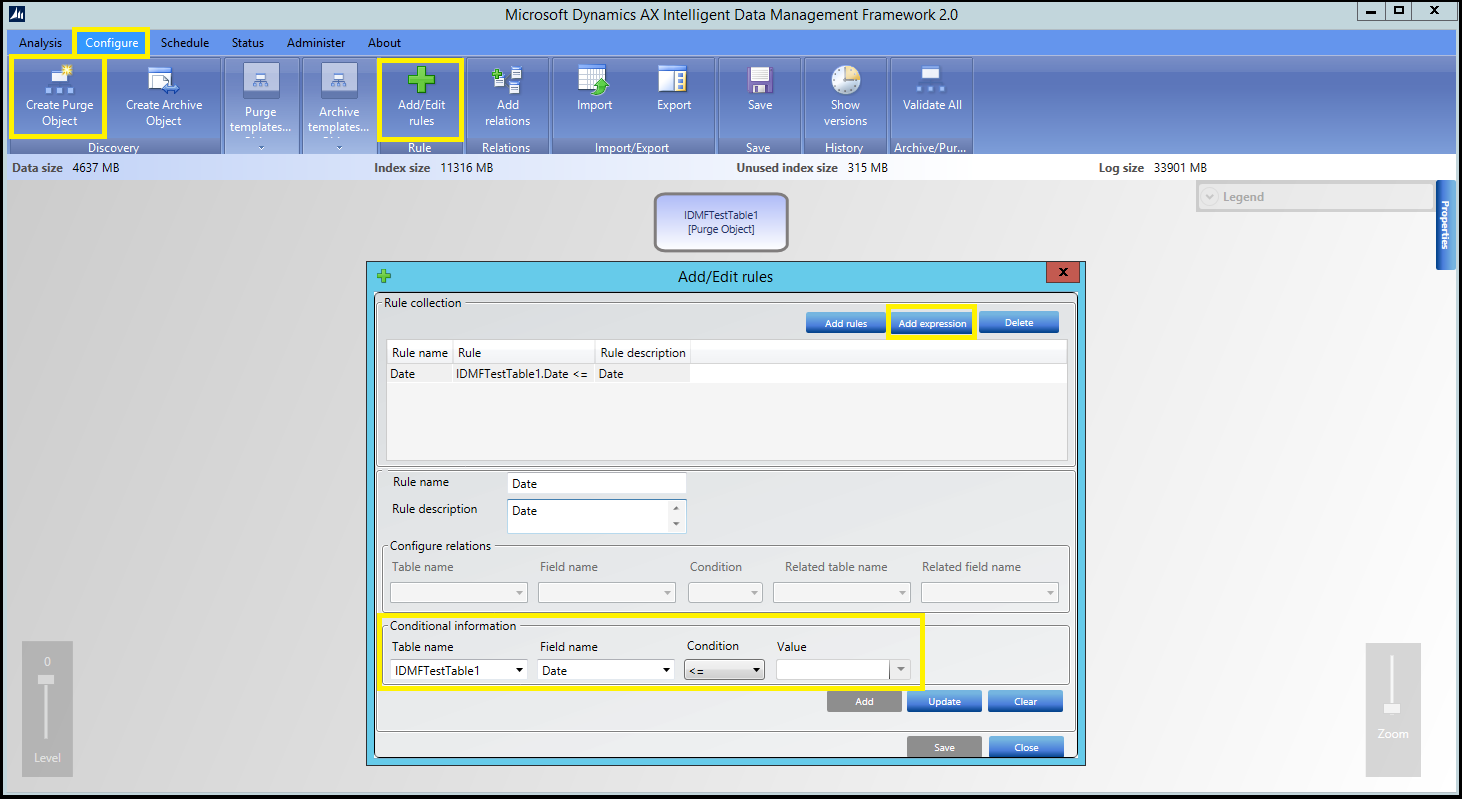
Note that I’ve configured the rule to only purge rows from the custom table where the Date field is <= to the value I enter when I schedule the purge job to run.
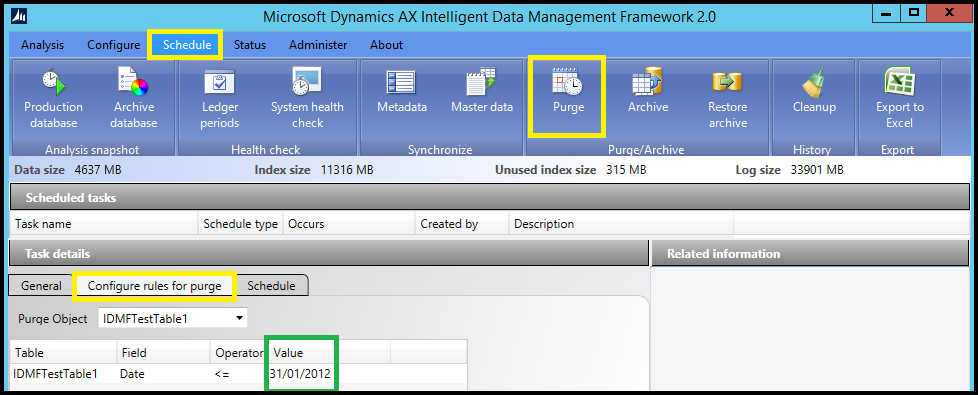
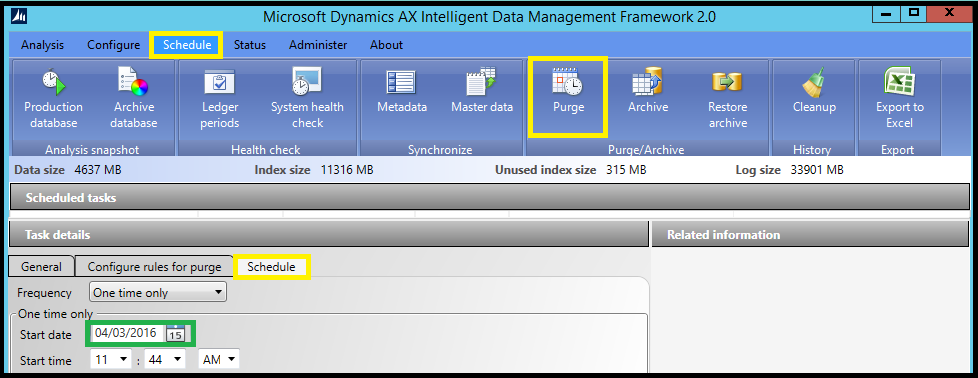
I now schedule the Purge job to run and add the value I want to use for Date <=. All this is done from the Schedule menu:
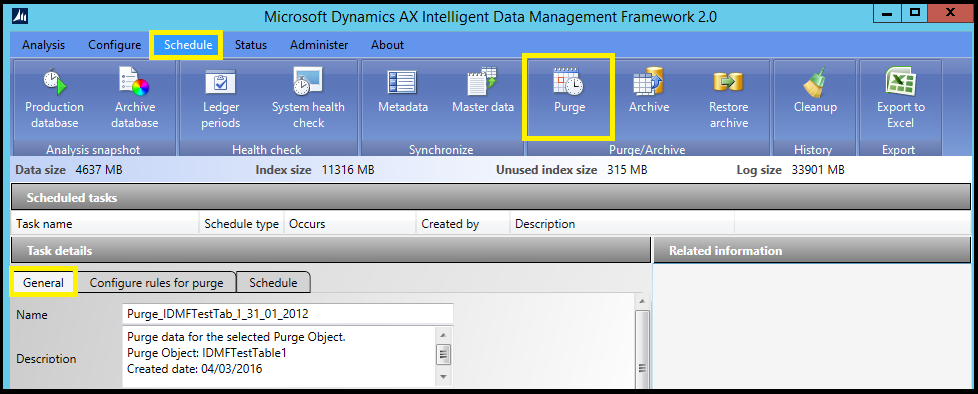
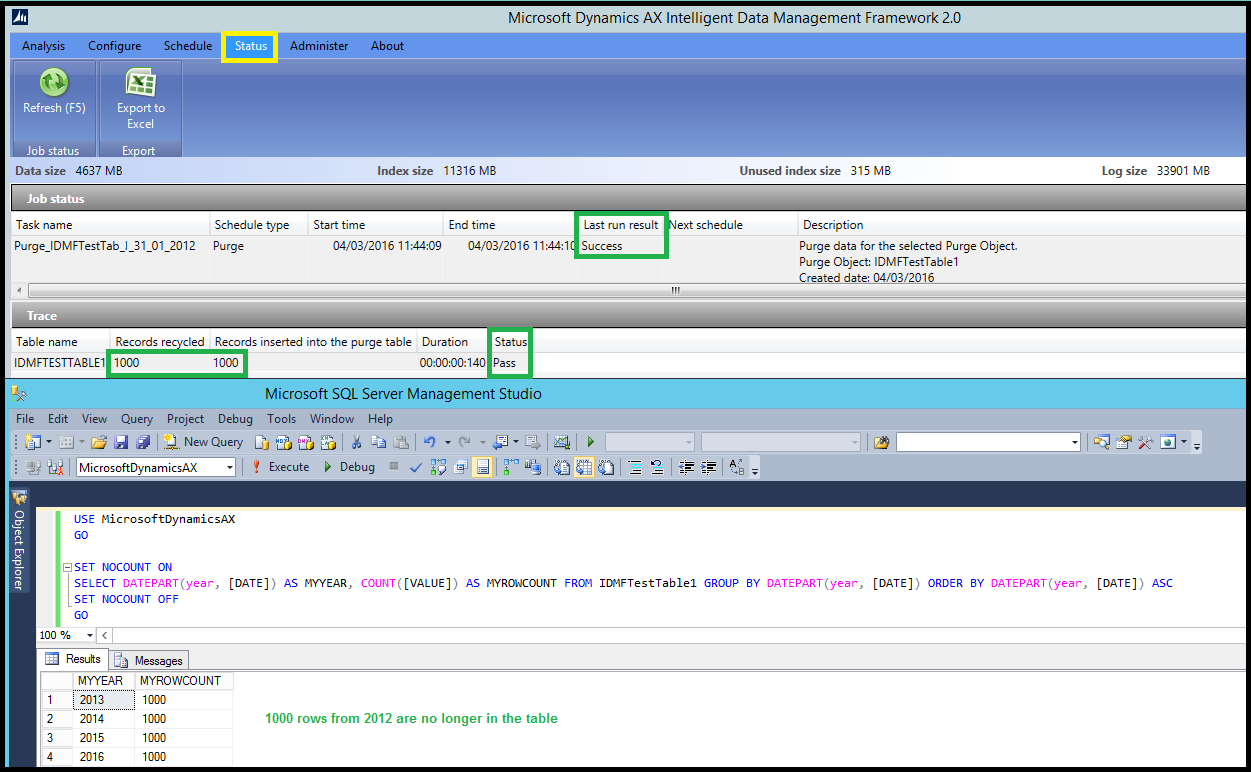
Once you’ve scheduled the job, it should appear in the job status list under Status.
When the job has run successfully, you can see how many rows it purged.
If I check my Production Database, I can see that there are now 1000 rows less in the table I purged the data from, as intended:
4. Restore archived data
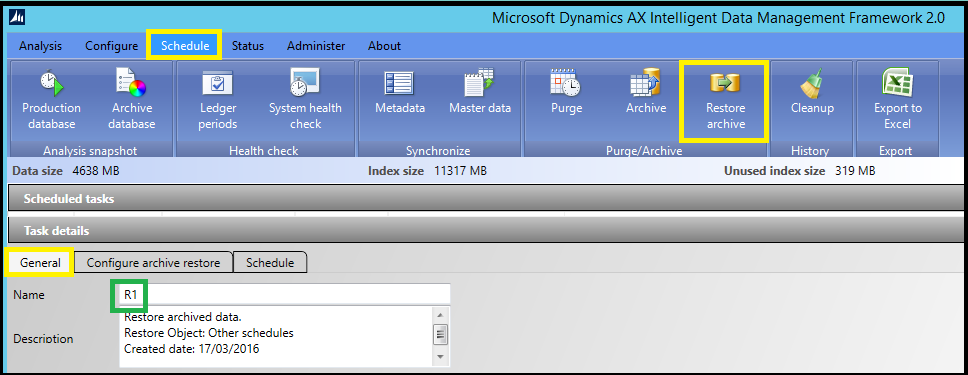
To restore archived data, go to the Schedule menu and click on the Restore archive button.
Name the job under the General tab:
Select the relevant schedule under the Configure archive restore tab:

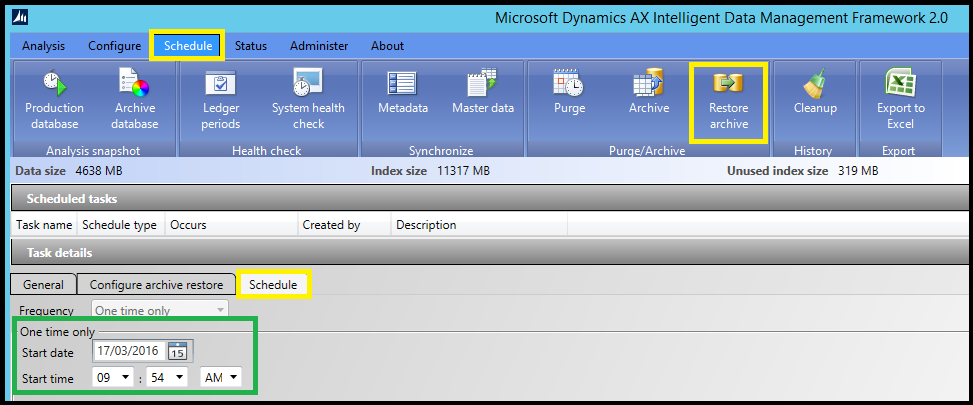
And finally, schedule the job to run when convenient under the Schedule tab:
Once you’ve scheduled the job, it should appear in the job status list under Status.
When the job has run successfully, you can see how many rows it restored.

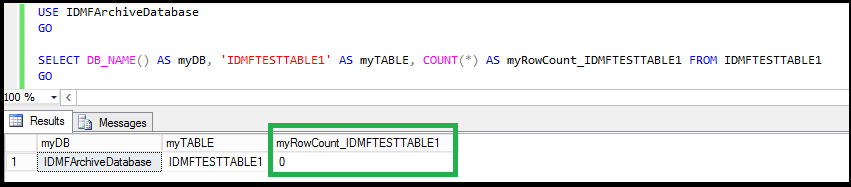
If I check my Archive Database, I can see that there are now no rows in the table I restored the data from, as intended:
5. Testing
As always, ensure you’ve set up a proper Dynamics AX TEST environment first, and that you are familiar with the impact of your IDMF archiving, restoring, or purging actions before you perform them in PROD.