


Overview
Your Outlook can change everything
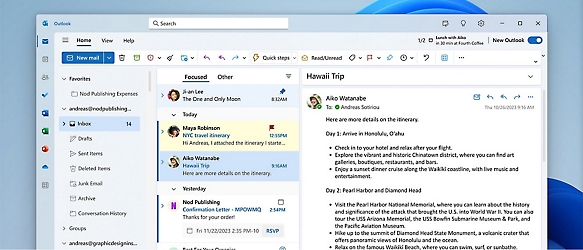
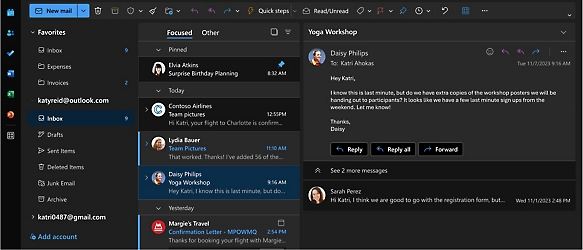
- See everything you need to manage your day in one view. Easily stay on top of emails, calendars, contacts, and to-do lists—at home or on the go.
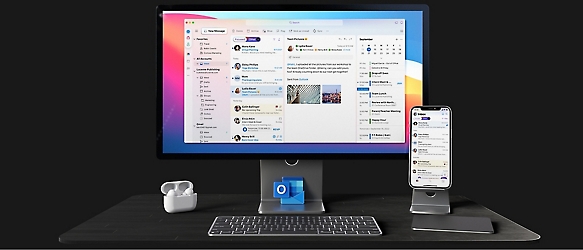
- Access personal, work, or school emails in the Outlook app on desktop and mobile, including Outlook.com, Gmail, Yahoo!, iCloud, and other mail services.
- Help keep your sentences concise and polished with suggestions as you write, plus intelligent spelling and grammar checks.3
- Quickly send, edit, or read a document on the go. Use Word, Excel, or PowerPoint from your inbox, and securely link to your OneDrive files.


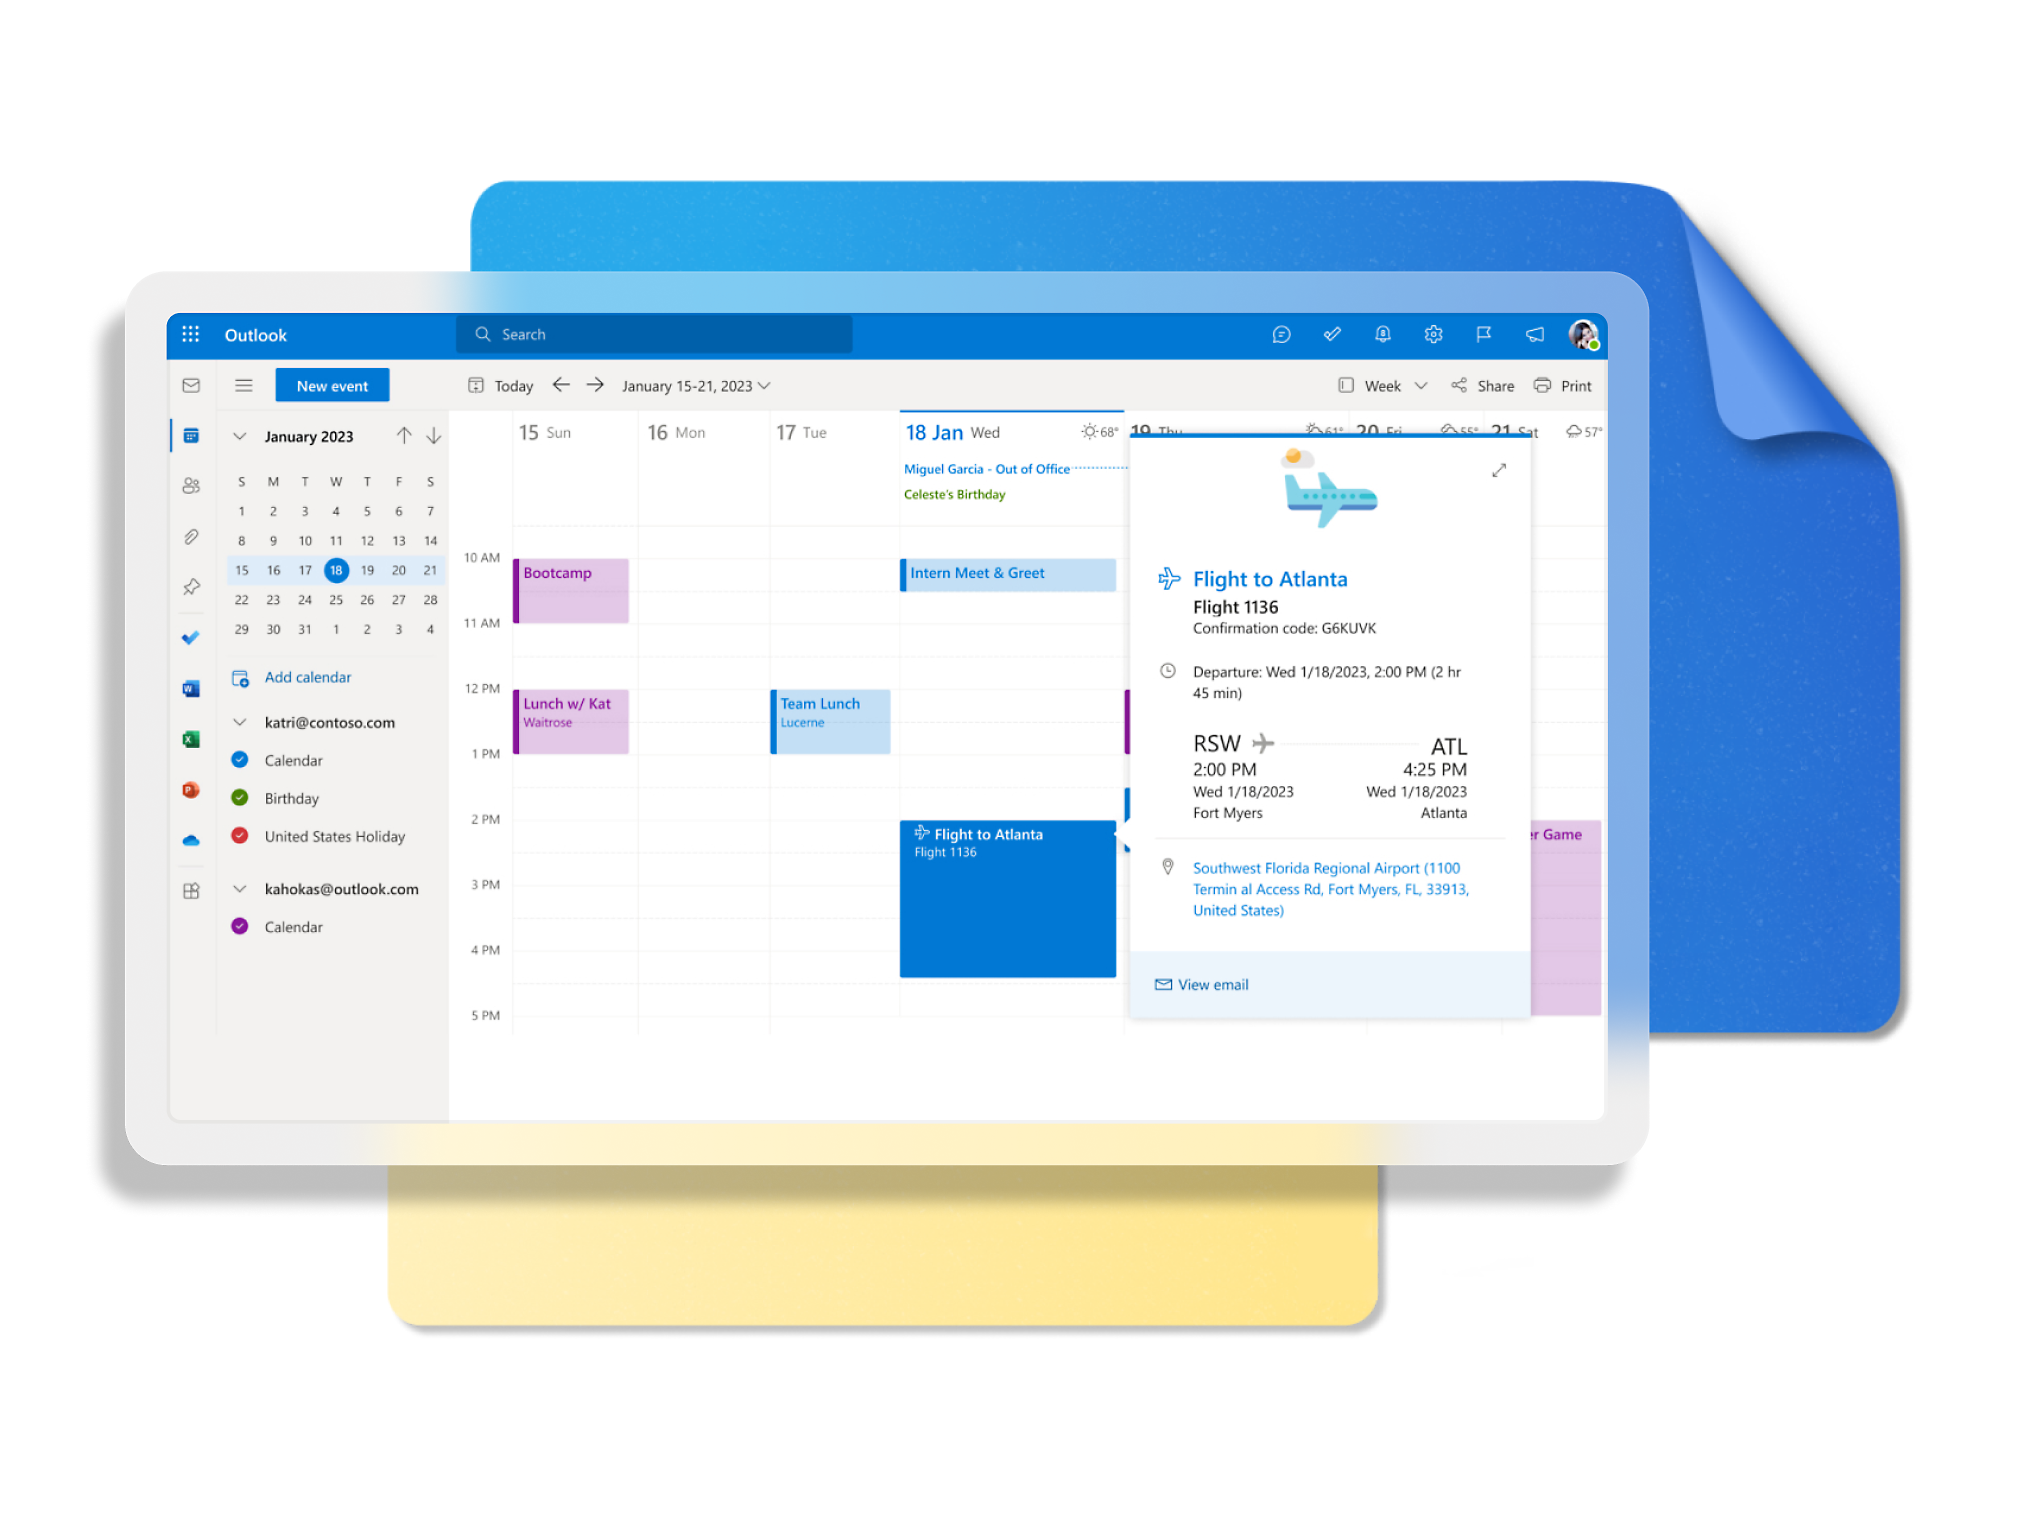
- Schedule events, track packages and flights,3 and set reminders to help you stay on task.
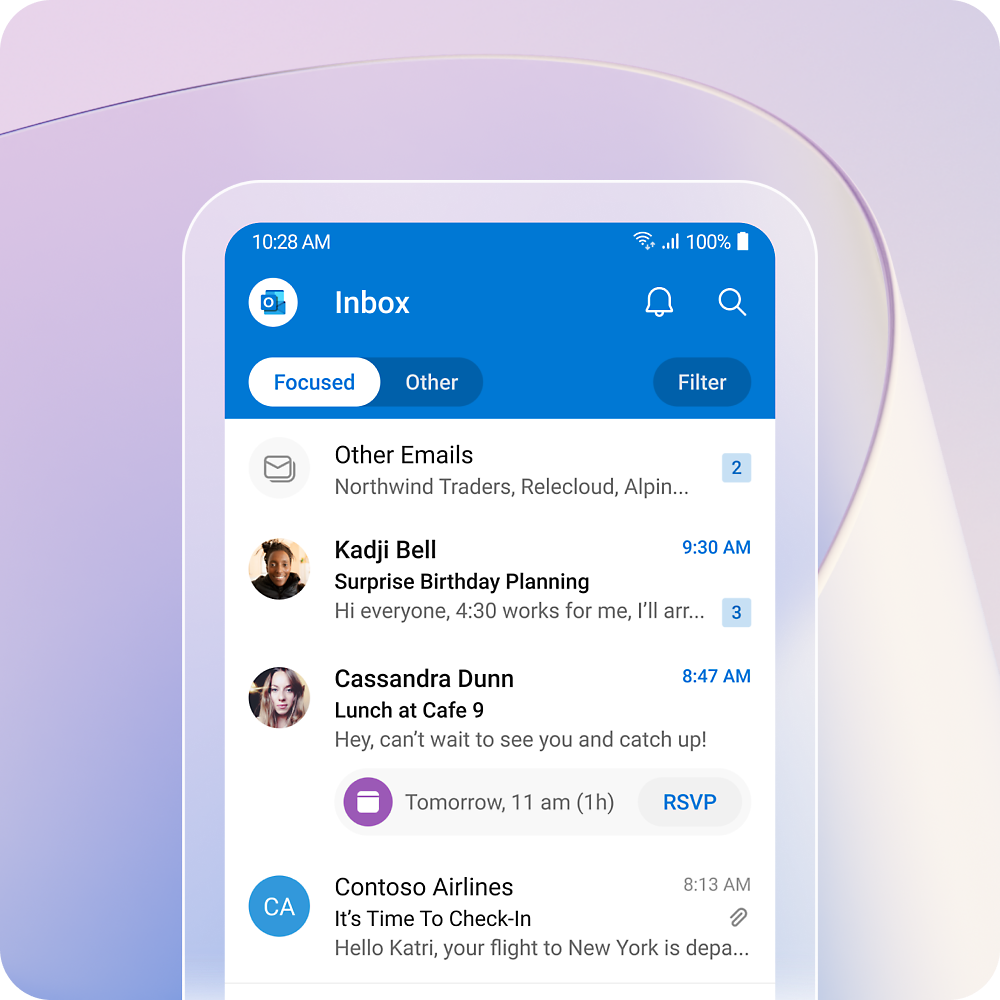
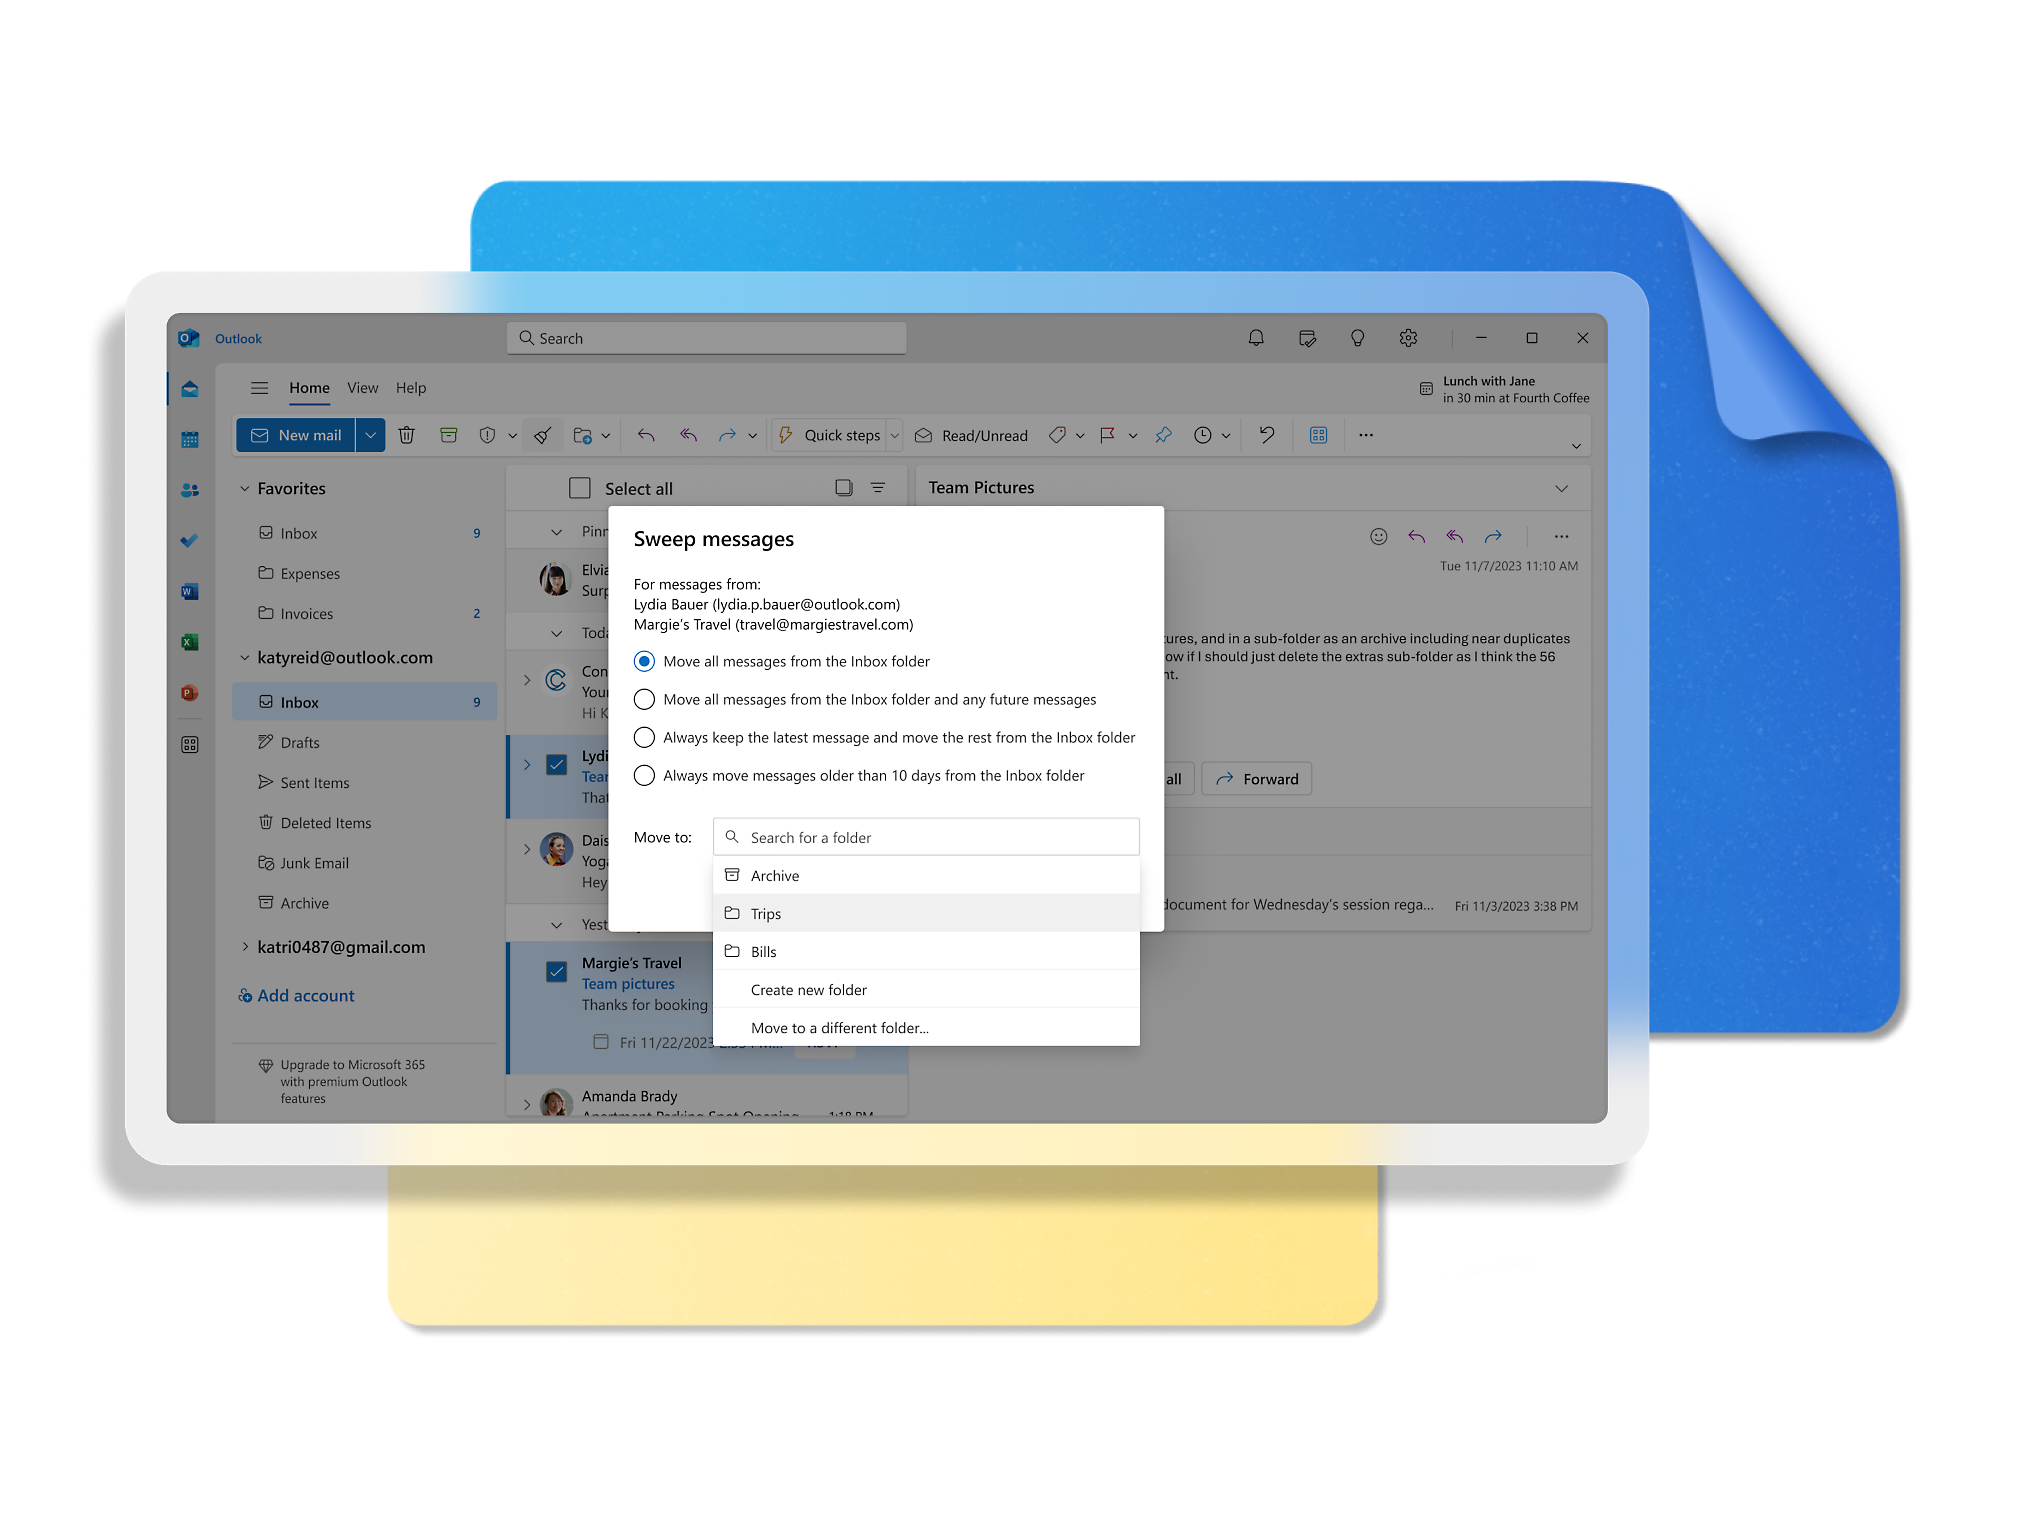
- Remove clutter with focused inbox and sweep features. Put emails on snooze and flag important messages.
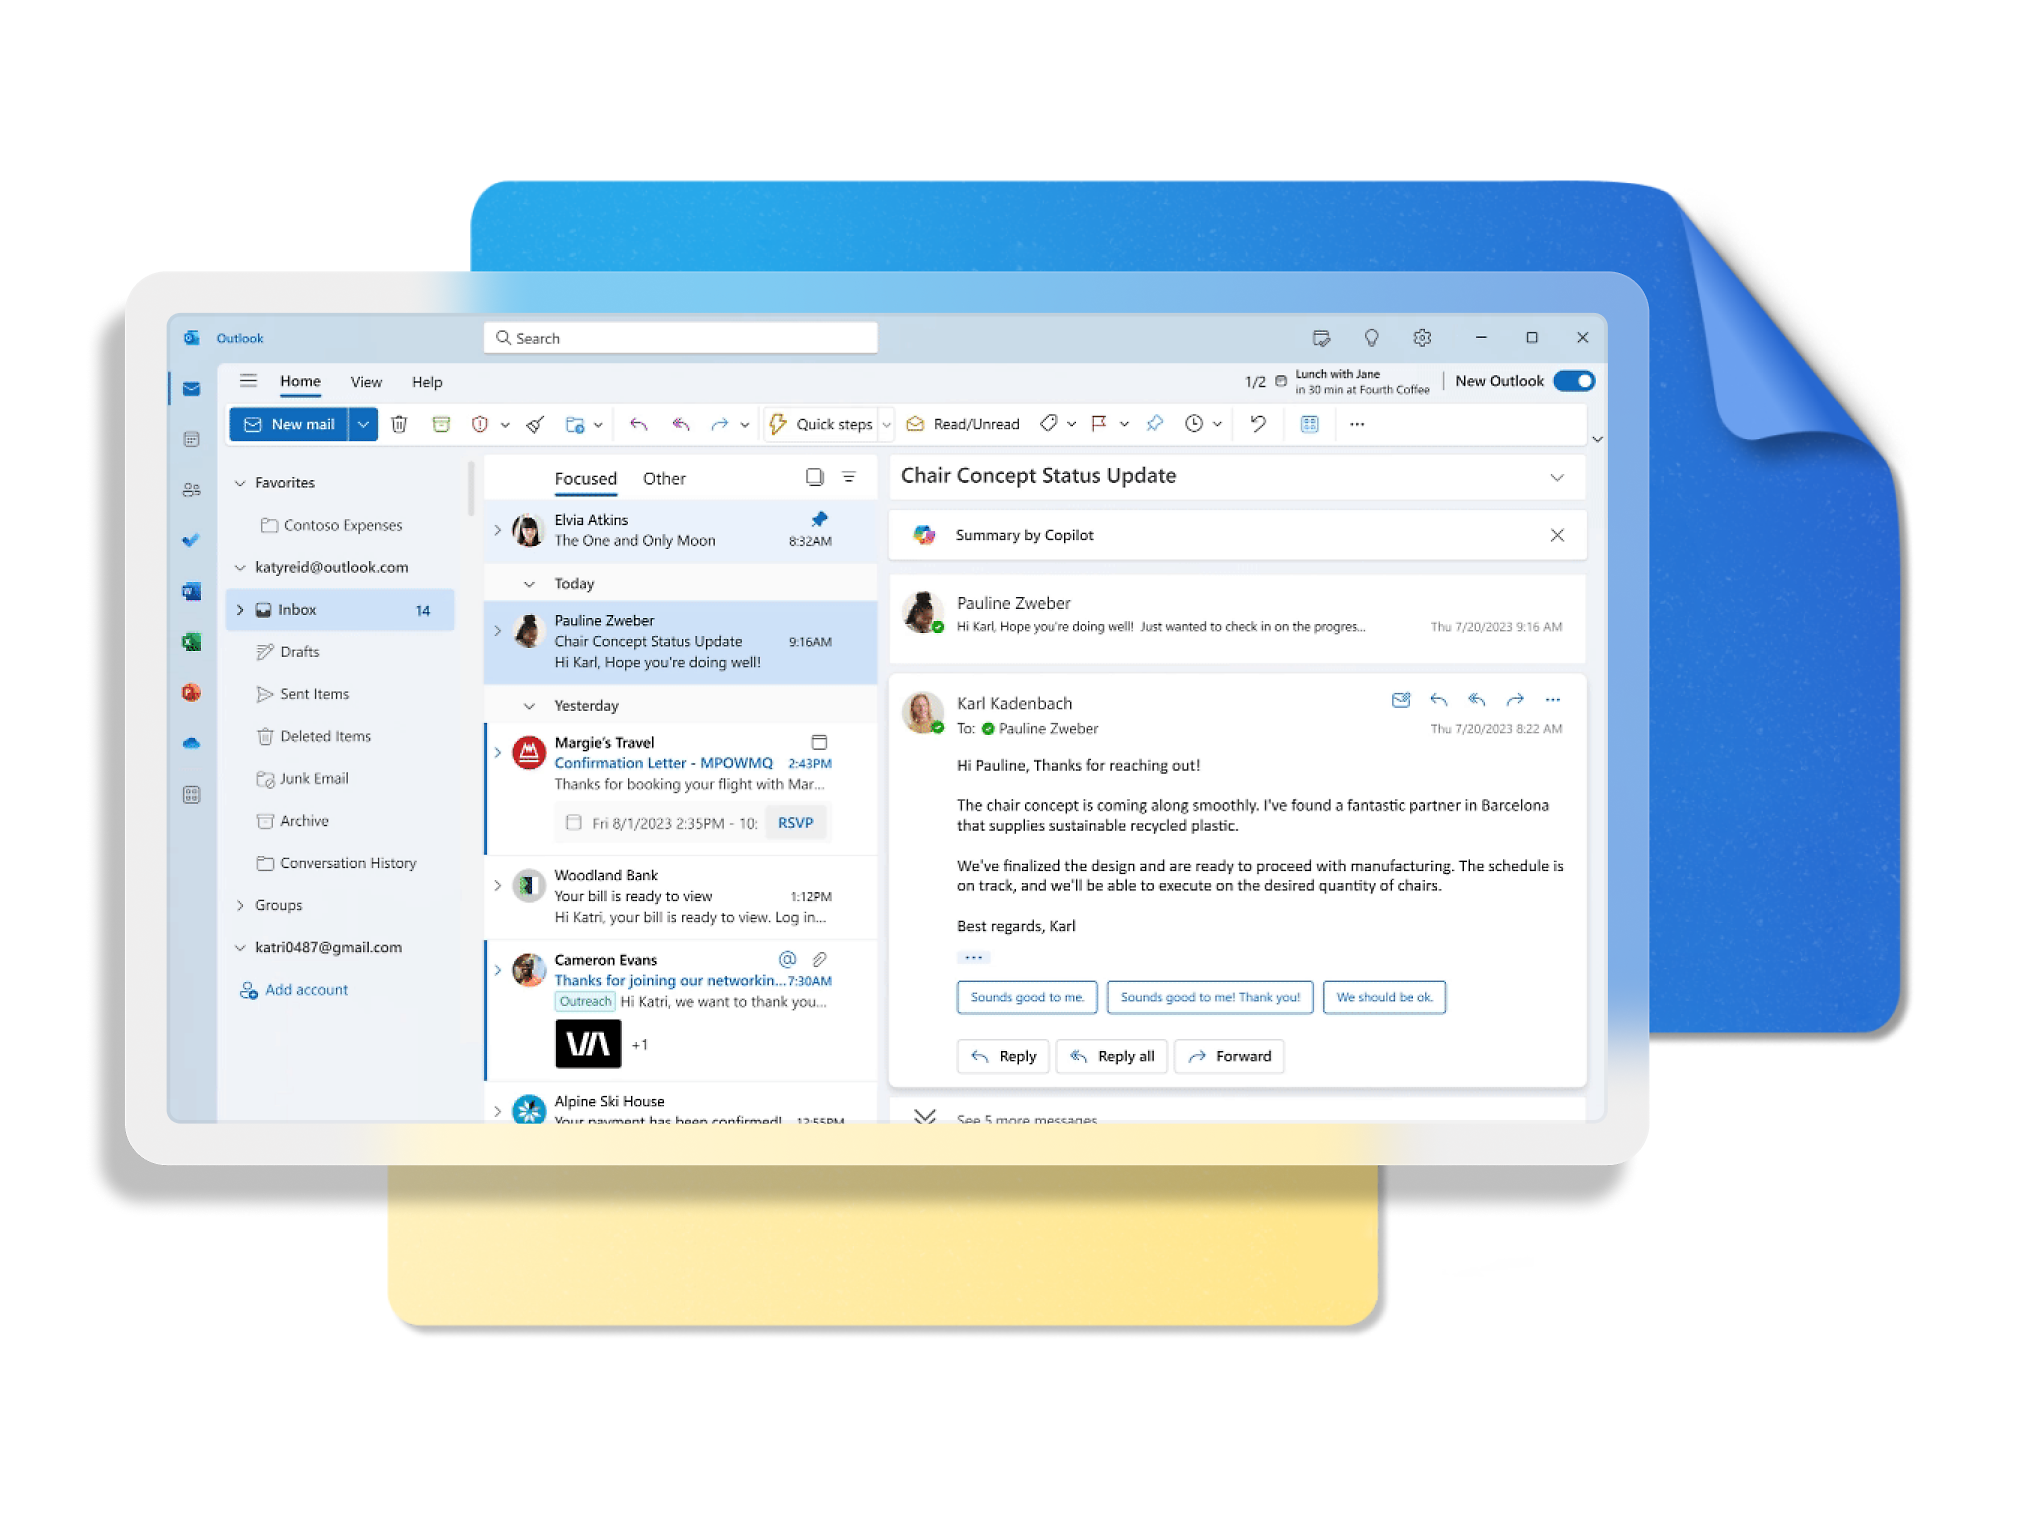
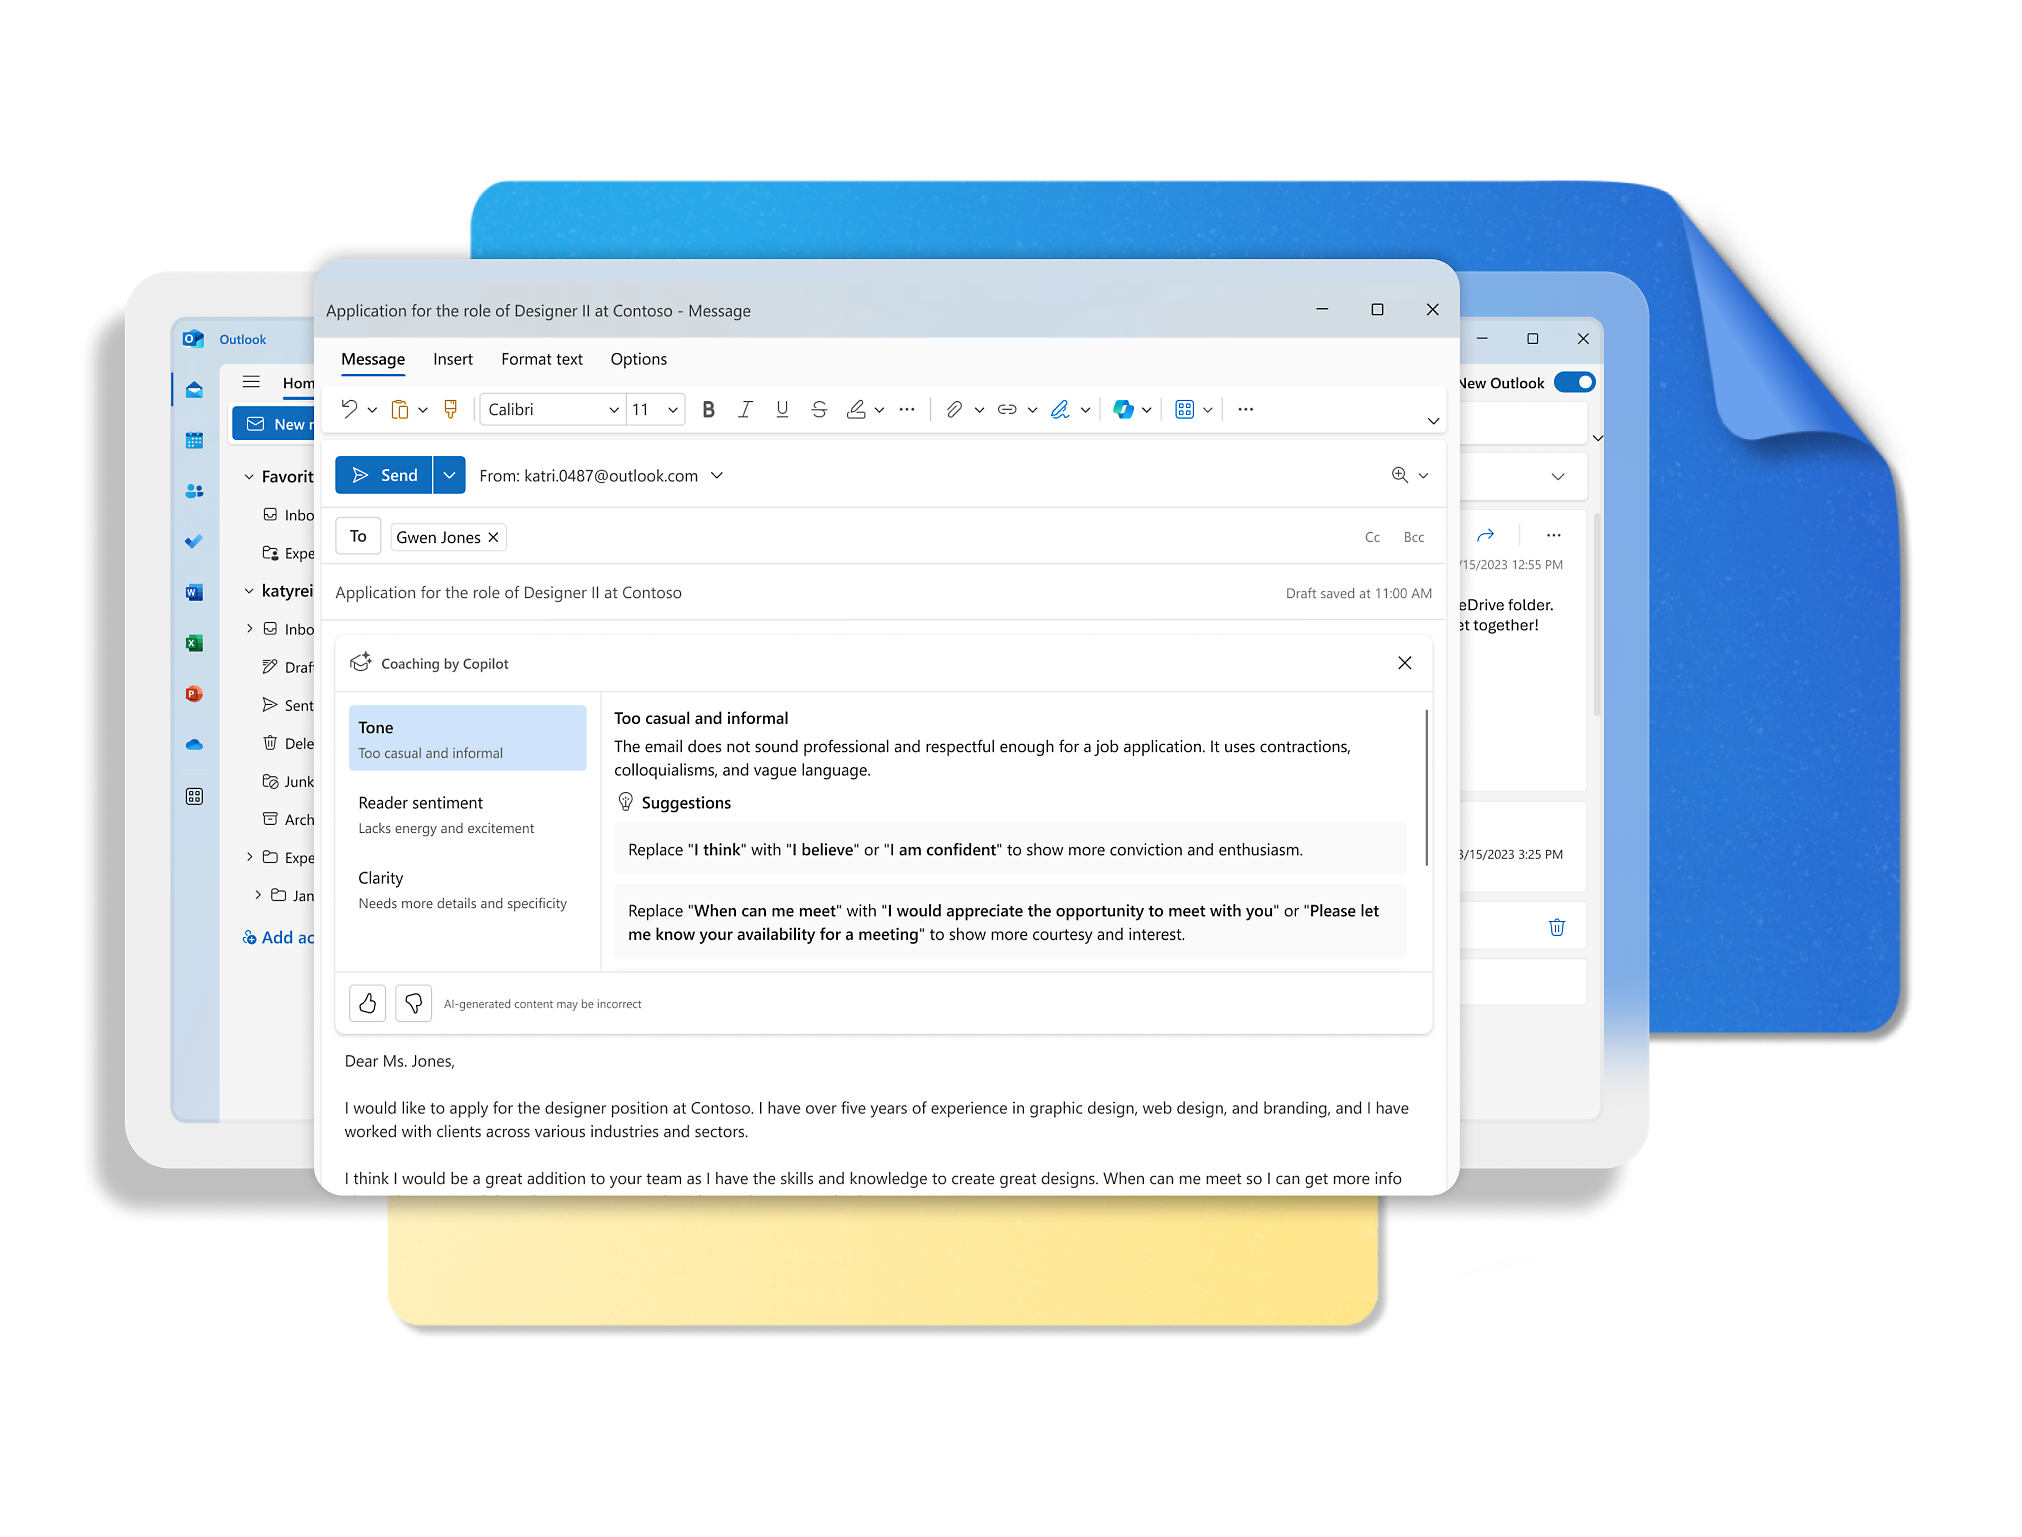
- Tell Copilot what you want to say. It drafts your email and helps refine the tone, length, and clarity. You decide when it's ready to send.
- Stay on top of long threads (and spend less time in your inbox) by having Copilot summarize key details and any questions specific to you.
- Ensure your emails have the right clarity, length, and tone so you come across the way you intended.
-


Take the tour
See Outlook in Action
Manage what’s important with Outlook. Whether it’s different email accounts, multiple calendars, or signing that form, Outlook has you covered - at home, for work, or on-the-go.
From first thought to ready-to-send with Copilot
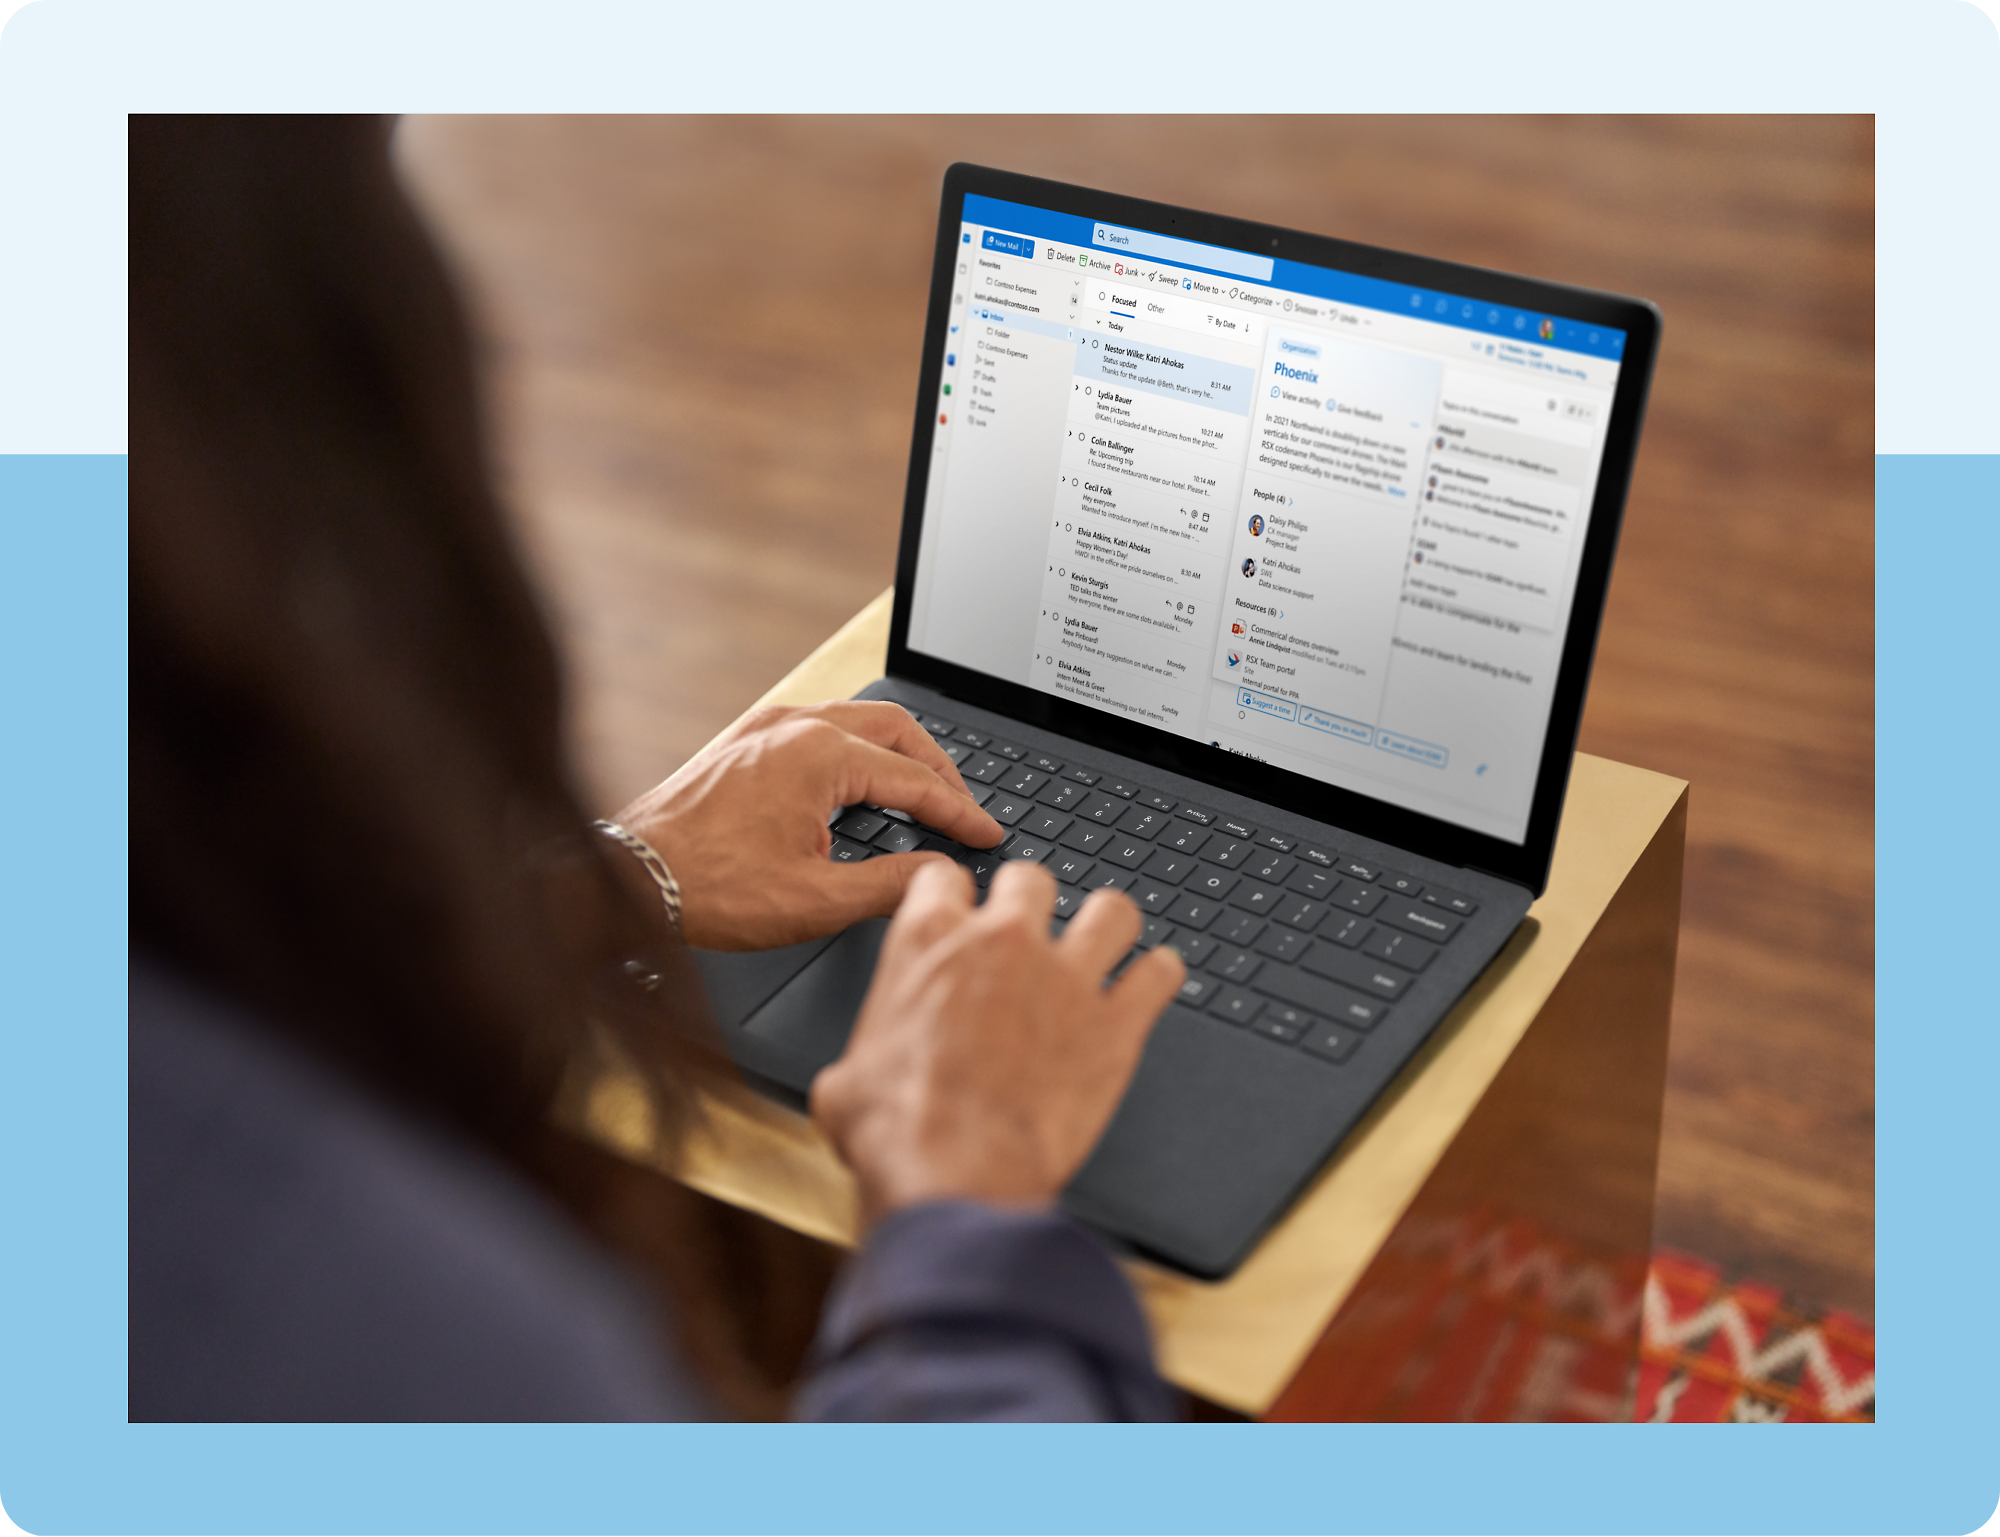
Streamline your different accounts in one place
Easily access Word, Excel, PowerPoint, and OneDrive files


PLANS AND PRICING
Outlook is better with Microsoft 365

Download the app
Keep on top of your inbox and calendar wherever you are with Outlook.
Outlook keeps you in control of your day to help you write and prioritize communications across email accounts and devices.
Windows
Outlook is included for free with Windows.
Android
Catch up on your email and calendar, available free on Outlook for Android.
iOS
Catch up on your email and calendar, available free on Outlook for iOS.
MacOS
Designed for macOS, enhanced for Apple Silicon, and free for personal use.
Web portal
Sign in to your Outlook on the web.


Microsoft 365 apps
Learn more about Microsoft 365 products


News and tips
Get the latest on Microsoft Outlook


FREQUENTLY ASKED QUESTIONS
- To create an Outlook.com account, you can click the “Create free account” button at the top of this site.
- Yes! You can use these accounts across all Outlook apps with the benefits that come with free or paid plans, depending on which you have.
- Yes! Outlook desktop apps on Windows and Mac and mobile apps on iOS and Android support most third-party accounts including Gmail, Yahoo!, iCloud, and other mail services. You can access multiple personal accounts as well as your work or school accounts all in a single Outlook app. This will help put all your mail and calendars in one place. Toggling between accounts is simple with a few clicks of a button, without leaving the app.
- For details on Outlook mailbox storage and Microsoft storage, please see this support article.
- If you have a paid account, you do not receive ads. This includes customers using Outlook with a Microsoft 365 account provided by their company, school, or organization. It also includes those who have a Microsoft 365 Basic, Personal, or Family subscription.
If you use a free email service such as Outlook.com, Hotmail, or Gmail without a Microsoft 365 subscription, you’ll see ads in your inbox clearly marked with an ad label to distinguish them from other emails. If you prefer not to see ads, you may purchase a Microsoft 365 subscription to remove any advertising served by Microsoft. Experiences for Microsoft 365 for Business and education subscribers may vary by plan. - Customers who have a Microsoft 365 Basic, Personal, or Family plan get an ad-free inbox, 100 GB of Outlook mailbox storage, and advanced security features4. They also receive data encryption in their mailbox and for the emails they send; automatic protection from suspicious links in emails; scans for viruses and malware; and removal of dangerous attachments.
With a Personal or Family plan, you can additionally enjoy Copilot6 in Word, Excel,7 PowerPoint, OneNote, and Outlook, as well as premium Microsoft Editor functionality and advanced email management features like search folders, quick steps and conditional formatting. Personal and Family plans also offer offline and desktop access to Microsoft 365 apps such as Word, Excel, and PowerPoint, plus up to 6 TB secure cloud storage (1 TB per person) which covers OneDrive files and photos as well as Outlook email attachments.
Copilot in Outlook currently works with outlook.com, hotmail.com, live.com, and msn.com email addresses. - You’ll be asked to activate your Office license, which will enable access to all the productivity apps that come with your license, including ad-free classic Outlook for Windows (Win32) or Outlook for Mac.


Get started
What happened to Hotmail?
Outlook.com replaced Hotmail years ago, but your Hotmail account will continue to work across Outlook apps.
Create free account
Don’t have an account? Get started with a free Outlook.com email today.
Try Microsoft 365
Get the best Outlook experience with a Microsoft 365 subscription.
- [1]Once your paid subscription begins, you have a 7-day cancellation window to receive a prorated refund, only paying for what you use. You may cancel your subscription at any time in the Microsoft 365 admin center. Learn how to cancel your Microsoft 365 subscription. When a subscription is canceled, all associated data will be deleted. Learn more about data retention, deletion, and destruction in Microsoft 365.
- [2]After your one-month free trial ends, your subscription will automatically convert to a paid subscription and you’ll be charged the applicable subscription fee based on the subscription term and billing plan you select. Cancel anytime during your free trial to stop future charges. A credit card is required to sign up. Storage for trials will be limited. Microsoft reserves the right to suspend access to its products and services if payment is not received after your one-month free trial ends. Learn more.
- [4]Features apply to customers who have an @outlook.com, @hotmail.com, @live.com, or @msn.com account. Copilot features are available in Outlook.com, Outlook built into Windows, Outlook on Mac, and iOS and Android apps.
- [5]Available with a Microsoft 365 subscription.
- [6]AI features only available to subscription owner and cannot be shared; usage limits apply. Learn more.
- [7]Copilot in Excel requires AutoSave to be enabled, meaning the file must be saved to OneDrive; it doesn't function with unsaved files.
Follow Microsoft 365